


Special offers from our partners!

Find Replacement BBQ Parts for 20,308 Models. Repair your BBQ today.

14 15
OPERATION
OPERATION
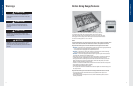
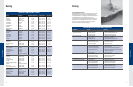
• To turn the griddle off , turn the thermostat knob
clockwise to the “OFF” position.
• ALWAYS turn to the“OFF” position when not in use and
lower the heat between cooking loads.
Griddle/Simmer Plate Cooking Tips
• To prevent sticking, use liquid cooking oil or butter for
eggs, pancakes, French toast, fi sh, and sandwiches.
• Non-stick cooking spray is not recommended as it
contains a high water content that has a tendency to
burn quickly.
• Corn oil is not recommended as it has a high sugar
content. It will caramelize and burn on the cooking
surface making removal of residue very diffi cult.
• IMPORTANT: NEVER fl ood a hot griddle with cold
water. This thermal shock causes the griddle to warp or
crack.
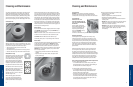
Griddle/Simmer Plate Clean Up & Care
• It is not necessary to wash the griddle after every
use. When light cooking is performed and AFTER the
griddle has cooled, simply wipe down the surface with
a clean cloth or paper towel. The oils in the food which
cooked on the griddle surface will naturally season the
griddle providing a “natural” non-stick surface.
• After heavy cooking is completed and the griddle
is still warm enough to create steam, pour a small
amount of club soda at room temperature directly
on the griddle. Using a metal spatula, pull oils and
food particles toward the trough in front. Wipe entire
surface with a paper towel. Follow with the seasoning
process of applying oil.
• Keeping the griddle well seasoned will prevent the
griddle from developing surface rust. If the griddle is
not used for a period of time, it must be re-seasoned.
The griddle must be re-seasoned each time after it is
washed.
• Note: It is normal for the griddle to darken over time.
This is the sign of a well seasoned griddle.
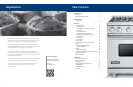
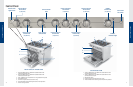
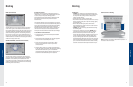
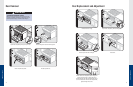
Surface Operation
Rack Positions
Each oven is equipped with three TruGlide™ racks. All
ovens have six rack positions. Position 6 is the farthest
from the oven bottom. Position 1 is the closest to the
oven bottom. The racks can be easily removed and
arranged at various levels. It is recommended that when
using two racks, to bake with the racks in positions 2 and
4 or positions 3 and 5.
Oven Features
Removable bottom
Broiler burner
Convection fan
TruGlide™
Oven racks (3)
Oven lights (4)
Bake burner
6
5
4
3
2
1
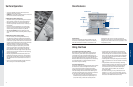
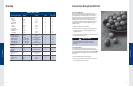
Using the Oven
Conventional and Convection Cooking
Because of variations in food density, surface texture
and consistency, some foods may be prepared more
successfully using the conventional bake setting. For
this reason, conventional baking is recommended when
preparing baked goods such as custard. The user may
fi nd other foods that are also prepared more consistently
in conventional bake. It is recommended to use this
function for single-rack baking.
Convection Cooking Tips
Convection cooking is a cooking technique which utilizes
fan-forced air to circulate throughout the entire oven
cavity creating the optimum cooking environment.
Cooking with convection is intended when performing
multi-rack baking and for heavier foods. Following are
some tips which will allow you to get the best results out
of your oven when cooking with convection.
• As a general rule, to convert conventional recipes to
convection recipes, reduce the temperature by 25°F
(10°C) when using a convection cooking function.
• Cooking times for standard baking and convection
baking will be the same. However, if using convection
to cook a single item or smaller load, then it is possible
to have 10-15% reduction in cooking time. (Remember
convection cooking is designed for multi-rack baking
or cooking large loads.)
• If cooking items which require longer than 45 minutes,
then it is possible to see a 10-15% reduction in cooking
time.
• A major benefi t of convection cooking is the ability
to prepare foods in quantity. The uniform air circulation
makes this possible. Foods that can be prepared on
two or three racks at the same time include: pizza,
cakes, cookies, biscuits, muffi ns, rolls, and frozen
convenience foods.
• For three-rack baking, use any combination of rack
positions 2, 3, 4, and 5. For two-rack baking, use rack
positions 2 and 4 or positions 3 and 5. Remember that
the racks are numbered from bottom to top.