


Special offers from our partners!

Find Replacement BBQ Parts for 20,308 Models. Repair your BBQ today.
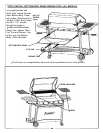
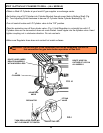
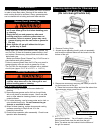
COOKING MODE: LP GAS WITH WOOD
CHUNKS FOR FLAVOR
How to light your LP Gas grill when planning to cook
using primarily LP Gas and supplementing with wood
chunks for flavor.
2. Open Hood.
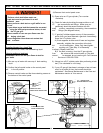
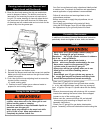
COOKING MODE: CHARCOAL ONLY
How to light your grill when planning to cook using only
charcoal:
1. Open Hood.
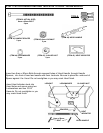
A standard size high quality hardwood charcoal (2 7/8 X 2 7/8
X 1 1/4) should be used. Charcoal briquettes made from maple,
oak, birch or elm woods will burn clean with very little smoke and
without unpleasant odors.
Warning: For Bonza 3 use no more than 95 Charcoal bri-
quettes(5 1/2Lbs). For Bonza 4 use no more than 112 char-
coal briquettes (6 3/4. Lbs).
2. MAKE SURE THE FLAVOR ACTIVATOR ADJUSTING
KNOB IS PUSHED IN FOR CHARCOAL MODE.
6. Light the remaining burners from left to right by turning the
control knob counter-clockwise. Your grill has a crossover
ignition system that allows the burners to light successively
off one another. Confirm each burner is lit before lighting
another burner.
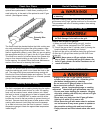
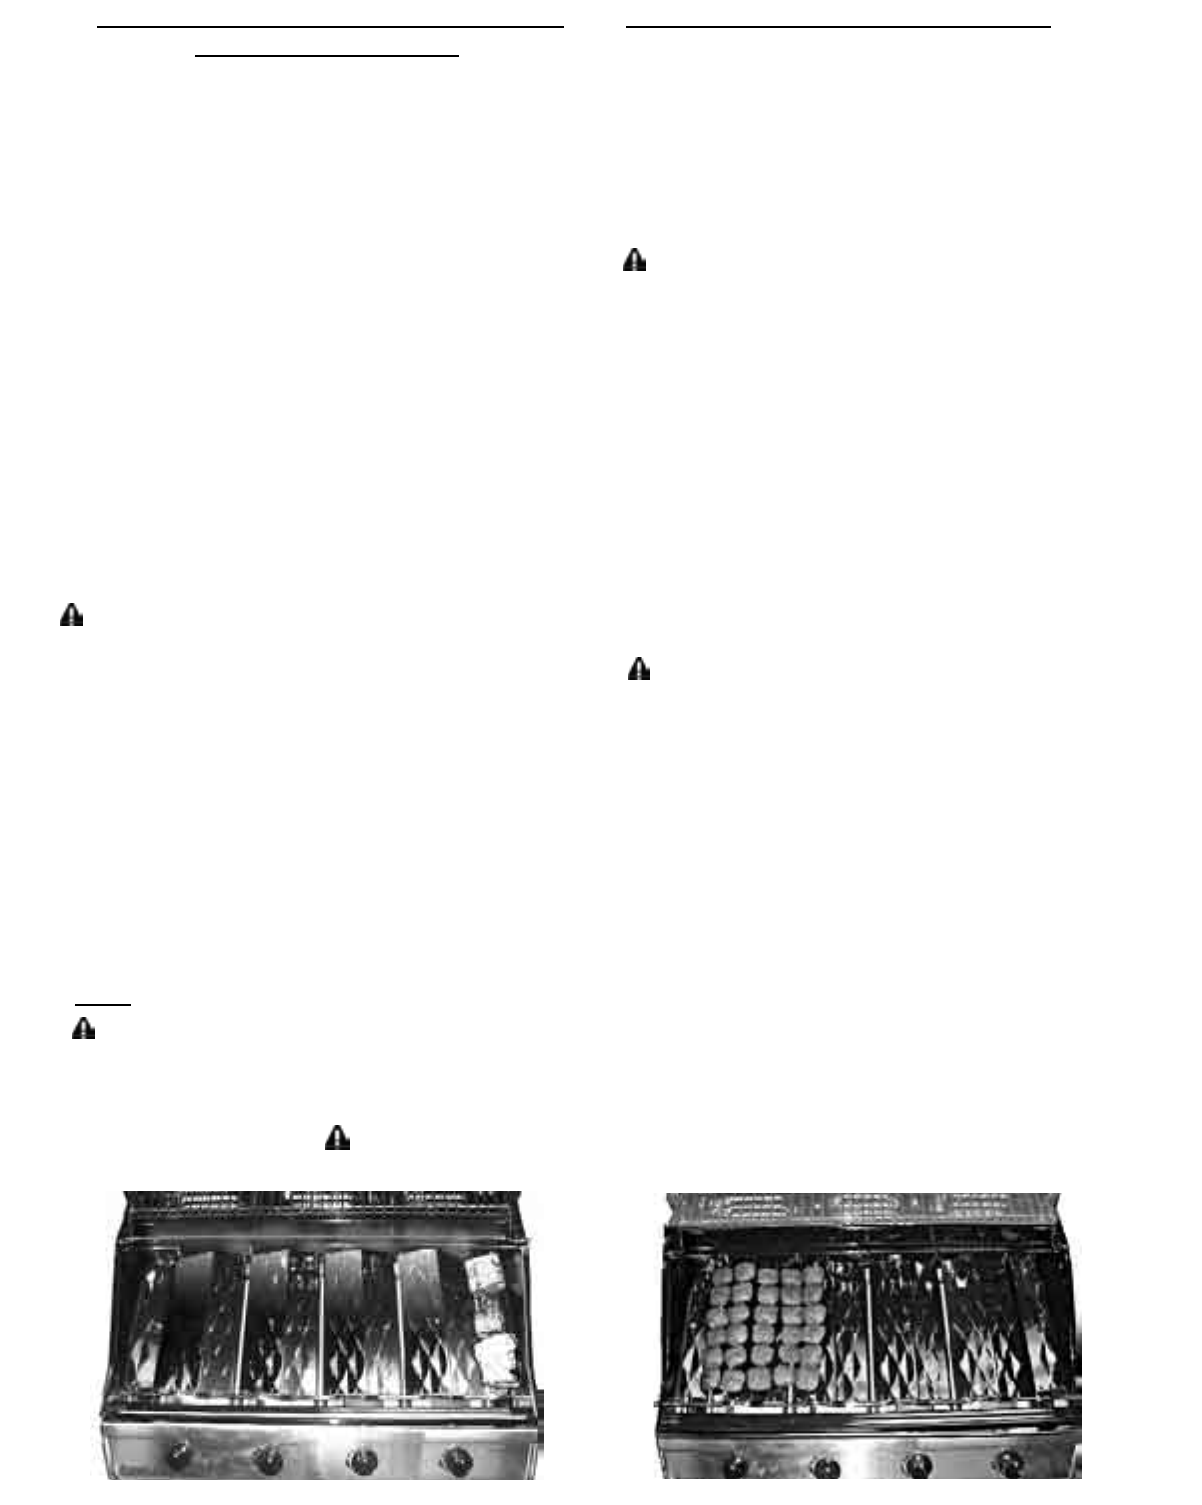
1 . Soak desired quantity of wood chunks in water for a
minimum of 30 minutes. Wood chunks should be placed
along either the left or right side of the grill on top of
the outermost louver. No more than four wood chunks
should be used on each side(Charcoal briquettes can
be substituted for wood chunks).
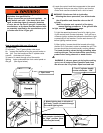
4. Important: The LP gas cylinder valve must be opened
first before turning the control knobs on the grill. Turn the
handle on the LP cylinder valve counter-clockwise until it
stops.
7. After ignition, burners should be burned at the high posi-
tion for 3-5 minutes in order to preheat the grill. This pro-
cess should be done every cooking session. When cook-
ing with LP gas only, the hood should be closed during
preheating. When using wood chunks, the hood should be
OPEN during preburn .
WARNING: If a burner goes out during the cooking
cycle, turn all knobs to the off position and close the
valve on the LP cylinder. Open hood and wait five
minutes before attempting to relight the grill.
WARNING: If any or all burners fail to light after
following Steps 3 & 4, turn all knobs to the “off”
position and close the valve on the LP gas cylinder.
Wait five minutes; then repeat all of the above
lighting procedures.
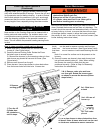
3. Remove cooking grids and place the desired amount of
Charcoal evenly on top of the Louvers. Do not stack the
charcoal briquettes.
4. From the “Off” position, push control knob in on the left
burner and turn counter-clockwise until you feel resistance.
Pause 4 seconds, then continue turning the control knob until a
click is heard and the burner is lit.
Use an appropriate amount of charcoal for the desired cook-
ing effect. Less charcoal for slower cooking and more
charcoal for hotter cooking. Do not exceed the maximum
amount of charcoal recommended above. The excess
heat could damage your grill.
5. Light the remaining burners from left to right by turning the
control knob counter-clockwise. Your grill has a crossover
ignition system that allows the burners to light successively
off one another. Confirm each burner is lit before lighting
another burner.
6. If any of the burners do not light, repeat Step 3. The burner
should light within three or four attempts. If burner still does
not light, try the next burners from left to right.
26
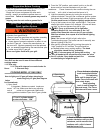
Wood Chunks placed along left or right side of grill.
Charcoal placed in grill.
5. From the “Off” position, push control knob in on the left
burner and turn counter-clockwise until you feel
resistance. Pause 4 seconds, then continue turning the
control knob until a click is heard and the burner is lit.
7. After ignition, pre burn the charcoal by turning the controls
to “High” position for 10 minutes. After 10 minutes turn off
the burners. The hood should remain open during preburn
to allow excess heat and smoke to escape. Leaving the
hood closed during the preburn can damage your grill.
WARNING: NEVER USE LIGHTER FLUIDS WITH THIS GRILL.
WARNING: If any or all burners fail to light after
following Steps 3 & 4, turn all knobs to the “off”
position and close the valve on the LP gas cylinder.
Wait five minutes; then repeat all of the above
lighting procedures.
3. MAKE SURE THE FLAVOR ACTIVATOR KNOB IS
PUSHED OUT FOR GAS MODE.