


Special offers from our partners!

Find Replacement BBQ Parts for 20,308 Models. Repair your BBQ today.
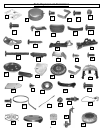
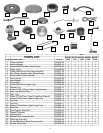
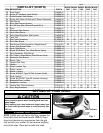
PARTS LIST (CONT'D)
ITEM DESCRIPTION PART #
29 Heat Shield 03.6506.27 1 1 1 1 1
30 Screw, ST3.8x6mm (Heat Shield) 03.6506.28 2 2 2 2 2
31 Guide Bracket, Main Burner 03.6506.29 1 1 1 1 1
32 Screw, M4x10mm (M. Burner/S. Burner Electrode) 03.6506.30 4 4 4 4 4
33 Main Burner 03.6506.31 1 1 1 1 1
34 Wire, Main Burner Ground 03.6506.32 1 1 1 1 1
35 Nut, M4 Hex (Main Burner/Ground Wire) 03.6506.33 2 2 2 2 2
36 Piezo 03.6260.01 1 2 1 2 2
37 Electrode, Main Burner 03.6506.34 1 1 1 1 1
38 Knob, Main Burner 03.6506.35 1 1 1 1 1
39 Valve/Hose/Regulator, Main burner 03.6506.36 1 1 1 1 1
40 Level Vial 03.6506.37 1 1 1 1 1
41 Side Table Accessory 03.6506.38 All All All All All
42 Grid, Side Burner 1210.5.001 ---- 1 ---- 1 1
43 Side Burner/Table Accessory (Replacement) 1220.5.001 All All All All All
44 Cover, Side Burner/Table 03.6506.39 ---- 1 ---- 1 1
45 Knob, Side Burner 03.6506.40 ---- 1 ---- 1 1
46 Screw, M3.5x8mm Torx (Side Burner Valve) 03.6506.41 ---- 2 ---- 2 2
47 Valve Assembly, Side Burner 03.6506.42 ---- 1 ---- 1 1
48 Pin, Cotter 1.6mmx28mm (Side Burner Valve) 03.6235.00 ---- 2 ---- 2 2
49 Electrode, Side Burner 03.6506.43 ---- 1 ---- 1 1
50 Burner, Side 03.6506.44 ---- 1 ---- 1 1
51 Lantern Gas Tube 03.6506.45 ---- ---- 1 1 1
52 Lantern 03.6506.46 ---- ---- 1 1 1
53 Cover, Lantern Top 03.6506.47 ---- ---- 1 1 1
54 Globe, Lantern 03.6506.48 ---- ---- 1 1 1
55 Mantle, Lantern 03.6506.49 ---- ---- 2 2 2
56 Screw, #10x3/4" Type 25 Csk (Lantern Knob) 03.6506.50 ---- ---- 1 1 1
57 Knob, Lantern 03.6506.51 ---- ---- 1 1 1
58 Screw, #4-24x3/8" Type 25 (Lantern Housing) 03.6506.53 ---- ---- 2 2 2
59 Electrode/Piezo, Lantern 03.6506.54 ---- ---- 1 1 1
60 Pushbutton, Lantern 03.6506.55 ---- ---- 1 1 1
61 Lantern/Gas Tube Accessory 1230.5.001 All All All All All
62 Carry Bag Accessory 1240.5.001 All All All All All
QTY
MODEL
2400
MODEL
2410
MODEL
2420
MODEL
2430
MODEL
2440
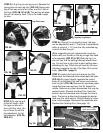
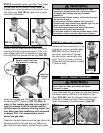
SETTING UP YOUR GRILL
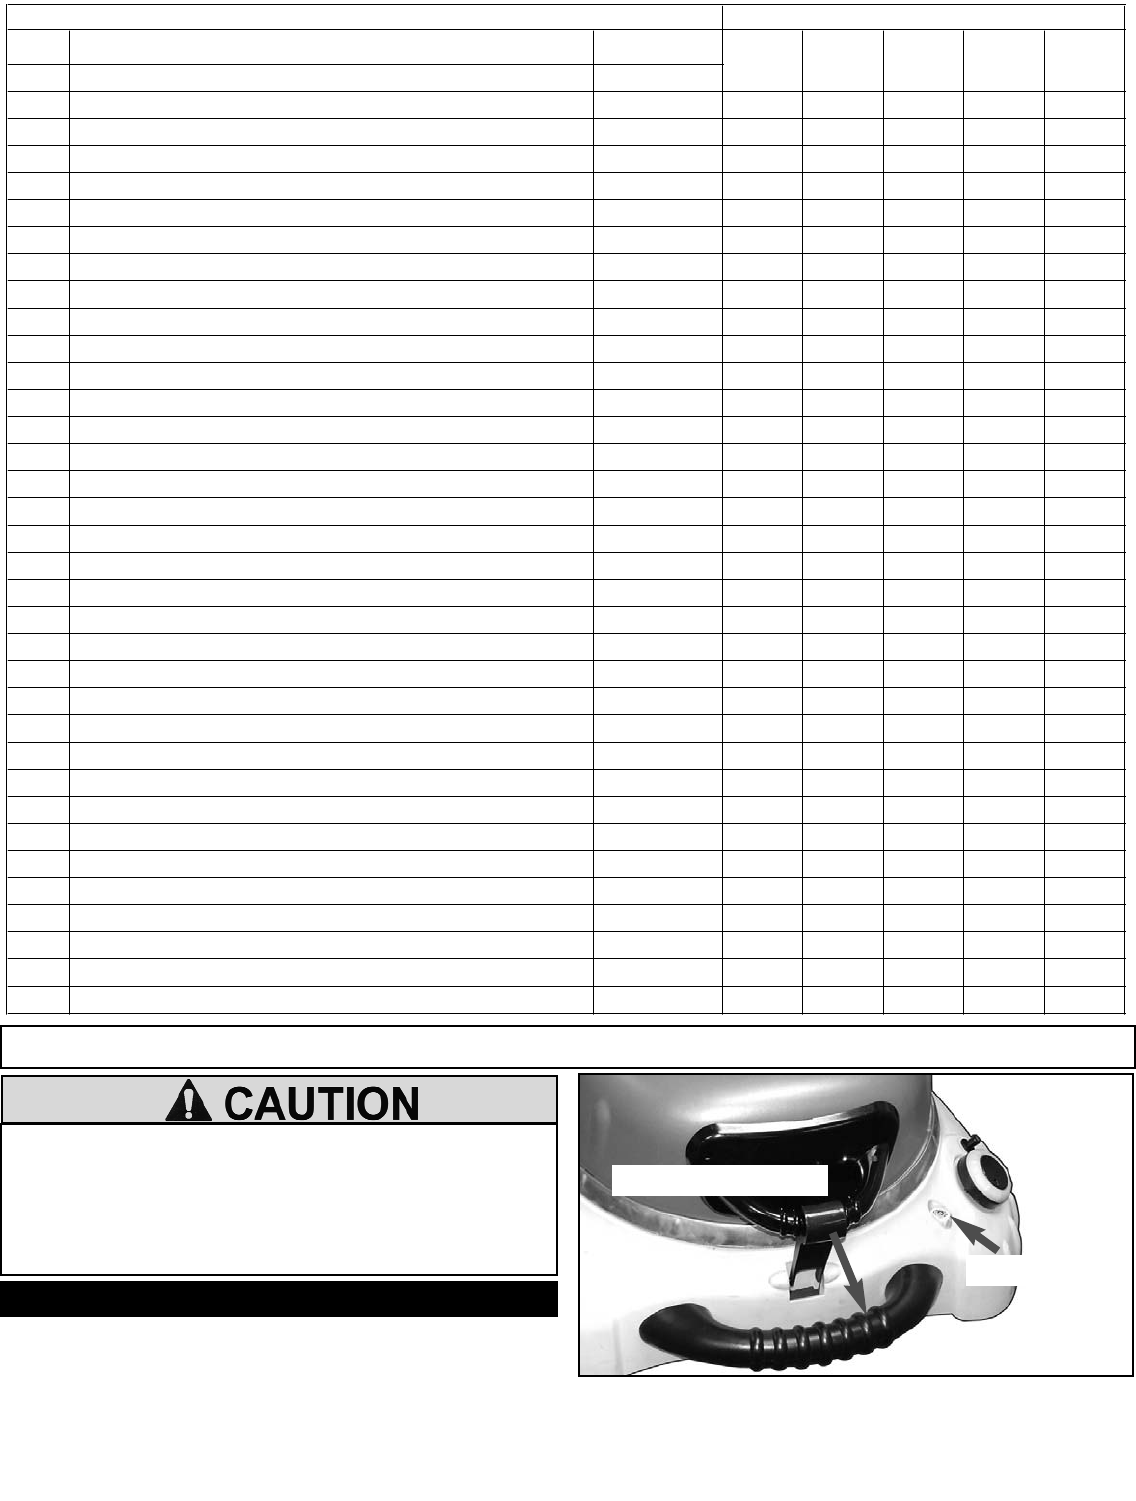
Fig. 1
Release Hood Latch
Level Indicator
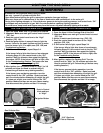
STANDING GRILL ON LEGS
STEP 1) With your grill flat on the floor, release the
Hood latch from the Hood Handle. (FIG. 1) Open
Hood and remove any accessories from the grid
that are with your model. Do not remove anything
else at this step. Close and re-latch the hood.
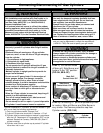
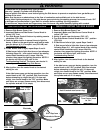
To reduce the risk of a cut or pinching injury:
· Wear protective gloves when handling parts that have
sharp edges.
· When opening legs, keep hands and fingers away from
the three body leg mount areas to avoid pinching. (See
FIG. 2A)
5