


Special offers from our partners!

Find Replacement BBQ Parts for 20,308 Models. Repair your BBQ today.
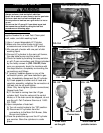
1) When you have finished using your grill, turn the grill
Control Knob clockwise to the “Off” position. Make sure
there are no open flames nearby,
2) Disconnect the LP cylinder from the Grill Burner, Side table
Burner and the Lantern. Remove the Lantern and gas tube
from the grill. Store them in a safe place.
3) Wait until the grill is cool before closing the hood, cleaning
or putting on a cover.
4) Regularly clean your LP gas grill between uses and after
extended storage periods. To maintain the condition and
extend the life of your grill, cover the unit when stored out
side for any length of time, especially during the winter
months.
END OF COOKING SESSION
CARE AND MAINTENANCE
CLEANING THE GRILL
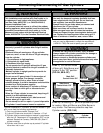
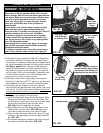
How to Clean the Burners:
A) Main Grill Burner and Side Burner:
a) Remove the Cooking Grid.
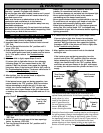
b) Remove the Main Grill Burner, by first removing the
single screw securing it to the bowl. (FIG. 18C)
c) Remove Burner from the grill by lifting the burner up
and out. You do not have to remove Side Burner.
d) Use a pipe cleaner to clear insect nests from the Main
Burner and the Side Burner inlet hole. (FIG. 18D & 18E)
Open up clogged burner holes with a small nail or wire.
(FIG. 18D & 18F) Normal wear and corrosion could
enlarge some holes, however, if large cracks or holes
are found, replace the Burner. Note: It is normal for
surface rust to be present on the burners. The
burners can be wire brushed and coated with cooking
oil periodically. Make sure there are no insects or insect
nests blocking the inlet hole.
To reduce the risk of fire beneath the grill:
· Inspect and clean clogged burner/venturi tubes for
insects and insect nests.
· Make sure LP cylinders are disconnected from the grill
Main Burner, Side Burner and Lantern, that all control
knobs are turned off, and the grill is completely cooled
before cleaning the burners.
· To avoid burns, allow the grill and the grease in the
grease container to cool before emptying, handling
parts or cleaning.
· To reduce the risk of a fire, empty the Grease container
after each cooking session so excessive grease does
not accumulate.
· Never light the LP gas grill without the Grease
Container in place.
· Allow grill to completely cool before replacing side
burner cover.
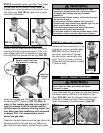
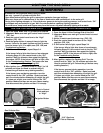
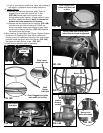
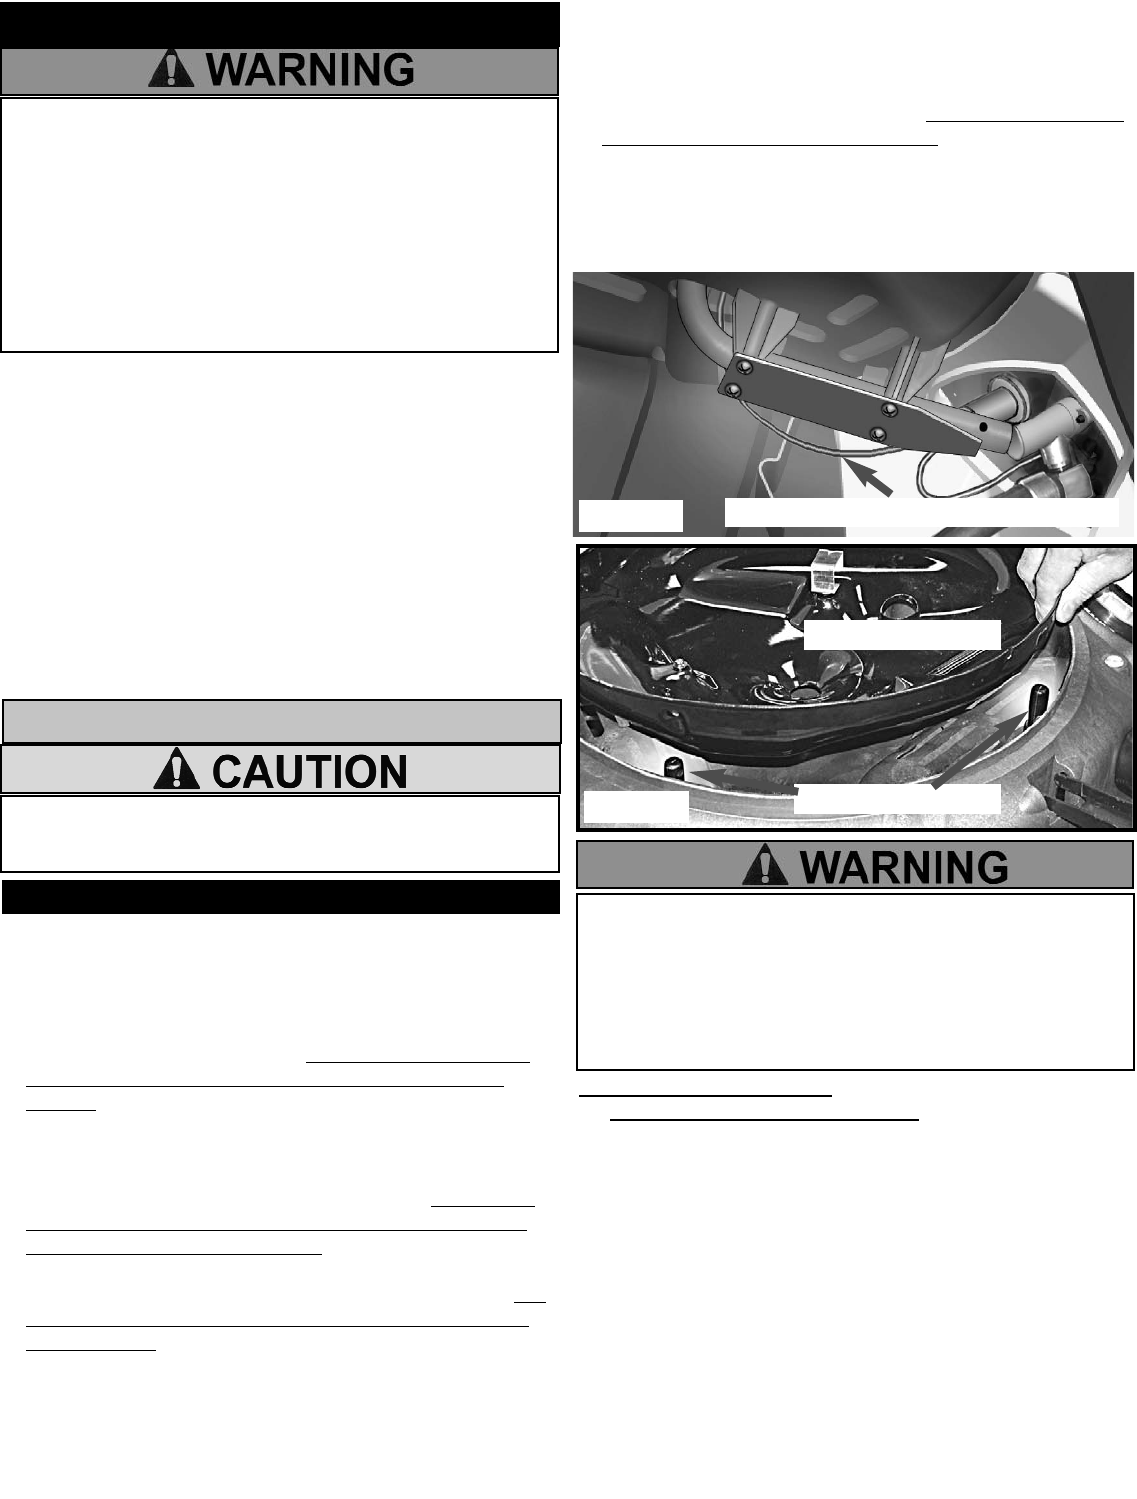
To re-install the Bowl Pan, be sure to locate the indents
on the (4) Bowl Pan posts and re-connect the electrode
wire.
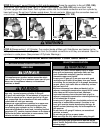
5) Lantern-Wipe clean the lantern housing, globe and top cap
with a mild detergent and soft cloth. Do not use abrasive
cleaners that will scratch the housing.
6) Burners-Clean the Burners annually, or whenever heavy
build-up is found, to ensure that there are no signs of
blockage (debris, insects) in either the burner portholes,
the primary air inlet, or the neck of the burner. (See Burner
cleaning instructions next section.)
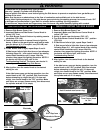
FIG. 18B
Lift Bowl Pan out
Bowl Pan Posts (4)
To reduce the risk of a cut injury:
· Be careful or wear protective gloves when cleaning grill
parts that have sharp edges.
1) Remove Grease Container and Cooking Grid.
2) Grease Container-Wash the Grease Container with soap
and water.
3) Cooking Grid-Clean the residue off with a baking soda
and water solution. For stubborn stains, use a
non-abrasive scouring powder. Do not use steel wool or
other abrasive cleaners that can scratch the non-stick
coating. This can cause foods to stick.
4) Hood and Body-It is not necessary to remove all the
grease from inside the hood. Wipe the outside hood
and body with paper towels or soft damp cloth. For further
cleaning, use warm soapy water and a cloth. Do not use
steel wool, oven cleaner or other abrasive cleaners that
can scratch the painted surfaces.
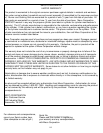
5) Remove excess grease and/or fat from the Bowl with a soft
plastic or wooden scraper or nylon-bristled brush only. Do
not immerse the gas controls. Avoid getting water in the
Burner Holes.) The Bowl Pan can be removed for
additional cleaning or replacement. Follow procedure for
removing the burner screw and Main Grill Burner. Then
disconnect the electrode wire from the Ignitor under the
grill and lift the Bowl Pan out. (Fig. 18A & 18B)
Disconnect Electrode Wire from Ignitor
FIG. 18A
17