


Special offers from our partners!

Find Replacement BBQ Parts for 20,308 Models. Repair your BBQ today.
7
8
ASSEMBLY ASSEMBLY
• BEFORE ASSEMBLY READ ALL INSTRUCTIONS CAREFULLY.
• ASSEMBLE UNIT ON A CLEAN, FLAT SURFACE.
• TOOLS NEEDED: ADJUSTABLE WRENCH, PHILLIPS HEAD SCREWDRIVER
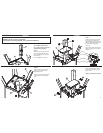
Carefully position grill as shown.
Do not tighten screws all the
way. Leg frames may need to be
adjusted during assembly.
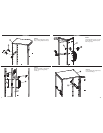
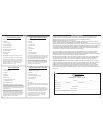
STEP 1
Attach rear legs (4), right front leg
(25) and left front leg (26) to bot-
tom of smoker body (1) using phil-
lips screws (A).
Do not fully tighten screws yet.
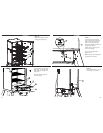
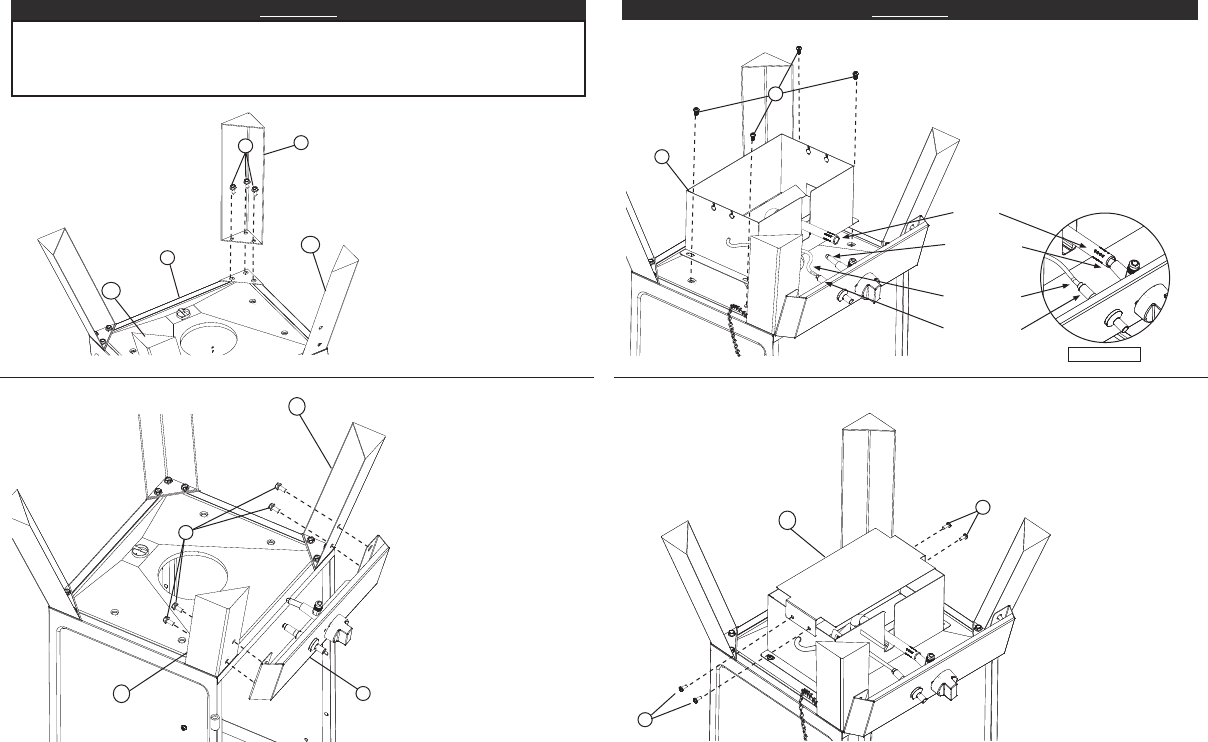
STEP 3
Position burner box (6) over center
hole in bottom of smoker body,
carefully aligning venturi over valve
orifi ce as shown. Attach burner box
to smoker body using phillips
screws (A).
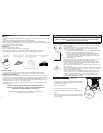
Firmly attach ignition wire to piezo
ignitor on control panel as shown
in Figure B.
STEP 2
Attach control panel (5) to right
front leg (25) as shown using
phillips screws (A).
Repeat on opposite side attaching
control panel (5) to left front leg
(26).
A
4
25
26
1
25
26
5
B
B
20
A
6
Figure B
Venturi
Ignition Wire
Piezo Ignitor
Valve Orifi ce
STEP 4
Attach heat shield (20) to burner
box (6) using self tapping screws
(B) as shown.
Tighten all hardware at this time.
A