


Special offers from our partners!

Find Replacement BBQ Parts for 20,308 Models. Repair your BBQ today.

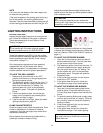
OPERATING INSTRUCTIONS
GENERAL USE OF THE GRILL AND ROTISSERIE
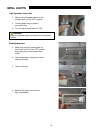
Each main burner is rated at 15,000 BTU/Hr. The
main grill burners encompass the entire cooking
area and are side ported to minimize blockage from
falling grease and debris. Above the burners are
stainless steel flame tamers. The igniter knobs are
located on the lower center portion of the valve
panel. Each rotary igniter is labeled on the control
panel.
USING THE GRILL
Grilling requires high heat for searing and proper
browning. When grilling, take into consideration the
meat involved and desired preparation. Large
pieces of meat or poultry may need to be cooked at
a lower setting after the initial browning. This
method cooks the food thoroughly without burning
the outside.
Food cooked for a long time or basted with a sugar-
based marinade may need a lower heat setting
near the end of its cooking time.
To begin:
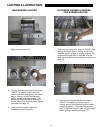
1. Make sure the grill has been leak tested and is
properly placed.
2. Remove any remaining packing materials.
3. Light the grill burners using the instructions on
page 14.
4. Turn the control knob(s) to the “HI/IGNITE”
setting, and preheat the grill for 15 minutes. The
grill lid should be closed during the pre-heat
period.
5. Place the food on the grill and cook to the
desired preparation. If necessary, adjust the
heat setting. The control knob may be
positioned at any setting between “HI/IGNITE”
and “LO”.
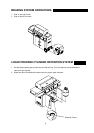
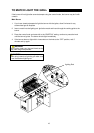
USING THE ROTISSERIE BURNER
Your grill is capable of performing back burner
rotisserie cooking. Light the rear burner as
described in the lighting instructions on page 14.
Once lit, the rotisserie burner will reach cooking
temperature in about 1 minute.
The rotisserie motor is capable of turning up to a 12
lb. cut of meat or poultry. The motor slides onto the
stainless steel motor mount.
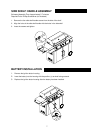
The rotisserie motor must be electrically grounded
in accordance with local codes or, in the absence of
local codes, with the National Electrical Code,
ANSI/NFPA 70-1990.
After its first use, the stainless steel adjacent to the
rotisserie burner will most likely turn dark blue. This
is a normal property of the non-rusting type
stainless steel used on the grill.
WARNING
The rotisserie motor is equipped with a plug and
should be plugged directly into a properly grounded
receptacle in accordance with local codes or, in the
absence of local codes, with the National Electrical
Code, ANSI/NFPA 70, or the Canadian Electrical
Code, CSA C22.1. DO NOT cut or remove the
grounding prong from this plug.
Keep the rotisserie motor cord away from the
heated surfaces of the grill. When not in use
remove and store the motor in a dry location.
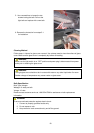
THE ROTISSERIE SKEWER
The skewer for the rotisserie should be assembled
into the motor by placing the pointed end into the
motor, and then sliding the grooved bushing into the
slot at the opposite side of the grill.
The thumbscrew for the grooved bushing should be
inside the grill body.
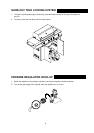
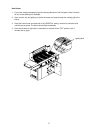
LOADING THE ROTISSERIE SKEWER
1. Screw the bushing onto the skewer rod at the
opposite end from the point.
2. Slide and tighten the counterbalance apparatus
onto the skewer rod approximately 2 to 4 inches
from the bushing.
3. Slide the first meat fork onto the skewer rod,
prongs toward the food.
4. Center the product to be cooked on the skewer,
and then push the meat forks firmly together.
5. Tighten the wing nuts.
6. It may also be necessary to wrap the food with
butcher’s string to secure loose portions. Never
use nylon or plastic string to wrap the food.
7. Once the food is secure, insert the skewer into
the motor.
13