


Special offers from our partners!

Find Replacement BBQ Parts for 20,308 Models. Repair your BBQ today.
10
LIGHTING
Prior to lighting your barbeque,visually check all hoses before each
use
for nicks, cracking, abrasions or cuts. If the hose is found to be
damaged
in any way, DO NOT USE YOUR BARBEQUE. A
replacement
hose and regulator is required (see ‘
PARTS LIST’ in
Assembly
Brochure).
IMPORTANT
• Always raise the barbeque lid before lighting.
• Do not lean over the barbeque when lighting the burner.
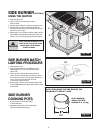
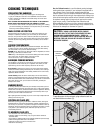
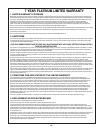
• Visually check the flames every time you light your barbeque
(Figure
10). If the flame is abnormally small or a smoky yellow --
shut
off the barbeque and check the venturi tubes for blockage
(see
Figure 8) or refer to the Troubleshooting Guide.
MAIN BURNERS
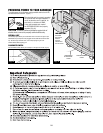
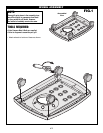
USING THE IGNITOR (Figure 11A)
1.Open the lid before lighting.
2.Turn off all of the burner control knobs and close the gas supply valve.
3.Open the gas supply valve and wait 5 seconds.
4.Push in and turn a single main burner control knob to ‘HIGH’.
All
other control knobs should be in the "OFF" position.
5.Depress
the ignitor, repeat if necessary.
6.If the burner does not light immediately (within five seconds), turn
burner
control knob off and wait 5 minutes to clear the gas.
7.Repeat steps 1 to 6. If burner still fails to light, refer to
Troubleshooting Guide to determine cause and solution, or try the
Match
Lighting procedure (Fig. 11B).
CAUTION
!
IF LIGHTING MAIN BURNERS ONLY,
ENSURE
SIDE BURNER KNOB IS IN THE OFF
POSITION.
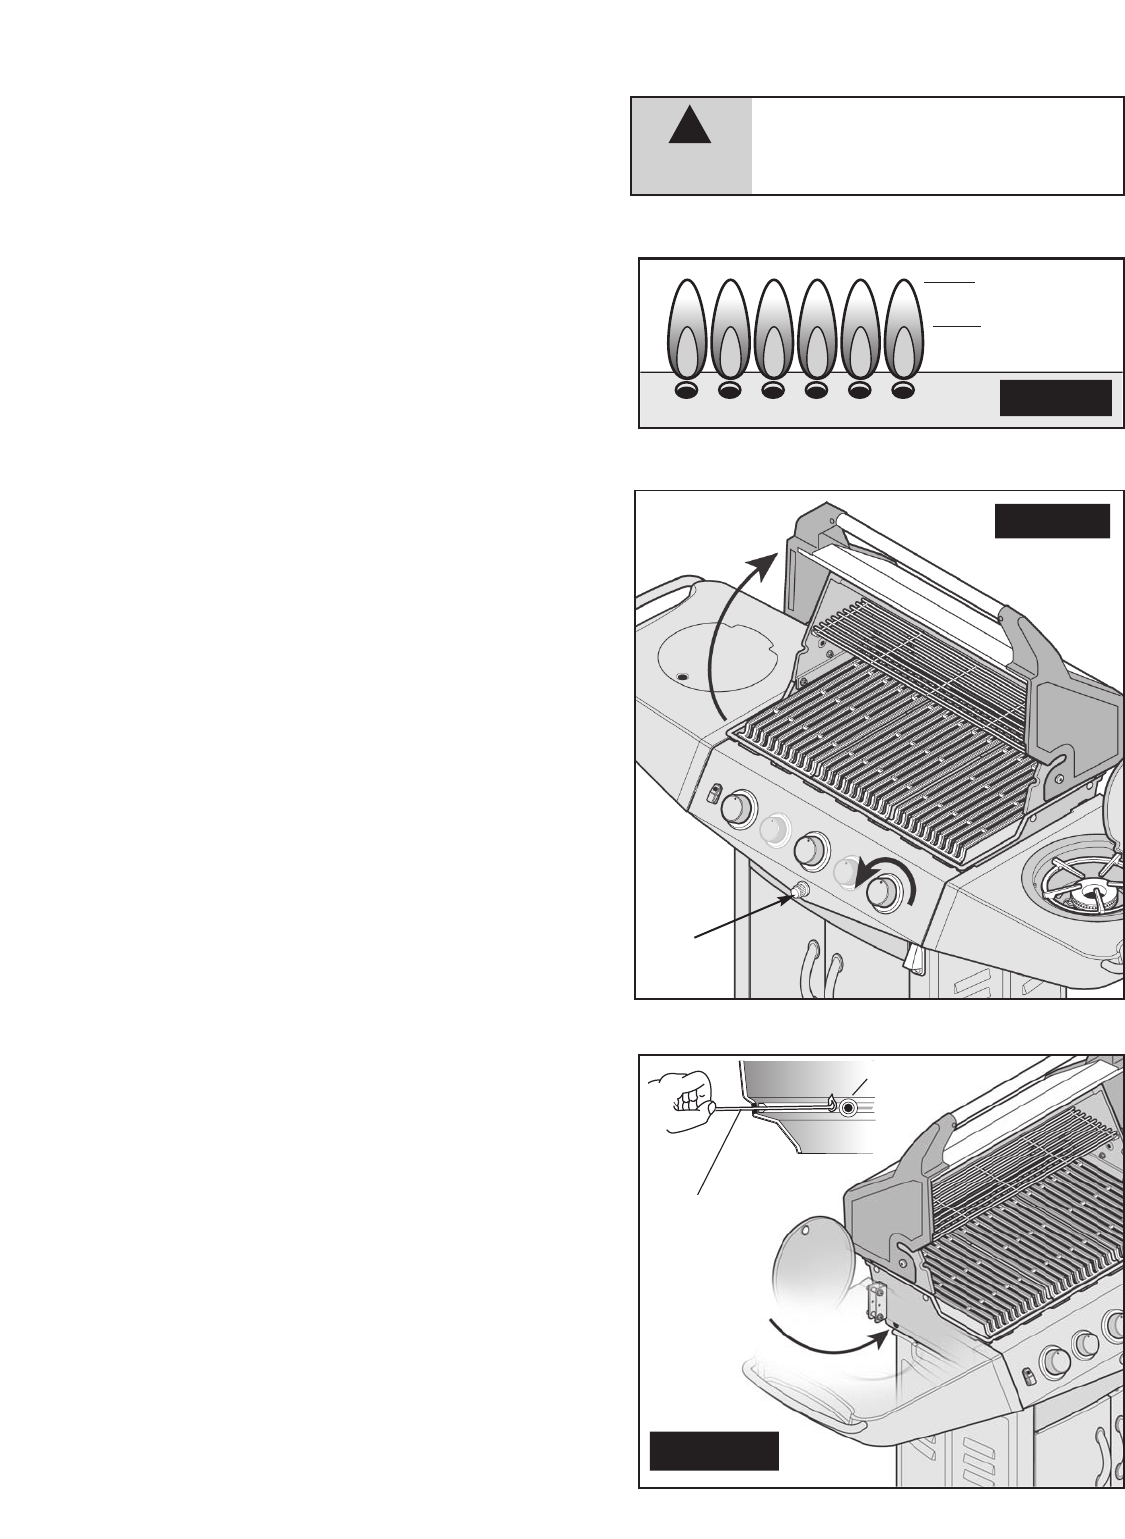
MATCH LIGHTING PROCEDURE
1. Open the lid before lighting.
2.
Place an ignited lighter or lit match through the lighting hole,
approx.
1.25 cm (1/2") from burner. (See Figure 11B)
3. Push in and turn the left burner control knob to ‘HIGH’. The
burner
should light immediately (within five seconds). If it
does
not, extinguish the lighter or match, turn the control knob
to
off, and wait 5 minutes to clear the gas.
4.
Repeat steps 1 to 3. If burner fails to light, refer to the
Troubleshooting Guide to determine cause and solution.
5.
Once left hand burner is lit, light remaining burners in this
sequence:
center burner, then right burner.
1.
Fig. 11A
Fig. 11B
HIGH
LOW
Fig. 10
LIGHTING THE OTHER MAIN BURNERS
Once one burner has been lit, push in and turn the adjacent control
knob
to ‘HIGH’. The unlit burner will light automatically.
4.
5.
BURNER
MATCH
MATCH
LIGHTING
HOLE
LIGHTING THE OTHER MAIN BURNERS
Once one burner has been lit, push in and turn the adjacent control
knob
to ‘HIGH’. The unlit burner will light automatically.