


Special offers from our partners!

Find Replacement BBQ Parts for 20,308 Models. Repair your BBQ today.
9
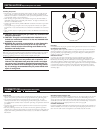
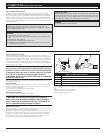
CONNECTION Liquid Propane Gas Grills
Type 1 Connective Coupling
All Ducane liquid propane gas grill regulators are equipped with a UL-listed tank
connection as per the latest edition of ANSI Z21.58. This will require a liquid propane
tank that is similarly equipped with a Type 1 connection in the tank valve. This Type 1
coupling allows you to make a fast and totally safe hookup between your gas grill and
your liquid propane tank. It eliminates the chance of leaks due to a POL fitting that is
not properly tightened. Gas will not flow from the tank unless the Type 1 coupling is
fully engaged into the coupling.
WARNING: The Type 1 connective coupling supplied with
your grill must not be replaced with a different type of grill/tank
connection system. Removal will result in loss of warranty and,
if improperly done, may result in serious bodily injury or death,
or in a fire or an explosion causing damage to property.
WARNING: Do not let the regulator hose loop up towards the
bottom of the burner box.
The propane cylinder valve connection provided with this grill incorporates the four
important safeguards listed:
Hand Assembly
1. Make sure the cylinder valve and all appliance valves are in their “OFF” positions.
2. When connecting regulator/burner valve assembly to cylinder valve, turn large
plastic nut clockwise until it stops.
3. Gas will not flow unless plastic nut is fully engaged.
4. HAND TIGHTEN ONLY.
Disconnecting Cylinder
1. Turn cylinder valve and all appliance valves “OFF”.
2. Turn large plastic nut counterclockwise to disengage coupling.
WARNING: Do not use a tool to tighten the connection.
Using a tool could damage the regulator coupling and could
cause a leak resulting in serious bodily injury or death, or in a
fire or an explosion causing damage to property.
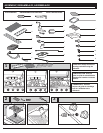
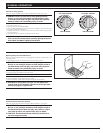
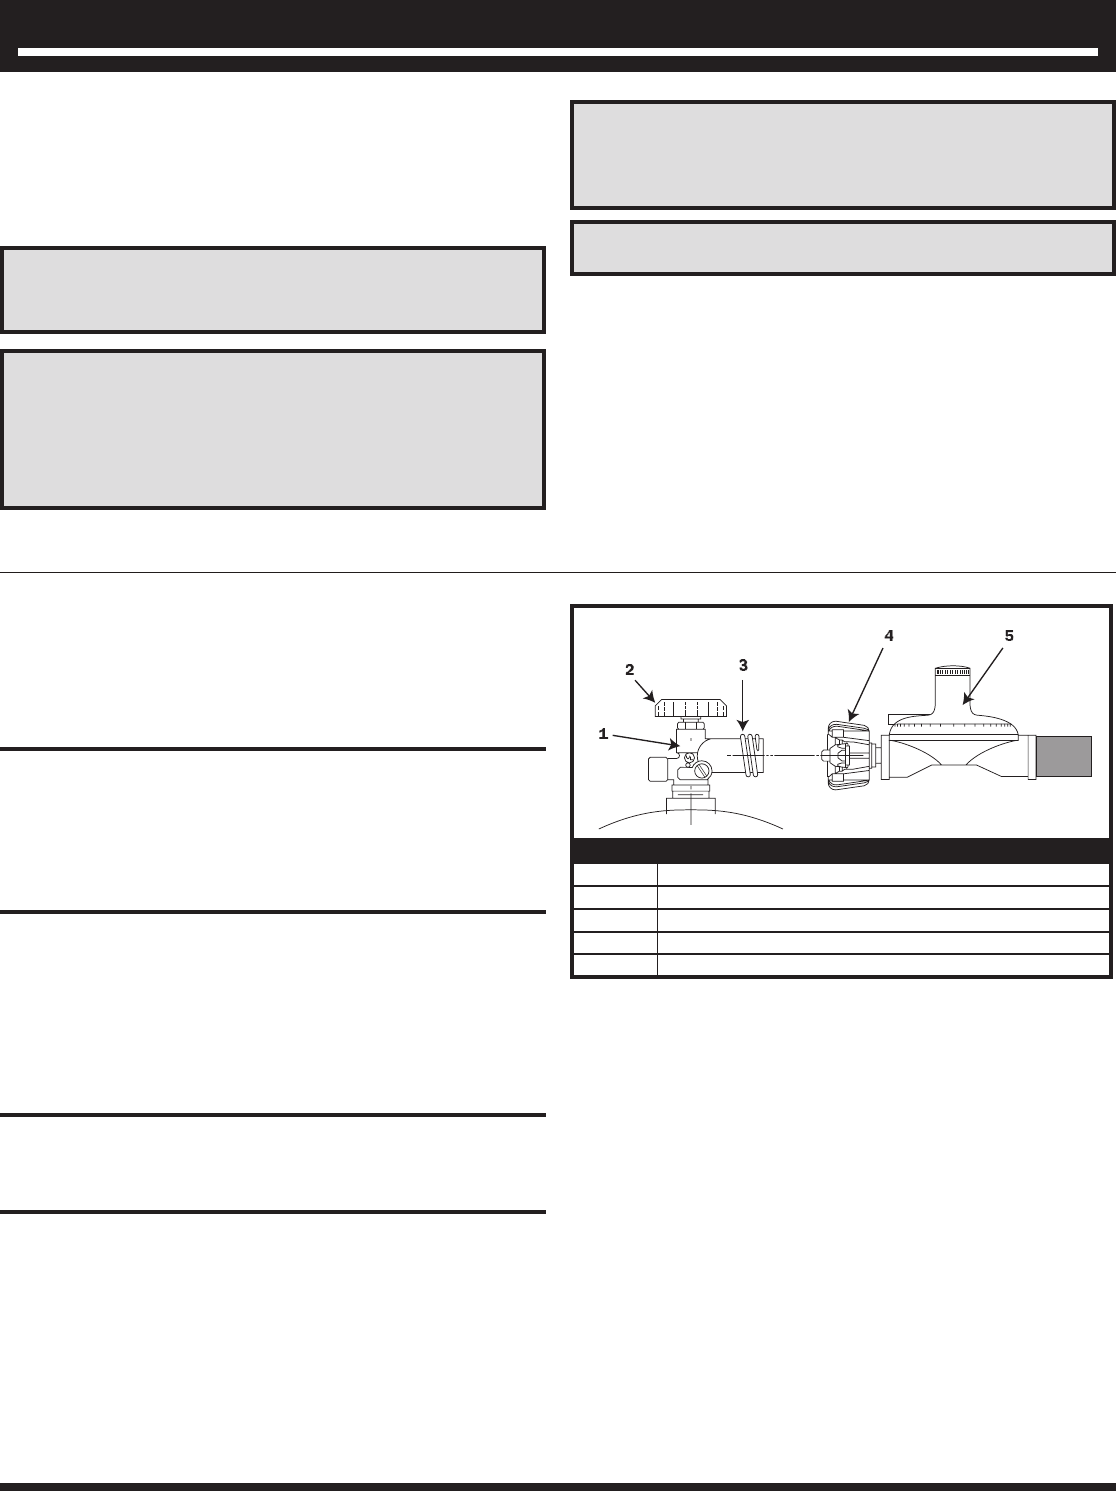
TYPE 1 CONNECTIVE COUPLING
1
Type 1 Valve
2
Hand Wheel
3
External Thread
4
Themally Sensitive Nut
5
Propane Regulator
Excess Flow Control
The propane regulator assembly incorporates a flow limiting device designed to supply
the grill with sufficient gas flow, yet control any excess flow.
Rapid changes in pressure can trigger the flow limiting device. If the cylinder valve is
turned to allow gas flow while a burner valve is open, the surge of pressure will cause
the device to activate. The device will remain closed until the pressure is equalized.
This should occur within a 5-second time frame. If the flame remains low, shut off
the gas valves, wait five seconds and relight grill one burner at a time.
IMPORTANT
Installation must conform with local codes or, in the absence of local codes, with
either the National Fuel Gas Code, ANSI Z223.1/NFPA 54, or can/cga-149.1, Natural
Gas and Propane Installation Code.
IMPORTANT
The liquid propane tank supply system must:
1. Have a safety relief device having direct communication with the vapor space of the
tank
2. Be arranged for vapor withdrawal
3. Include a collar on the tank to protect the tank valve
4 . Be equipped with an overfill protection device (OPD). The tank should be 12 inches
in diameter and 18½ inches tall.
CHECKING GAS LEAKS
Before operating your grill and after refueling, check carefully to be certain that all con-
nections are tight and there are no gas leaks. The easiest way to do this is to mix up a
little soapy water, like you would for washing dishes. Turn on the gas and brush a little
of the mixture around fittings. If new bubbles form, you have a leak!
IMPORTANT
See Assembly Guide for LP tank installation.
Type of Liquid Propane Tank
For LP gas grills, the LP gas supply cylinder to be used must be constructed and
marked in accordance with the specifications for LP Gas Cylinders of the US Depart-
ment of Transportation (DOT) or the National Standard of Canada, CAN/CSA-B339
Cylinders, Spheres and Tubes for the Transportation of Dangerous Goods. This tank
must be provided with a shut-off valve terminating in a liquid propane gas tank valve
outlet. The valve must be equipped with a Type 1 connection complying with the latest
edition of ANSI Z21.58.
To ensure that this does not cause difficulty in lighting the grill, follow these instruc-
tions
1. Make sure all burner valves are OFF.
2. Open cylinder valve and wait 5 seconds.
3. Follow lighting instructions.