


Special offers from our partners!

Find Replacement BBQ Parts for 20,308 Models. Repair your BBQ today.
www.desatech.com
111250-01E30
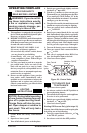
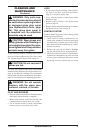
INSPECTING BURNERS
Check pilot ame pattern and burner ame pat-
terns often.
The pilot assembly is factory preset for the proper
ame. Alterations may have occurred during ship-
ping and handling. The pilot is located on the back
right hand side of the burner.
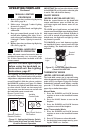
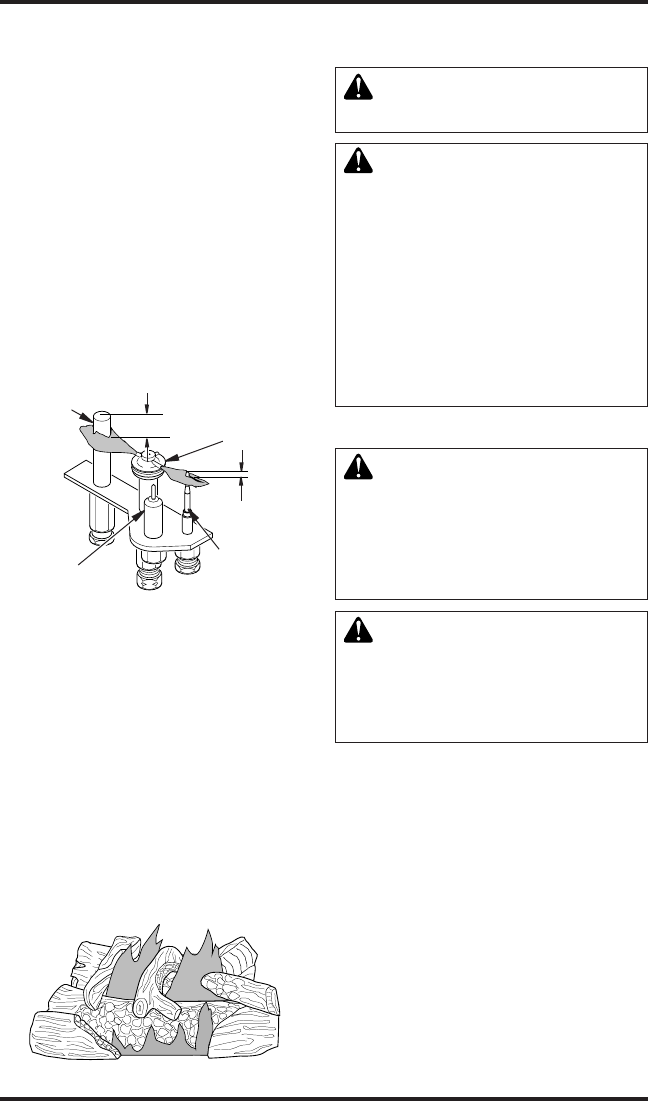
The ame must envelope 1/4" of top of the ignitor/
sensor and grounding stem.
If your pilot assembly does not meet these re-
quirements:
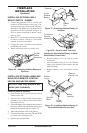
• Turn the adjustment screw marked PILOT clock-
wise to decrease or counterclockwise to increase
the ame to proper size (see Figure 54). Do not
remove the adjustment screw.
• see Troubleshooting, page 32
Burner ames will be steady; not lifting or oating.
Flame patterns will be different from unit to unit
and will vary depending on installation type and
weather conditions.
If the vent conguration is installed incorrectly,
the ames will lift or "ghost". This can be danger-
ous. Inspect the ames after installation to ensure
proper installation and performance.
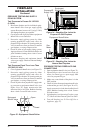
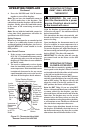
Figure 55 shows a typical ame pattern.
If burner ame pattern differs from that described:
• turn replace off (see To Turn Off Gas to Ap-
pliance, page 27)
• see Troubleshooting, page 32
Figure 55 - Typical Flame Pattern
Thermocouple
Thermopile
1/8"
Pilot Burner
Piezo
Ignitor
Figure 54 - Pilot Assembly
3/8" to 1/2"
CLEANING AND
MAINTENANCE
GLASS DOOR
-
-
Glass must be cleaned periodically. During start-
up it is normal for condensation to form on the
inside of the glass causing lint, dust, and other
airborne particles to cling to the glass surface.
During initial start-up a slight lm may form on
the glass due to paint curing. The glass should be
cleaned several times with a non-ammonia, non-
abrasive household cleaner and warm water after
the rst two weeks of operation. Thereafter, clean
the glass two or three times during each heating
season, depending on the usage and circumstances
present. Refer to Removing/Replacing Glass Door
on page 24 of this manual when removing glass
door for cleaning.