


Special offers from our partners!

Find Replacement BBQ Parts for 20,308 Models. Repair your BBQ today.
www.desatech.com
111250-01E28
OPERATING FIREPLACE
Continued
MANUAL LIGHTING
PROCEDURE
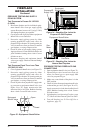
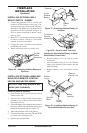
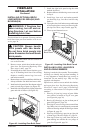
1. Removeglassdoor(seeRemoving/Replacing
Glass Door,page24.)
2. Followsteps1through7underLighting
Instructions, page27.
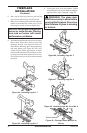
3. Depressgascontrolknobandlightpilot
withmatch.
4. Keepgascontrolknobpressedinfor30
secondsafterlightingpilot.After30sec-
onds,releasegascontrolknob.Followsteps
9through12underLighting Instructions,
page27.
5. Replaceglassdoor(seeRemoving/Replacing
Glass Door, page24).
OPTIONAL HAND-HELD
REMOTE OPERATION
Note:Allremotecontrolaccessoriesmustbe
purchasedseparately(seeAccessories,page
36).Followinstructionsincludedwiththe
remotecontrol.
-
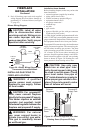
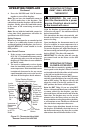
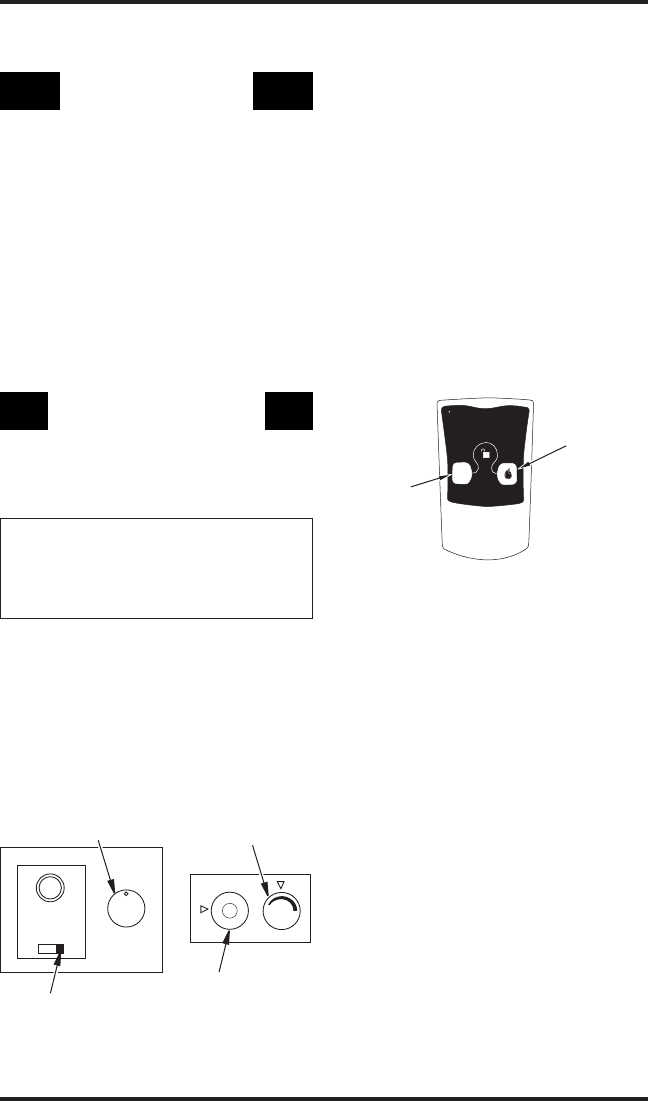
Lighting
Instructions
Afterlighting,letpilotameburnforabout
oneminute.TurncontrolknobtoONposition.
Adjustameadjustmentknobanywherebe-
tweenHIandLO.Slidetheselectorswitchto
theREMOTEposition(seeFigure51).Note:
Theburnermaylightifhand-heldremotewas
on when selector switch was last turned off.
Youcannowturntheburneronandoffwith
thehand-heldremotecontrolunit.
IMPORTANT:Donotleavetheselectorswitch
intheREMOTEorONpositionwhenthepilot
is not lit. This will drain the battery.
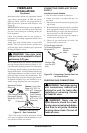
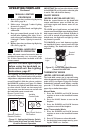
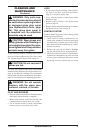
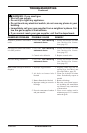
ON/OFF SERIES
Holdthecontrolbuttononthe hand-held
remoteuntilburnerturnson.Holdthecon-
trolbuttonagainuntilburnerturnsoff(see
Figure52).
pressbothbuttonsonhand-held
remotecontroluntillightstopsashing.Hand-
heldremotecontrolisnowlocked.Ifthereis
onitwillbeturnedoffautomatically.Inthe
lockedstate,thelightwillnotlightupwhen
anybuttonispressed.
pressbothbuttonstogether
onhand-heldremotecontroluntilthelight
stopsashing.Thehand-heldremoteisnow
unlocked.
O
F
F
P
I
L
O
T
L
O
I
H
ON
OFF
REMOTE
ON
OFF
O
N
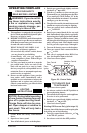
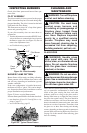
Selector Switch in
Remote Position
Figure 51 - Setting the Selector Switch,
Gas Control Knob and Variable Contorl
Knob for Remote Operation
Blower Control Knob
(Optional Accessory)
Gas Control Knob in
ON Position
Variable
Control Knob
Figure 52 - On/Off Hand-Held Remote
Control Unit HRC100
Control
Button
Indicator
Light
THERMOSTAT SERIES
Thehand-heldremotecanbeoperatedusing
eitherthemanualmode(MANU)orthermostatic
mode(AUTO)(seeFigure53,page29).Toselect
Fahrenheit/Centigrademodedisplay,carefully
pressthe˚C/˚Fmodebuttonwiththeendofa
papercliporsimilarbluntobject.
Manual Mode
1. PressthePOWERandLOCKbuttons
togethertoturnonthehand-heldremote
control.
2. PresstheMANUbuttontoturnonthe
replace.
3. PressthePOWERandLOCKbuttons
togethertoturnoffthereplace.
1. PressthePOWERandLOCKbuttons
togethertoturnonthehand-heldremote
control.
2. PressAUTObuttontoselectthismode.
3. Setthedesiredroomtemperaturebypress-
ingtheTEMP+or-buttons.