


Special offers from our partners!

Find Replacement BBQ Parts for 20,308 Models. Repair your BBQ today.
4
107050
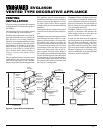
VENTED TYPE DECORATIVE APPLIANCE
EVGL850N
®
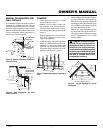
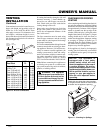
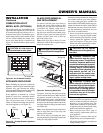
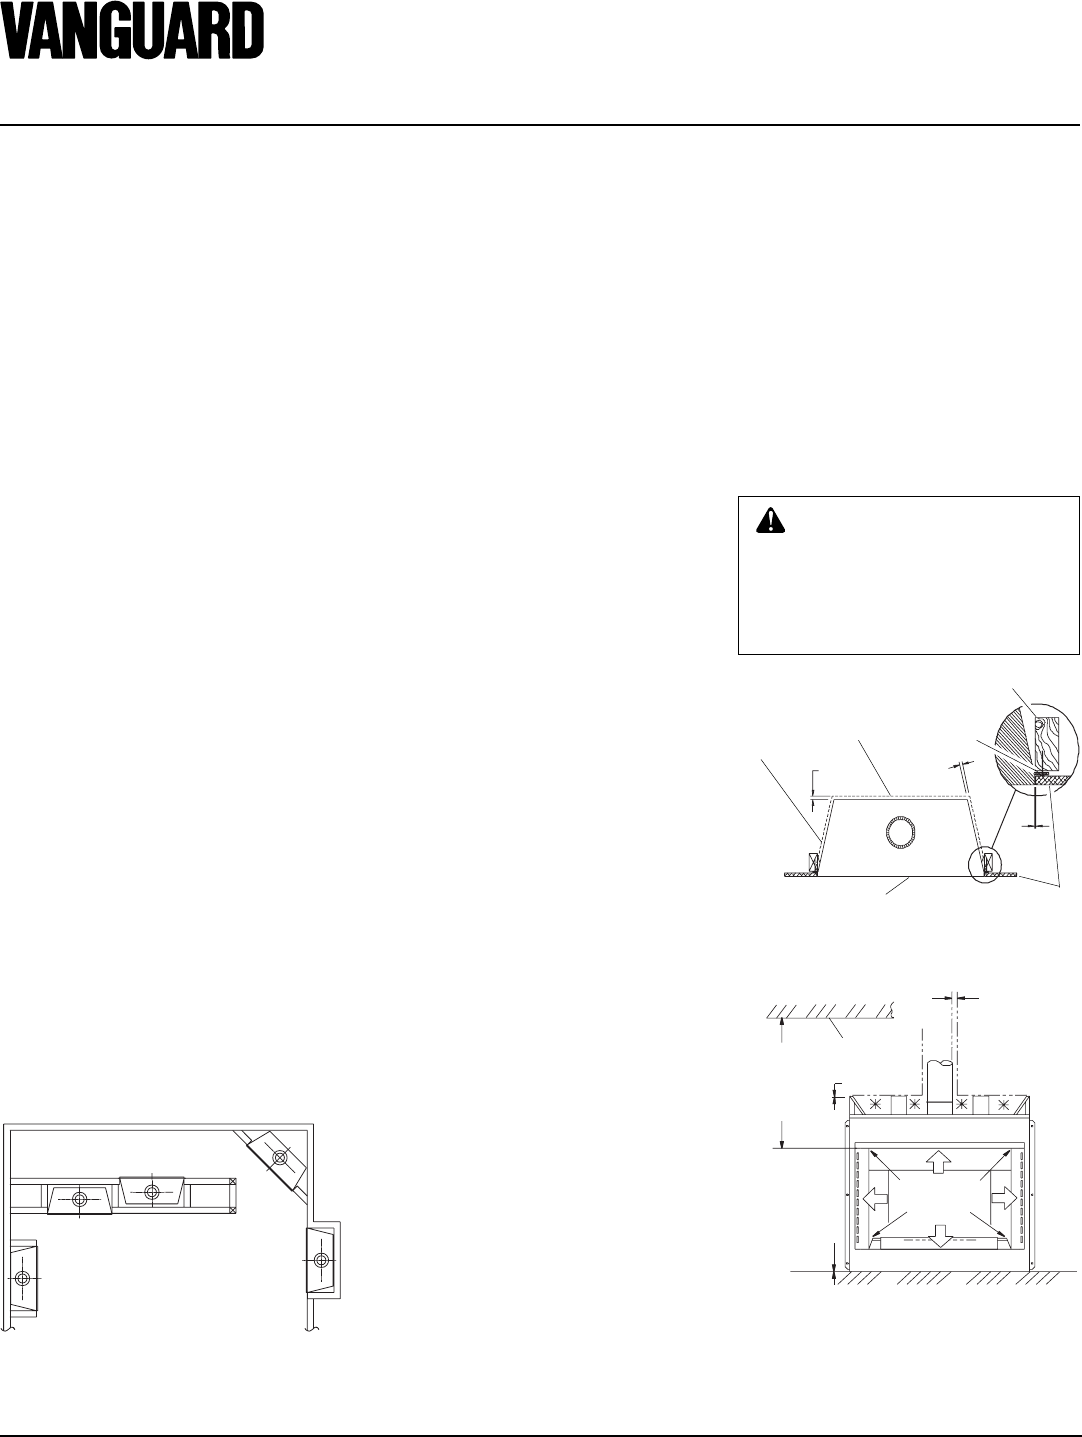
CLEARANCES
Minimum clearances to combustibles are:
• Back and Sides
of Outer Surround: ................ 1/2" min.
• Drywall to Sides of
Front Face (Nailing Flanges): .. 0" min.
• "B" Vent Surfaces: .................... 1" min.
• Ceiling to Opening: ........... 41
1
/2" min.
• Floor: ........................................ 0" min.
Figure 3 - Minimum Clearances (Top View)
Figure 4 - Minimum Clearances (Front
View)
CAUTION: Do not block re-
quired air spaces with insula-
tion or any other material. Do not
obstruct effective opening of ap-
pliance with any type of facing
material.
1/2" MIN.
(13mm)
1/2" MIN.
(13mm)
0"
Nailing
Flange
Front Face
Left Side
Surround
Back
41
1
/
2
"
(1054mm)
Min. Clearance
From Opening
To Ceiling
1" (25mm) Min.
Clearance to “B”
Vent’s Outer Pipe
0" Clearance
0" Clearance
To Floor (On
Noncombustible
Surface)
Do Not Block
Or Obstruct
Opening
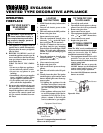
PRE-INSTALLATION
PREPARATION
To determine the safest and most efficient
location for your appliance, you must take
into consideration the following guidelines:
1. The location must allow for proper
clearances (see Clearances).
2. Consider a location where heat output
would not be affected by drafts, air con-
ditioning ducts, windows, or doors.
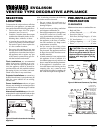
3. A location that avoids the cutting of
joists or roof rafters will make installa-
tion easier. Figure 2 shows a plan view
of a few common locations.
4. Do not use this appliance if any part
has been under water. Immediately call
a qualified service technician to inspect
the appliance and to replace any part
of the control system and any gas con-
trol that has been under water.
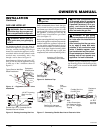
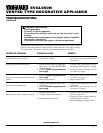
Flush installations are recommended
where living space is limited or at a pre-
mium, and since the space required to en-
close the appliance would be located be-
yond an outside wall, this would also reduce
the cutting of joists, roof rafters, and such.
Check local codes for any restrictions.
Projected installations can extend any
distance into the room. A projection may be
ideal for a new addition on an existing,
finished wall.
Corner installations make use of space
that may not normally be used and provides
a wider and more efficient range for radiant
heat transference.
Internal wall installations provide a dis-
creet option for room separation and can also
be ideal as an addition to an existing wall.
SELECTING
LOCATION
Figure 2 - Possible Locations for Installing
Appliance
INTERNAL WALL
INSTALLATION
CORNER
INSTALLATION
FULL
PROJECTION
INSTALLATION
FLUSH
INSTALLATION
Also, in selecting a location, the following
precautions must be observed:
1. Do not connect this appliance to a
chimney system used for a solid fuel
burning fireplace.
2. Install in an area providing ventilation
and adequate combustion air.
3. Due to high temperatures, the appliance
should be located out of traffic and
away from furniture and draperies.
4. NEVER obstruct the front opening of
the appliance or the flow of combus-
tion and ventilation air. Keep control
compartments accessible.
5. Do not locate in the vicinity where
gasoline or other flammable liquids
may be stored. The appliance area must
be kept clear and free from these com-
bustible materials.
6. A hearth extension is not required with
this appliance. If one is installed, it is
for aesthetic purposes only and does not
have to meet the standard requirements.
7. If the appliance is installed on a sur-
face other than wood flooring (such as
carpeting, tiles, etc.) a metal or wood
panel should be added, extending the
full width and depth of the appliance.
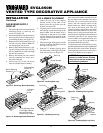
Drywall
2 x 4 Stud
Ceiling
Areas Indicated with
an “✳” are Required
Air Spaces. Do Not
Pack with Insulation
or any Other Material.