Special offers from our partners!

Find Replacement BBQ Parts for 20,308 Models. Repair your BBQ today.

9
107497
OWNER’S MANUAL
For more information, visit www.desatech.com
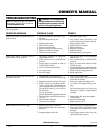
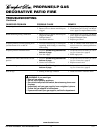
TROUBLESHOOTING
WARNING: Turn off appliance
and let cool before servicing. Only
a qualified service person should
service and repair appliance.
POSSIBLE CAUSE REMEDY
OBSERVED PROBLEM
Note:
For additional help, visit DESA
International’s technical service web site
at www.desatech.com.
Note:
All troubleshooting items are listed in
order of operation.
www.desatech.com
1. Ignitor electrode not connected to igni-
tor cable
2. Ignitor cable pinched or wet
3. Broken ignitor cable
4. Bad electronic ignitor
5. Ignitor electrode broken
6. Ignitor electrode positioned wrong
7. Batteries are dead or missing
8. Ground wire not attached
1. Gas supply turned off or equipment
shutoff valve closed
2. Control knob not in LOW/START
position
3. Control knob not pressed in while in
LOW/START position
4. Air in gas lines when installed
5. Low gas pressure
6. Low fuel supply
1. Control knob not fully pressed in
2. Control knob not pressed in long enough
3. Equipment shutoff valve not fully open
4. Burner flame not touching thermo-
couple, which allows thermocouple to
cool, causing burner to go out. This prob-
lem could be caused by one or both of
the following:
A) Low gas pressure
B) Dirty or partially clogged burner ports
5. Thermocouple connection loose at con-
trol valve
6. Thermocouple damaged
7. Control valve damaged
1. Incorrect gas supply or pressure
2. Blocked burner orifice or burner mani-
fold ports
3. Improper burner orifice size
When ignitor button is pressed, there is no
spark at burner
When ignitor button is pressed, there is
spark at burner but no ignition
Burner lights but flame goes out when con-
trol knob is released
Burner flame is too low or too high
1. Reconnect ignitor cable
2. Free ignitor cable if pinched by any
metal or tubing. Keep ignitor cable dry
3. Replace ignitor cable
4. Replace electronic ignitor
5. Replace electrode
6. Reposition electrode
7. Replace batteries
8. Reattach ground wire to ignitor
1. Turn on gas supply or open equipment
shutoff valve
2. Turn control knob to LOW/START
position
3. Press in control knob while in LOW/
START position
4. Continue holding down control knob. Re-
peat igniting operation until air is removed
5. Check for proper supply pressure
6. Refill supply tank
1. Press in control knob fully
2. After burner lights, keep control knob
pressed in 30 seconds
3. Fully open equipment shutoff valve
4. A) Contact local propane/LP gas com-
pany
B) Clean burner ports (see Cleaning and
Maintenance, page 8) or replace burner
assembly
5. Hand tighten until snug, then tighten
1/4 turn more
6. Replace thermocouple
7. Replace control valve
1. Check for proper gas supply pressure
2. Free burner orifice and manifold ports
of any burrs, lava rock particles, or other
blockage
3. Verify proper burner orifice sizing (see
specification chart, page 4)
Continued


