


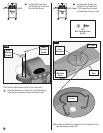


Special offers from our partners!

Find Replacement BBQ Parts for 20,308 Models. Repair your BBQ today.
26
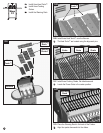
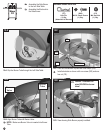
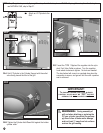
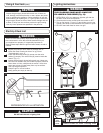
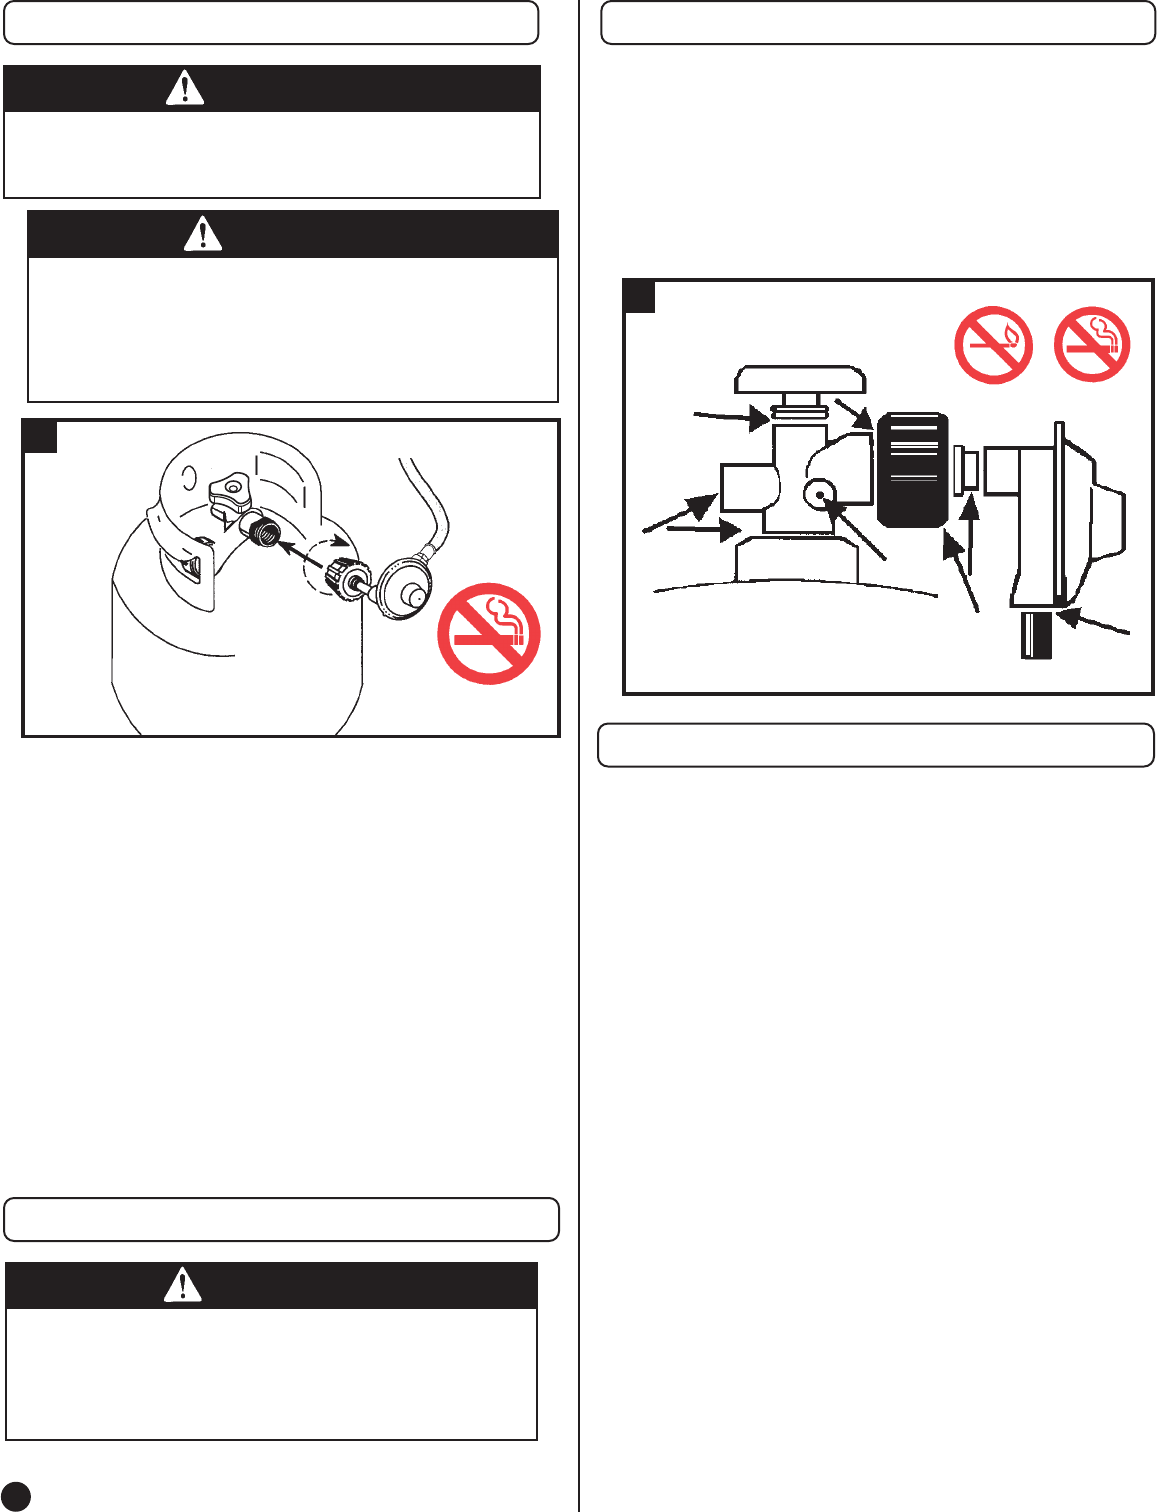
1. Check that the cylinder valve is closed by turning the cylinder
knob clockwise to a full stop.
2. Check that all the grill burner knobs are in the off position.
3. Remove the protective caps from the cylinder valve and cou-
pling nut. NOTE: The coupling nut connects to the large outside
threads on the valve outlet.
4. Hold the regulator in one hand and insert the nipple into the
valve outlet. Be sure the nipple is centered in the valve outlet.
Hand-tighten the coupling nut, taking care not to cross-thread
the connection (see Fig. 15).
5. Turn the coupling nut clockwise, tighten to a full stop.
If you cannot complete the final connection, disconnect the reg-
ulator and repeat steps 4 through 6. If you are still unable to
complete the connection, DO NOT use this valve and regulator!
6. Check that the hose has no kinks or sharp bends and clears
areas that will become hot during use. Never put strain on the
hose where it joins a fitting.
7. BEFORE lighting grill, check all connections for leaks using the
procedure as shown in Fig. 16 on pg. 26.
WARNING
This procedure MUST be performed OUTDOORS only! Be
sure L.P. cylinder valve is closed. Attach to Grill. Read and
follow directions on the cylinder and fuel hose safety tags.
CAUTION
In the connection process, the grill side of the connection will
seal on the back-check in the valve, resulting in a slight
resistance. The connection requires about one-half to three-
quarters additional turn to complete the connection. To dis-
connect, turn counterclockwise. Tighten by hand only. DO
NOT use tools.
DANGER
TO PREVENT FIRE OR EXPLOSION HAZARD:
• NO SMOKING. DO NOT use or permit sources of ignition
in the area while doing a leak test.
• Perform leak tests outdoors only.
• NEVER perform a leak test with fire or flame.
Connecting Type 1 L.P. Gas Cylinders
Leak Testing
15
Leak Testing
(cont.)
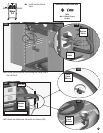
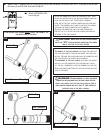
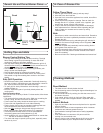
How to Check for Leaks
1. Make a soapy solution of equal parts mild liquid dishwashing
detergent and water.
2. Turn off all burner control knobs.
3. Turn on fuel supply. Turn cylinder valve knob counterclock-
wise (right to left) one rotation.
4. Apply soap solution to connections indicated with arrows in
Fig. 16. If bubbles appear at these areas, a leak is indicated.
• If you detect a leak:
1. Turn off the fuel supply. Push in and turn on control knobs
to release pressure in hose, then turn the control knobs back
to off.
2. Wash off soapy solutions with cold water and towel dry.
3. Stop a leak by tightening the loose joint, or by replacing the
faulty part with a replacement part recommended by Coleman.
DO NOT attempt to repair the cylinder valve if it should
become damaged; the cylinder MUST be replaced.
4. If you are unable to stop a leak, shut off the gas supply at the
cylinder valve. Remove the cylinder from the grill. Call a gas
appliance serviceman or L.P. gas dealer. DO NOT use grill
until the leak is corrected.
• When to test for leaks:
1. Perform a leak test each time the gas supply cylinder is
connected to the regulator. Leak test anytime a part of
the gas system is replaced.
2. Perform a leak test at least once each year whether the L.P.
gas supply cylinder has been disconnected or not.
3. Have a dealer check the cylinder for deterioration after 12
years, according to DOT regulations. Immediately replace
cylinder if any deterioration is found.
16
Fixing A Fuel Leak