


Special offers from our partners!

Find Replacement BBQ Parts for 20,308 Models. Repair your BBQ today.
B101586-4-0112Page 22
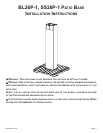
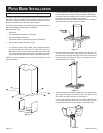
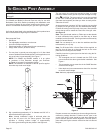
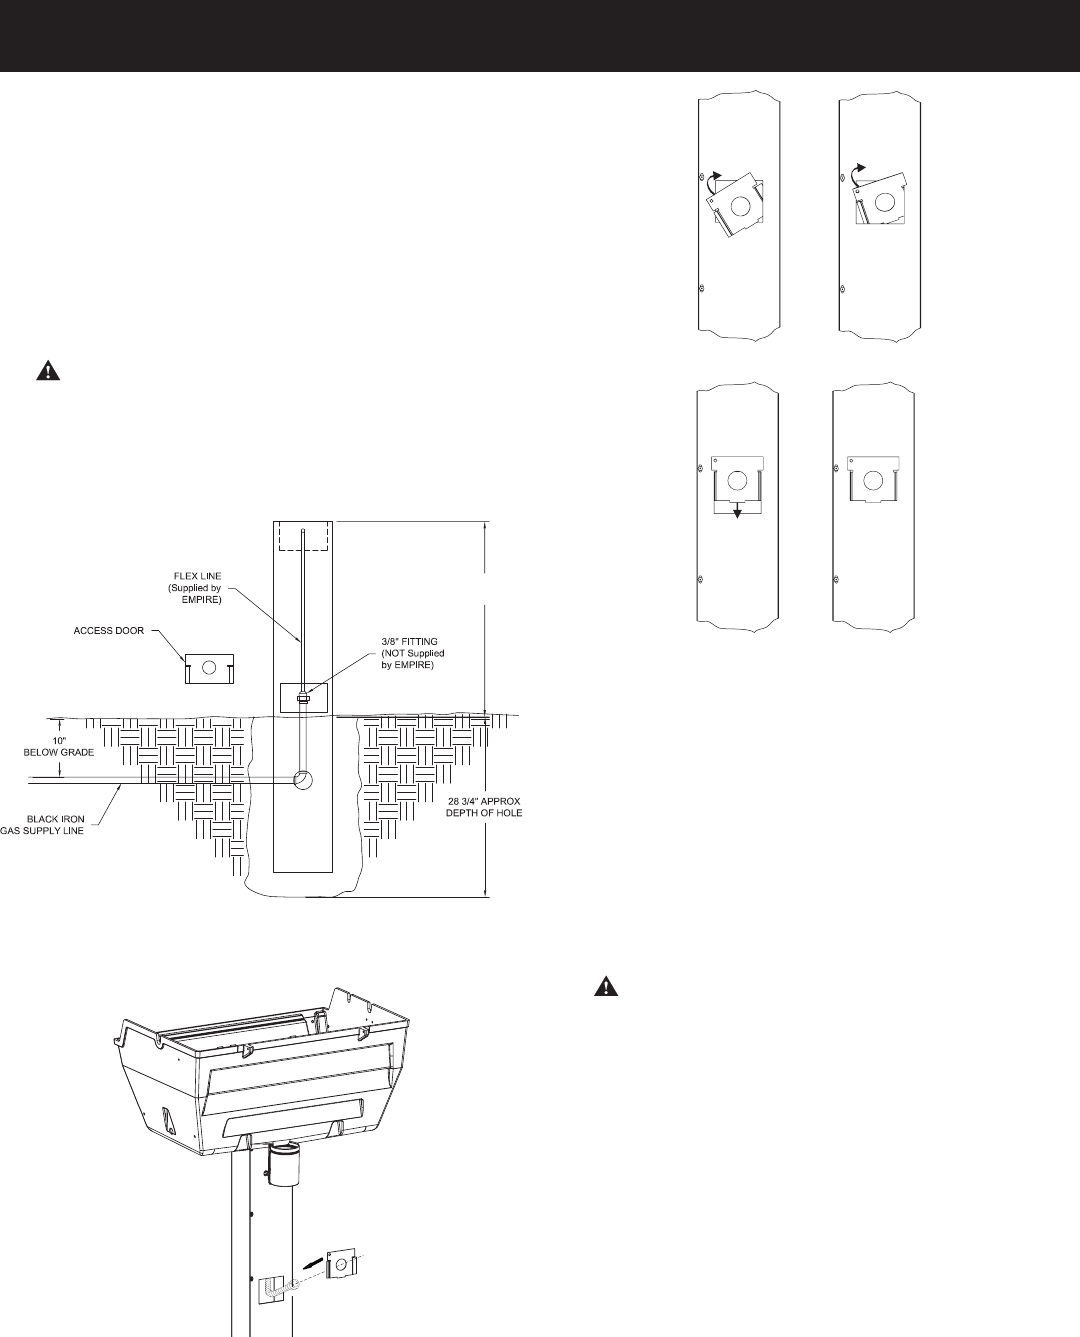
7. Arrange with your local gas company or licensed contractor to
have a gas supply line connected to the inlet of the stainless
steel ex tube assembly. The gas supply must have a shutoff
valve that is close to the post in case of emergency and must
be shutoff when the grill is not in use. See Figure 8.
The grill and its individual shutoff valves must be disconnected
from the gas supply piping system during any pressure testing
of that system at test pressures in excess of 1/2 PSIG. The
grill must be isolated from the gas supply piping system by
closing its individual manual shutoff valves during any pres-
sure testing of the gas supply piping system at test pressures
equal to or less than 1/2 PSIG.
WARNING: DO NOT SUPPLY LP GAS TO A GRILL DE-
SIGNED FOR NATURAL GAS OR NATURAL GAS TO A
GRILL DESIGNED FOR LP GAS.
Gas leak tests should be completed as directed in the grill
Owner’s Manual.
Completely ll remaining hole with soil.
24 3/4”
ABOVE GRADE
Figure 8
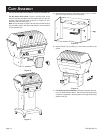
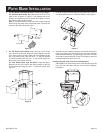
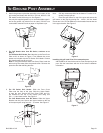
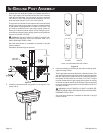
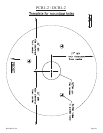
8. Install the post access door and grease cup as shown in Fig-
ures 9 and 10.
Figure 9
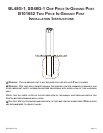
in-ground poSt ASSEmbly
STEP #1
STEP #2
STEP #3
STEP #4
NOTE: GAS LINE REMOVED FOR CLARITY
Figure 10
9. Continue assembly as directed by the Owner’s Manual pack-
aged with the grill head.
Test for gas leaks as directed by the grill’s Owners Manual. The
grill and its individual shutoff valves must be disconnected from
the gas supply piping system during any pressure testing of
that system at test pressures in excess of 1/2 PSIG. The grill
must be isolated from the gas supply piping system by closing
its individual manual shutoff valves during any pressure testing
of the gas supply piping system at test pressures equal to or
less than 1/2 PSIG.
WARNING: DO NOT SUPPLY LP GAS TO A GRILL DE-
SIGNED FOR NATURAL GAS OR NATURAL GAS TO A GRILL
DESIGNED FOR LP GAS.
Gas leak tests should be completed as directed in the grill
owner’s manual.