


Special offers from our partners!

Find Replacement BBQ Parts for 20,308 Models. Repair your BBQ today.

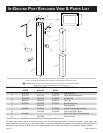
B101586-4-0112 Page 21
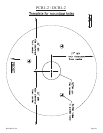
in-ground poSt ASSEmbly
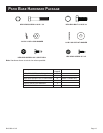
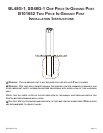
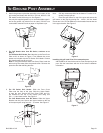
3. Attach the grease cup bracket assembly to the bottom of the
grill casting and fasten with #10-24 x 3/4” bolt, 9/32 ID x 5/8
OD washer, and #10-24 wing nut. See Figure 6.
Use only the supplied grease cup or noncombustible contain-
ers for the grease cup (aluminum or tin cans). DO NOT use
combustible containers such as paper or Styrofoam cups.
Figure 3
4. For Grill Heads other than R3 Series, continue on to
Step 5.
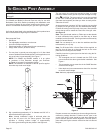
For R3 Series Grill Heads: Bend the tabs on the Post Cover
Plate to 90° as shown in Figure 4. Two different size cover
plates are included with the R3 Series Grill Heads. Choose
the plate that will best t your post.
Note: If using the stainless steel Post Cover Plate, bend the
tabs so they face away from the protective lm. Remove the
protective lm after bending the tabs.
COVER PLATE
PROTECTIVE
FILM SIDE
Figure 4
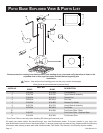
5. For R3 Series Grill Heads: Slide the Post Cover
Plate onto the front of the post. Slide the Upper Brack-
et onto the post. Secure the Post Cover Plate and Up-
per Bracket to the top of the square post using four
#10 – ½ Hex Head screws. See Figure 5.
For Grill Heads other than R3 Series: Slide the Upper
Bracket into the post. Secure the Upper bracket to the top
of the square post using four #10 – ½ screws. See Figure 5.
Figure 5
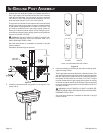
Note: Grill top comes assembled to the bottom. For ease of as-
sembly, remove grill top.
6. Place the grill bottom on top of the post and secure the
grill bottom to the post by placing four 1/4-20 x 3/4 Hex Head
screws and 1/4 x 5/8 Flat Washers in the threaded inserts that are
in the upper bracket. See Figure 6.
Figure 6
Installing old grill head P3 or P4 to new patio post.
A B101668 kit will need to be used to cover the opening in the
post. See the instructions with the kit for further installation
information.
Figure 7