


Special offers from our partners!

Find Replacement BBQ Parts for 20,308 Models. Repair your BBQ today.
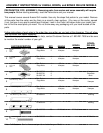
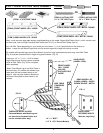
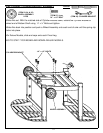
STEP 1- WHEEL LEG/ SIDE TABLE ASSEMBLY
TOOLS:
•Note: There are three side table designs used depending on the model: Square SideTables (Item 1) which can be used
on either side, Left and Right Teardrop Side Tables (Item 2 & 3), or Deluxe Side Tables (Item 4).
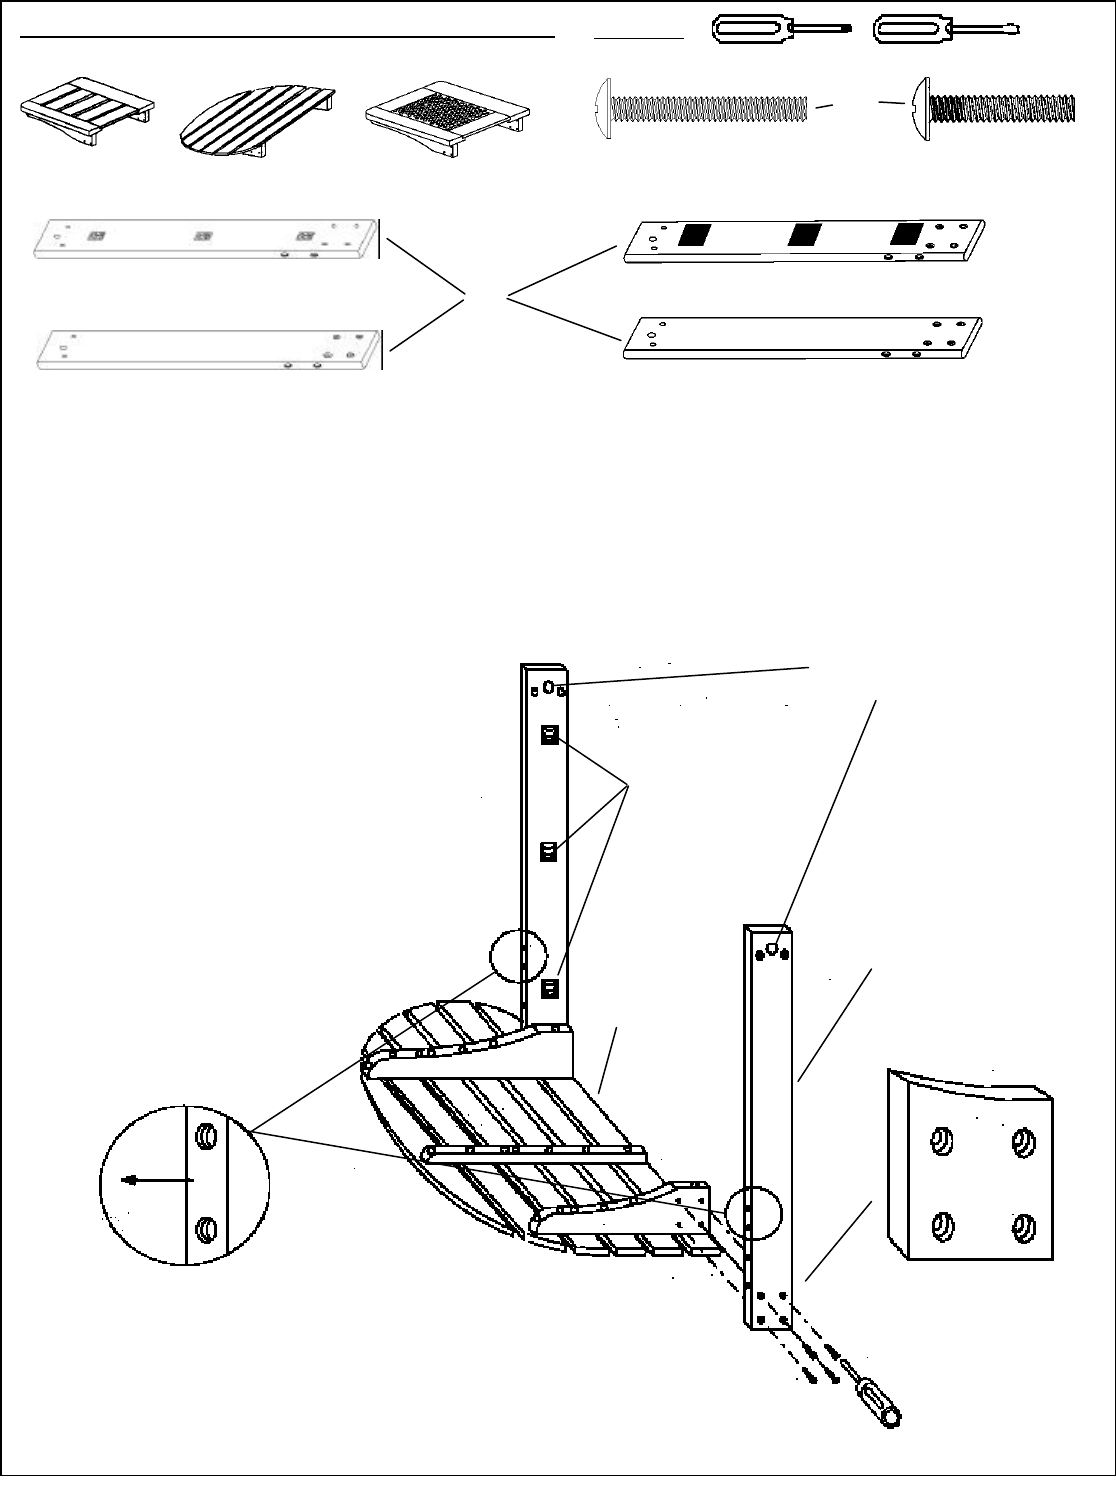
•Lay Left Side Table (depending on your model you have either 1, 2, or 4) upside down on flat surface as
shown. Locate the two Wheel Legs which are the shorter legs with a large axle hole at one end.
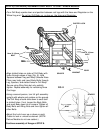
•On models with wooden legs, place Rear Wheel Leg so four large recessed holes face away from Side Table
(Fig. A) and two threaded holes in edge of leg point outward. (Fig. B)
• Insert four 1/4” x 1” (1/4” x 1 3/8” for Metal
legs) Bolts through the leg into the threaded
holes of Side Table. (Fig. A) Do not tighten
bolts completely.
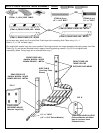
• Attach Front Wheel Leg to Left Side Table in
the same way. On models with wooden legs
make sure the two threaded holes on the
edge of each leg face outward. Make sure
the three velcro patches face inside on all
models.
FIG. B
THREADED HOLES IN LEGS
(Deluxed Models with Metal legs do
not have these threaded holes and
can be oriented either way.)
AXLE HOLES
(WHEEL LEGS)
FRONT WHEEL
LEG - THREE
VELCRO
PATCHES FACE
INSIDE
SIDE TABLE
(TEARDROP
TABLE
SHOWN)
REAR WHEEL LEG
KANGA, BONZA - WOOD
BONZA DELUXE - METAL
FIG. A
FOUR LARGE
RECESSED HOLES
(Wooden Legs Only)
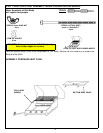
1/4” x 1” BOLT
9
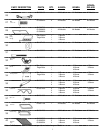
(ITEM 9) ACTUAL SIZE
1/4” x 1” BOLT 8 pcs
(1/4” X 1 3/8” Deluxe Models)
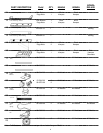
(ITEM 1, 2, or 4) SIDE TABLE
(ITEM 6) FRONT WHEEL LEG - WOOD
(ITEM 5) REAR WHEEL LEG - WOOD
OR
(ITEM 8) FRONT WHEEL LEG - METAL TUBING
(ITEM7) REAR WHEEL LEG - METAL TUBING
(ITEM 10) ACTUAL SIZE
1/4” X 1 3/8” BOLT 8pcs
OR