


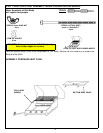
Special offers from our partners!

Find Replacement BBQ Parts for 20,308 Models. Repair your BBQ today.
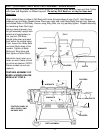
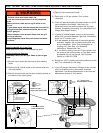
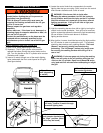
STEP 15-LEAK TESTING (TO BE PERFORMED IN A WELL-VENTILATED AREA.)
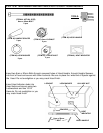
Supplies Needed for a Leak Test
Clean paint brush, water, and dishwashing liquid
How to perform a leak test
WARNING! Never use an open flame to test for gas
leaks.
1) Mix one cup of water with one cup of dish washing
liquid.
2) Confirm that all control knobs on the control panel are
in the off position.
3) Remove control knobs and the three retaining screws at
the bottom of the control panel.
4) Remove front control panel cover.
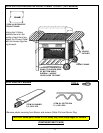
5) Open valve on LP gas cylinder (Turn counter-
clockwise).
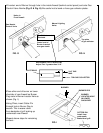
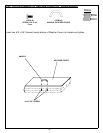
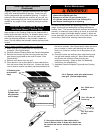
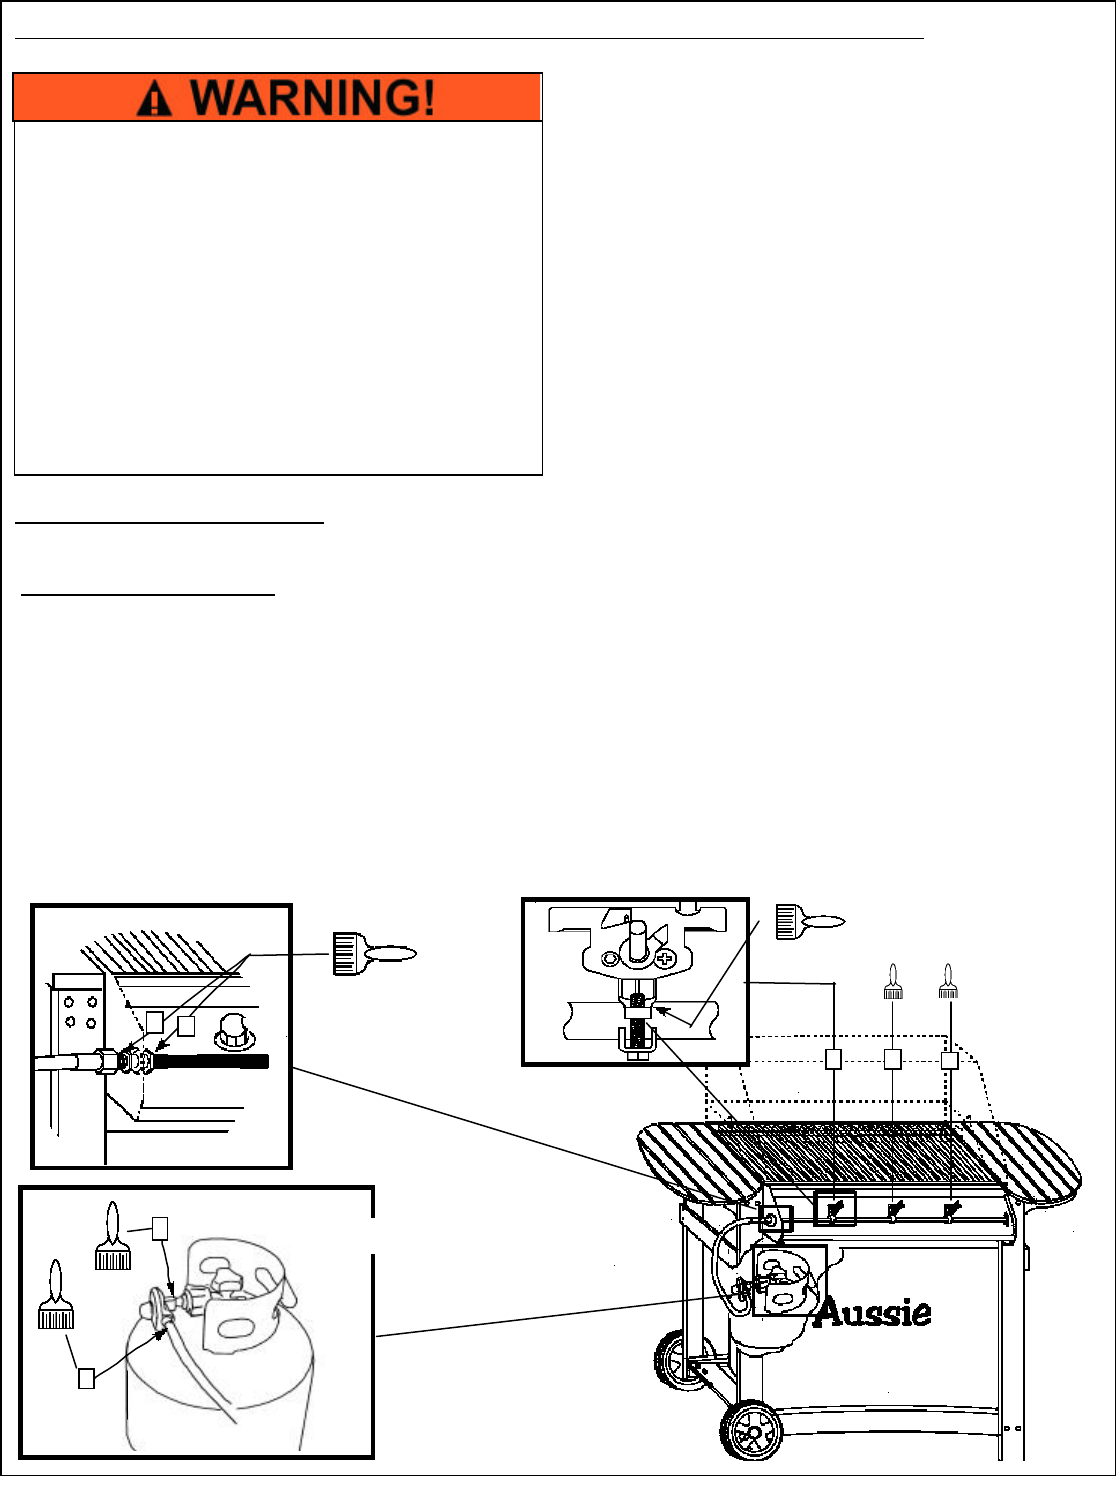
6) Check for leaks by brushing the soap solution on all LP
gas connections and fittings. Make sure you
generously brush the seven locations with the soap
solution, completely surrounding the connections and
fittings (See diagram below.)
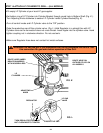
7) If “growing” bubbles appear on any of the connection
points, then you have detected a gas leak. Immediately
close the LP cylinder valve.
A) If leak appears at either end of hose and regulator
assembly, retighten the connection at the leak, but
do not overtighten. (Note: Only hand tighten at
coupling nut) (See Step 10 of Assembly
Instructions) Repeat Leak Test.
B) If the leak is coming from the LP gas cylinder, from
the valves at the control knobs, or if the leak cannot
be stopped, do not use the grill. Call Customer
Service at 1-800-251-7558.
8) Always turn off LP cylinder valve after performing a leak
test. (Turn clockwise to a full stop.)
9) If your LP gas grill has been in storage or has not been
used for a period of time, the burners should be
maintained. See Burner Maintenance in the Care and
Maintenance section of this manual.
· Perform a leak test before each use.
· Leak test must be performed in a well ventilated
area.
· Never perform a leak test on a grill while in use
or hot.
· If you detect a gas leak that cannot be corrected by
using the leak test procedures below, do not use
the LP gas grill.
· Never smoke or have an open flame near the grill
during a leak test.
· Insure Regulator Hose does not contact hot metal
surfaces.
24
3
4
3-THREADED FITTING
4-HOSE CONNECTION
2
1
1-MANIFOLD TUBE
2-REGULATOR HOSE FITTING
5, 6, 7 -GASKET SEAL
AROUND MANIFOLD TUBE
5
6
7