


Special offers from our partners!

Find Replacement BBQ Parts for 20,308 Models. Repair your BBQ today.
Buy Weber Grill Parts. It couldn't be easier. Find your Weber parts here.
18
WWW.WEBER.COM
®
AnnnNNUAL MAINTENANCE
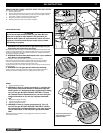
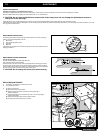
Inspection and cleaning of the Spider/Insect screens
To inspect the Spider/Insect screens, remove the control panel. If there is dust or dirt on the screens, remove the burners for cleaning the screens.
Brush the Spider/Insect screens lightly with a soft bristle brush (i.e. an old toothbrush).
ƽ CAUTION: Do not clean the Spider/Insect screens with hard or sharp tools. Do not dislodge the Spider/Insect screens or
enlarge the screen openings.
Lightly tap the burner to get debris and dirt out of the burner tube. Once the Spider/Insect screens and burners are clean replace the burners.
If the Spider/Insect screen becomes damaged or cannot be cleaned, please contact the Customer Service Representative in your area using the contact information on our web
site. Log onto www.weber.com
®
.
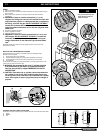
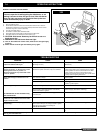
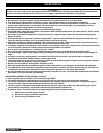
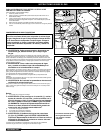
MAIN BURNER FLAME PATTERN
The Weber
®
gas barbecue burners have been factory set for the correct air and gas
mixture. The correct fl ame pattern is shown.
1) Burner tube
2) Tips occasionally fl icker yellow
3) Light blue
4) Dark blue
If the fl ames do not appear to be uniform throughout the burner tube, follow the burner
cleaning procedures.
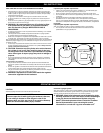
MAIN BURNER CLEANING PROCEDURE
Turn off the gas supply.
Remove the manifold (See “Replace Main Burners”).
Look inside each burner with a fl ashlight.
Clean the inside of the burners with a wire (a straightened-out coat hanger will work).
Check and clean the air shutter opening at the ends of the burners. Check and clean
the valve orifi ces at the base of the valves. Use a Steel bristle brush to clean outside of
burners. This is to make sure all the burner ports are fully open.
ƽ CAUTION: Do not enlarge the burner ports when cleaning.
1
2
3
4
a
b
c
d
e
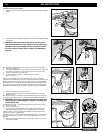
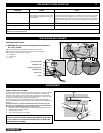
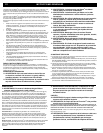
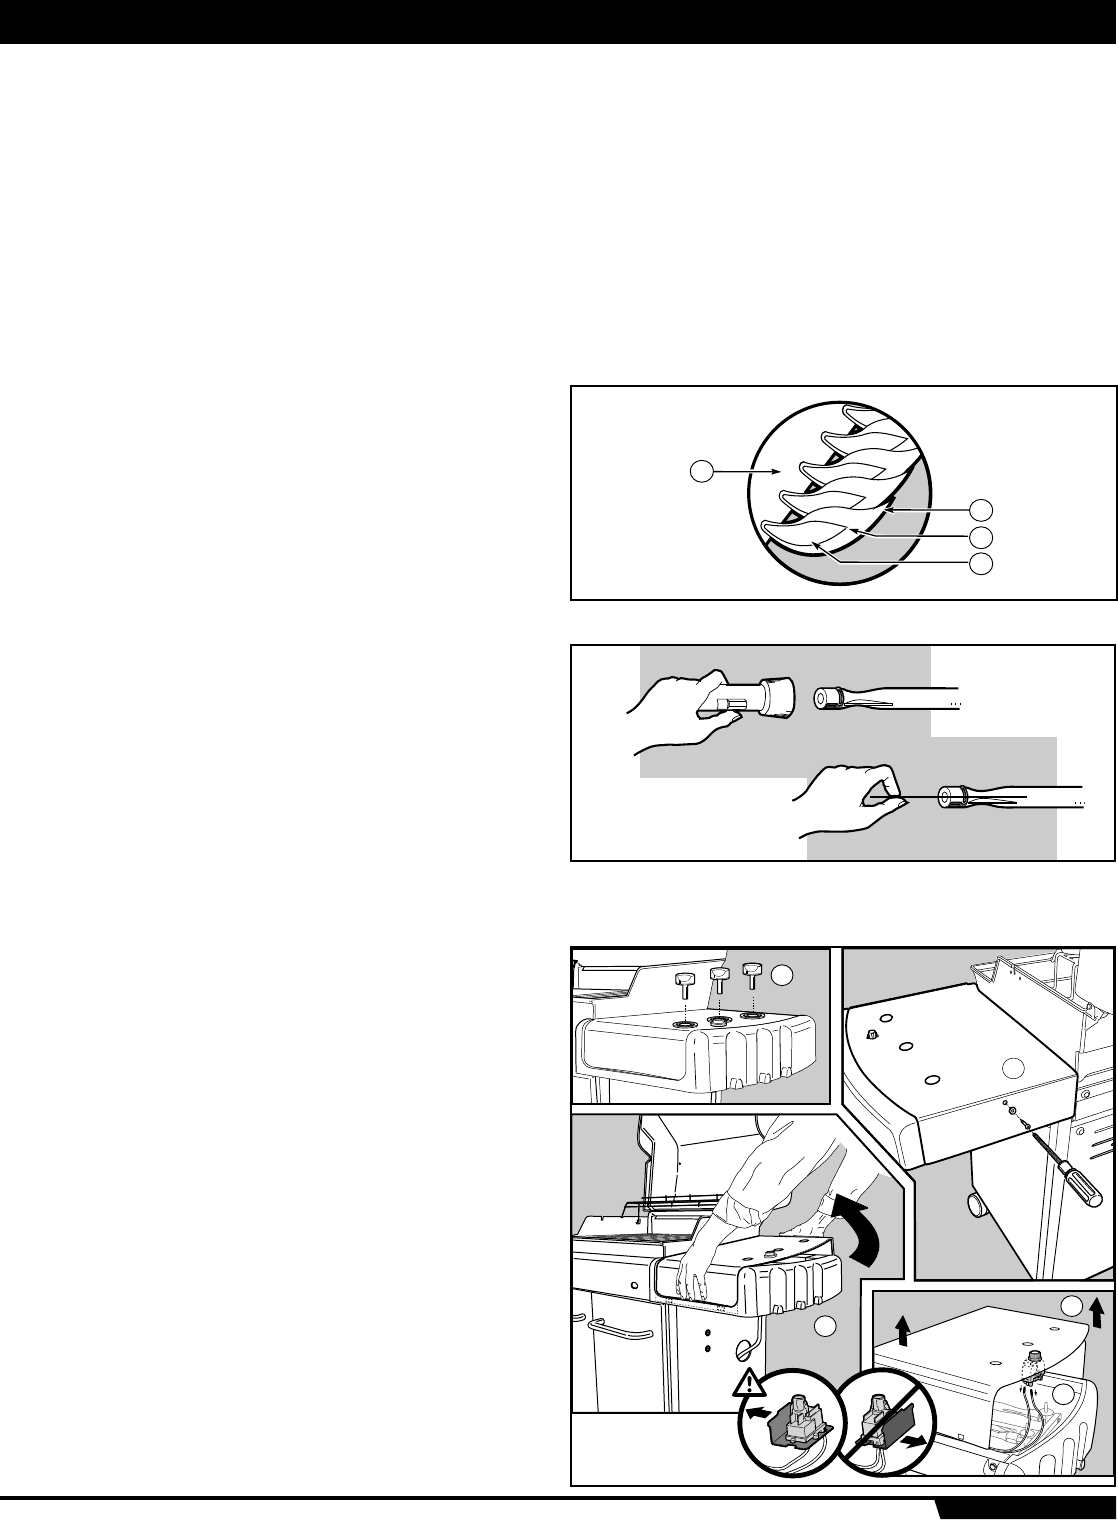
REPLACING MAIN BURNERS
1) Your Weber
®
gas barbecue must be OFF and cool.
2) Turn gas OFF at source.
3) To remove control panel:
(a) Take off the burner control knobs.
(b) Remove screw and washer from back of control panel with a
Phillips screwdriver.
(c) Tilt the back edge of the control panel up. Push in on the front edge to
release locking tabs.
(d) Disconnect the igniter wires from the ignition module.
(e) Carefully pull control panel away from frame.
MAINTENANCE