


Special offers from our partners!

Find Replacement BBQ Parts for 20,308 Models. Repair your BBQ today.
Buy Weber Grill Parts. It couldn't be easier. Find your Weber parts here.
C-6
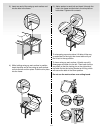
Fill liquid propane cylinder
Note - The liquid propane cylinder manufacturer is
responsible for the materials, workmanship and
performance of the cylinder. If the cylinder has a
defect, malfunctions, or you have a question regarding
the cylinder, call the cylinder manufacturer’s customer
service center. The phone number is on the warning
decal, which is permanently attached to the cylinder. If
the cylinder manufacturer has not resolved the issue to
your satisfaction, then contact the Customer Service
Representative in your region using the contact
information sheet provided with your manual.
To fill, take the liquid propane cylinder and filler
adapter to an RV center or look up gas-propane in the
phone book for other sources of liquid propane gas.
ƽ WARNING: We recommend that your liquid
propane cylinder be filled at an authorized liquid
propane gas dealer by a qualified attendant, who
fills the tank by weight.
IMPROPER FILLING IS DANGEROUS.
Tell your liquid propane dealer that this is a new liquid
propane cylinder. The air must be removed from a new
liquid propane cylinder before the initial filling. Your
liquid propane cylinder dealer is equipped to do this.
The liquid propane cylinder must be installed,
transported and stored in an upright position, and
should not be dropped or handled roughly.
Never store or transport the liquid propane cylinder
where temperatures can reach 125° Fahrenheit (too
hot to hold by hand – for example: do not leave the
liquid propane cylinder in a car on a hot day).
For full instructions on safe handling of liquid propane
cylinders, see Section “Operating”.
Connecting the Liquid Propane Cylinder
ƽ WARNING: Make sure that the LP cylinder valve
is closed. Close by turning valve clockwise.
ƽ DANGER
Do not use an open flame to check for gas
leaks. Be sure there are no sparks or open
flames in the area while you check for
leaks. Sparks or flames will result in a fire
or explosion which can cause serious
bodily injury or death, and damage to
property.
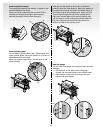
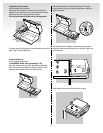
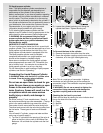
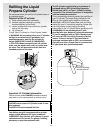
We utilize various LP tank manufacturers. Some of
the tanks have differing top collar assembles. (The top
collar is the metal protective ring around the valve.)
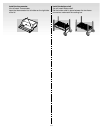
One series of tanks mount with the valve facing front.
The other tanks mount with the valve facing away from
the fuel scale. These types of tanks are illustrated
below.
You will need: LP cylinder, a soap and water solution
and a rag or brush to apply it.
1) Turn the LP cylinder so the opening of the valve is
either to the front, side or rear of the Weber Gas
Barbecue. Lift and hook the cylinder onto the fuel
gauge.
2) Loosen the cylinder lock wing nut. Swing the
cylinder lock down. Tighten the wing nut.
(1)
(2)
(3)
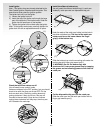
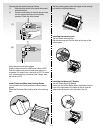
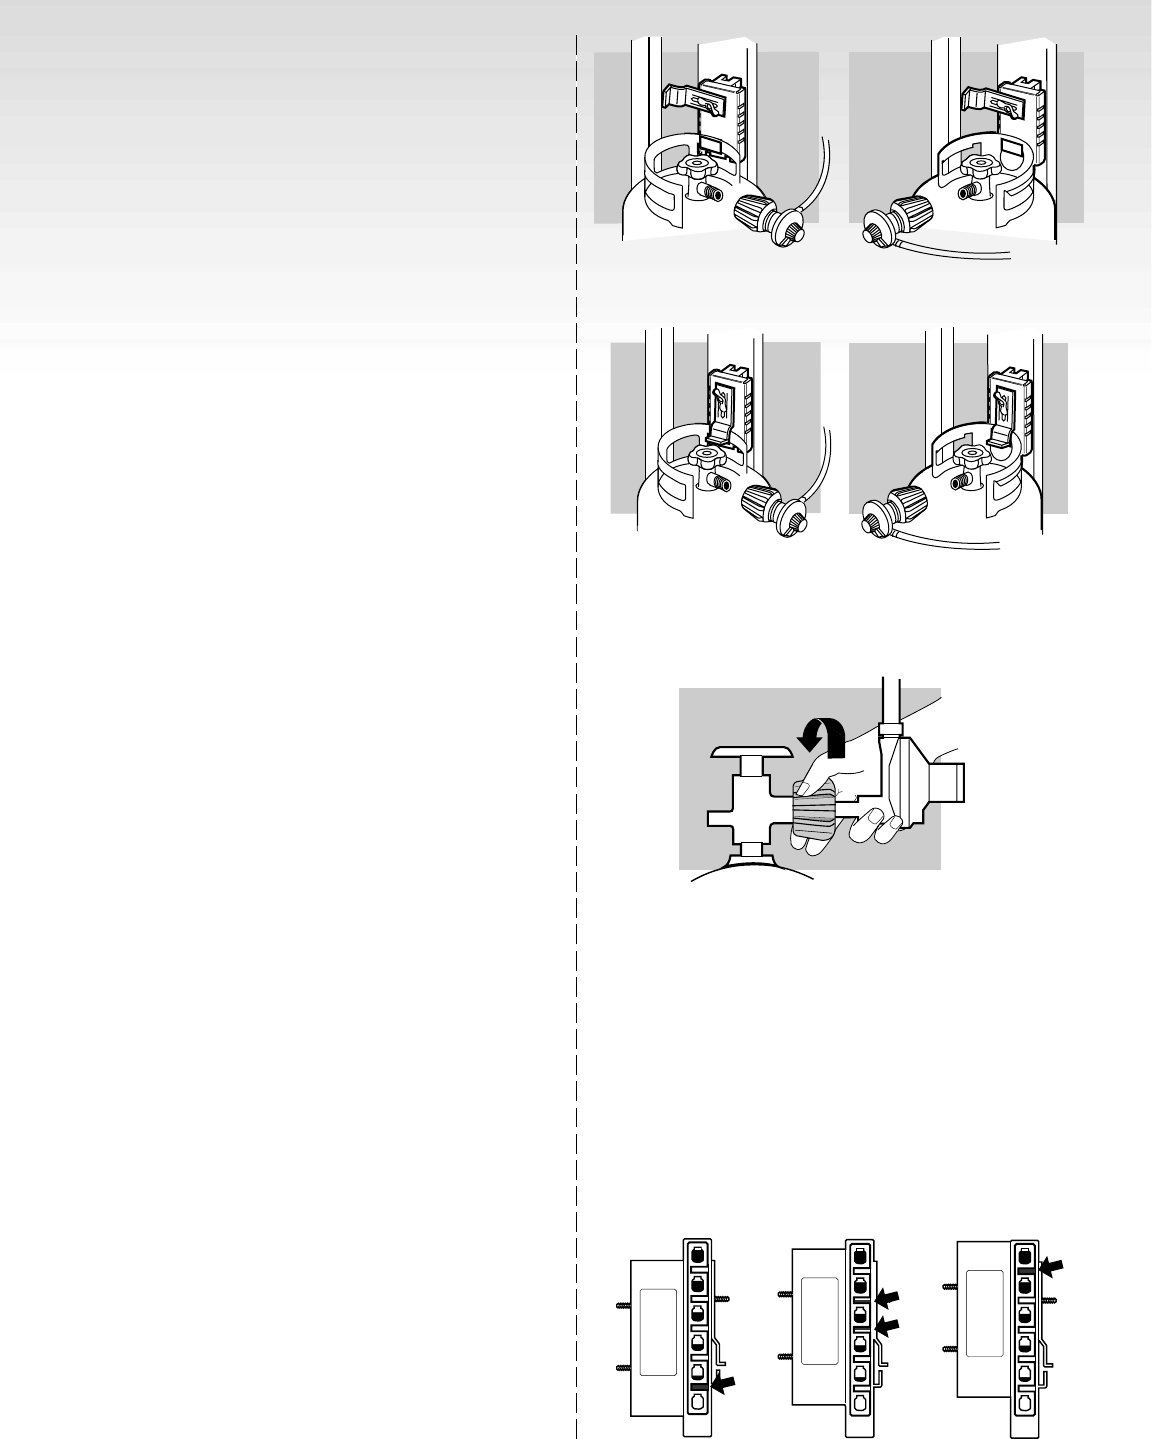
Checking the fuel level in your tank
Check the fuel level by viewing the color indicator level
line on the side of the tank scale.
1) Empty
2) Medium
3) Full
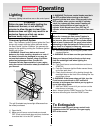
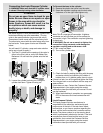
To Connect the hose to the cylinder:
3) Remove the plastic dust cover from the valve.
4) Screw the regulator coupling onto the tank valve,
clockwise, or to the right. Hand-tighten only.
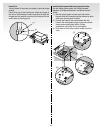
Note: This is a new type of connection. It tightens
clockwise and will not allow gas to flow unless the
connection is tight. The connection requires tightening
by hand only.
ƽ WARNING: Do not use a wrench to tighten the
connection. Using a wrench could damage the
regulator coupling and could cause a leak.