


Special offers from our partners!

Find Replacement BBQ Parts for 20,308 Models. Repair your BBQ today.
Buy Weber Grill Parts. It couldn't be easier. Find your Weber parts here.
5
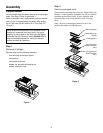
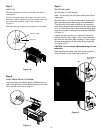
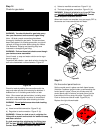
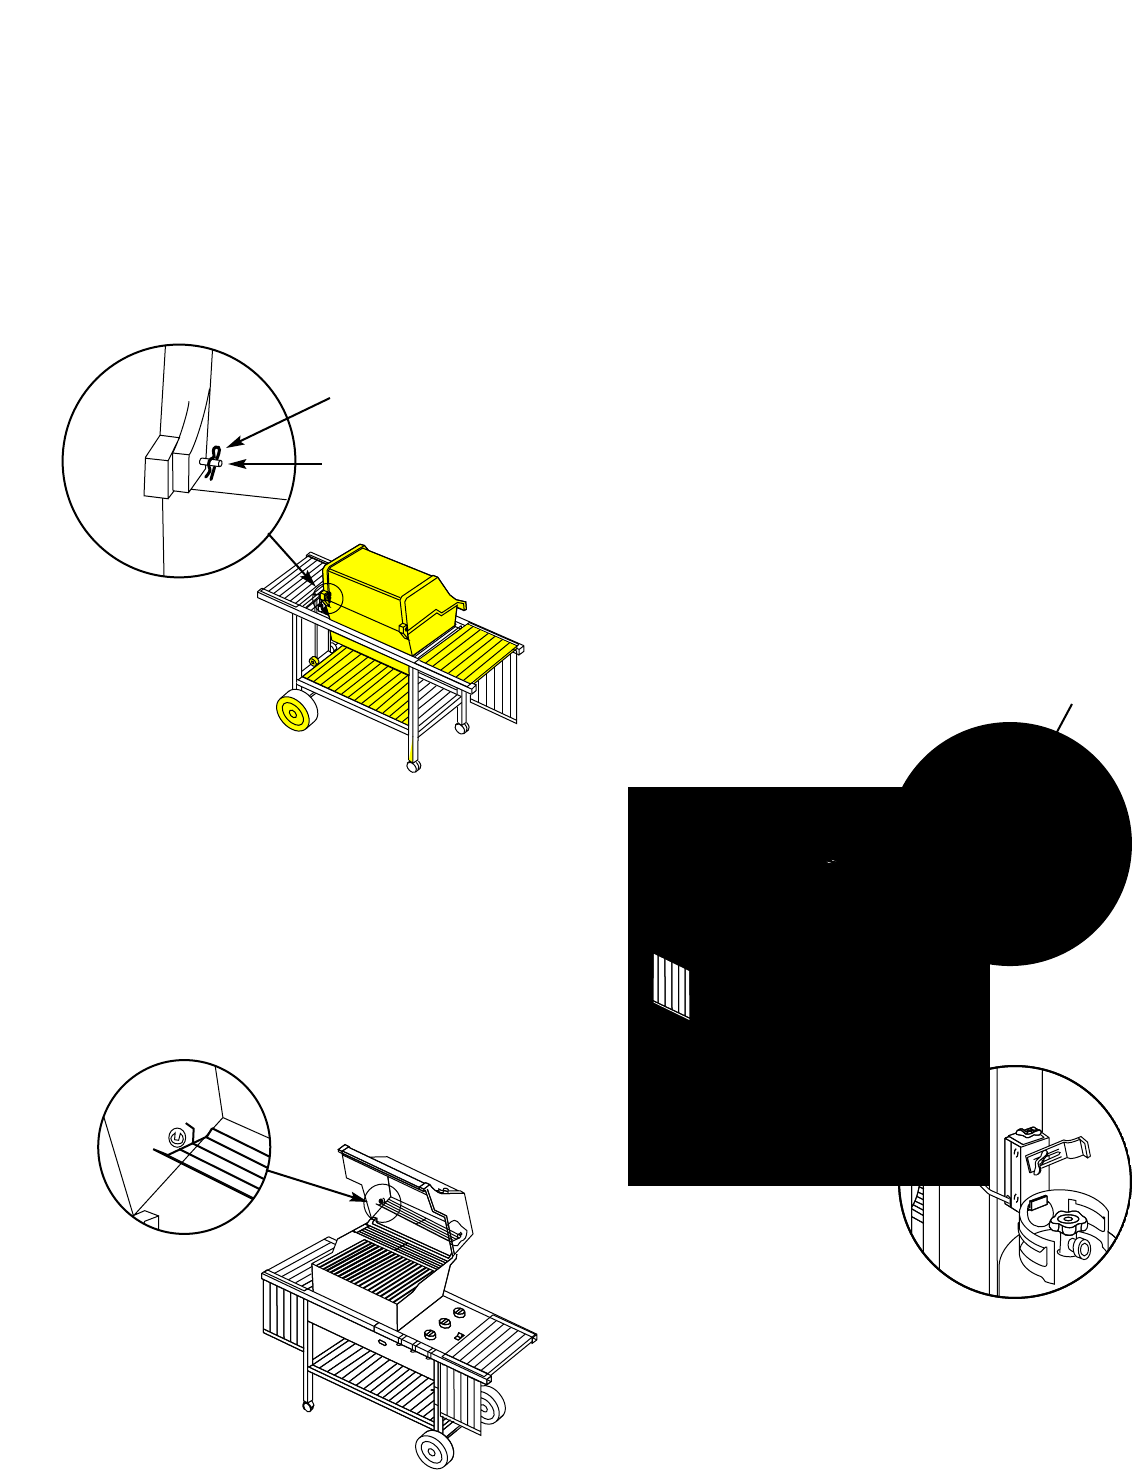
Step 7
Install Lid
Remove hinge pins and hair pin cotters from back of
cooking box.
Set the lid in place. Align the hinges at the rear of the
barbecue. Insert hinge pins from the outside. Insert hair
pin cotters into the small holes in the hinge pins.
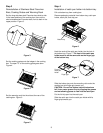
Figure 10.
Remove tape securing the thermometer into its holder.
Hair pin cotter
Hinge pin
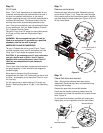
Step 8
Install Weber Warm-Up Basket
Insert one end of the Weber Warm-Up Basket into the
hole in the right end of the lid and the other end into the
slot in the left end of the lid. Figure 11.
Figure 10
Figure 11
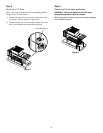
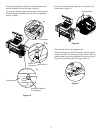
Step 9
Set LP fuel scale
You will need: LP tank (empty).
Note - For accuracy, the fuel scale must be set with an
empty tank.
We utilize various LP tank manufacturers. Some of the
tanks we receive have differing top collar assemblies.
(The top collar is the metal protective ring around the
valve.) One series of tanks mounts with the valve facing
front. The other tanks mount with the valve facing away
from the fuel scale. These types of tanks are illustrated
in Figure 12.
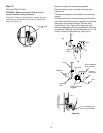
Loosen the tank lock wing nut. Tighten so the lock is
held up out of the way. Figure 12 (a). Lift and hook the
tank onto the fuel scale. With an empty LP tank, adjust
the fuel scale setting to E with scale setting (top) wing
nut. Figure 12 (b).
CAUTION: Do not remove adjustment wing nut from
tank scale.
After adjusting tank scale, push tank down a couple of
times to check that the tank scale is set on “E”.
F
E
F
E
(a)
Scale setting
wing nut
Figure 12
F
E
(b)