


Special offers from our partners!

Find Replacement BBQ Parts for 20,308 Models. Repair your BBQ today.
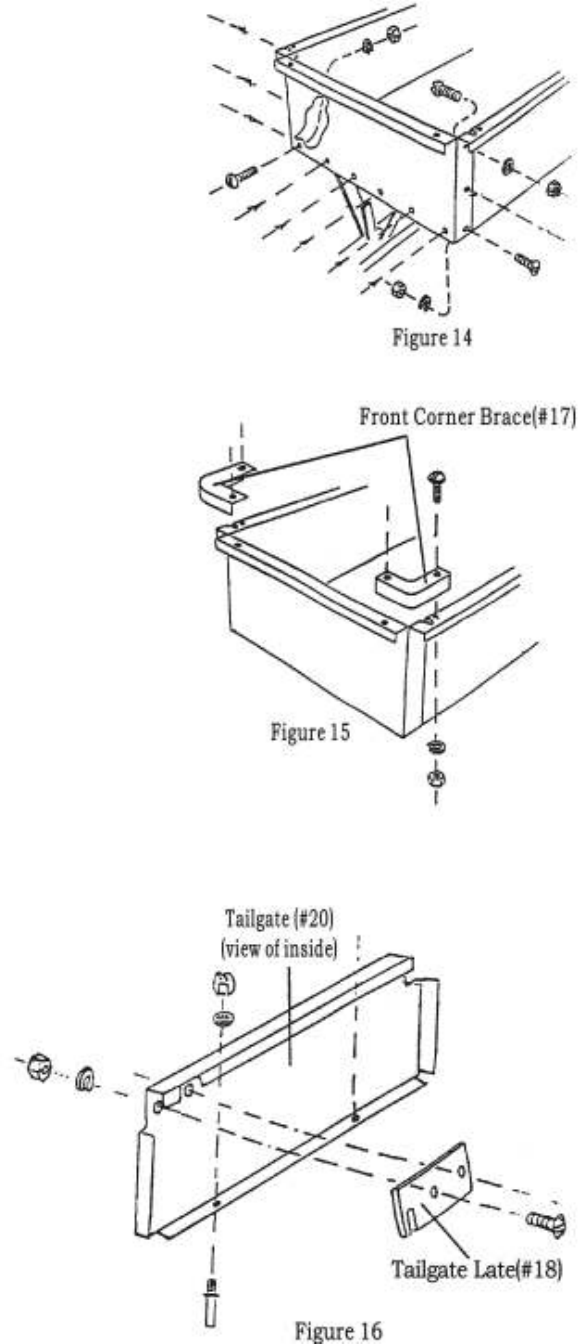
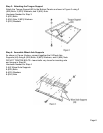
Final Step: Attaching Tail Gate with Latches
First attach the two Tailgate Latches(#18) to the inside of the
Tailgate(#20) using 2 (#21) Bolts, 2 (#23) Washers, and 2
(#24) Nuts for each Tailgate Latch(#18). Next, insert the
Tailgate Pins(#19) into the holes on the bottom part of the
Tailgate. See Figure 16 for Tailgate Pin locations. Secure
Tailgate Pin(#19) by adding a (#32) Washer and a (#31) Nut to
the Pin threads.
Next, put Tailgate in place on the Trailer Cart. Position
Tailgate so the two Tailgate pins line up with the two holes on
the Rear Cross Brace(#12). The Tailgate latches can be
dropped over the open slots on the Side Panels that lock the
Tailgate into place. Assembly is complete.
Before using the cart,
check that all hardware connections are tight.
Hardware Needed for Step 16:
1 (#20) Tailgate
2 (#18) Tailgate Latches
2 (#19) Tailgate Pins
2 (#32) Washers
2 (#31) Nuts
4 (#21) Bolts
4 (#23) Washers
4 (#24) Nuts Page 10
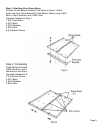
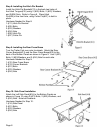
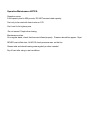
Step 14: Attach Front Panel
Attach the Front Panel(#16) to the Front Cross Brace(#2) and
to the two Side Panels(#14) using 12 (#21) Bolts, 12 (#23)
Washers, and 12 (#24) Nuts. See Figure 14 for bolt locations.
Hardware Needed for Step 14:
1 (#16) Front Panel
12 (#21) Bolts
12 (#23) Washers
12 (#24) Nuts
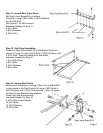
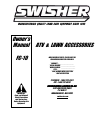
Step 15: Install Front Corner Braces
Install the Front Corner Braces(#17) to the corners of the Front
Panel(#16) and the Side Panels(#14) using 2 (#21) Bolts, 2
(#23) Washers, and 2 (#24) Nuts for each Front Corner Brace.
See Figure 15.
Hardware Needed for Step 15:
2 (#17) Front Corner Braces
4 (#21) Bolts
4 (#23) Washers
4 (#24) Nuts