


Special offers from our partners!

Find Replacement BBQ Parts for 20,308 Models. Repair your BBQ today.
8
NOTE: DIAGRAMS & ILLUSTRATIONS ARE NOT TO SCALE.
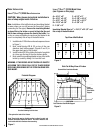
Chimney requirements
The Legacy™/eLite™ c/e260 inserts are approved for use in
masonry fireplaces built to UBC Chapter 37 or equivalent
with a minimum 30” opening at the front of the fireplace.
Do not remove brick or mortar from masonry fireplace to
accommodate insert. Do not remove brick or mortar from
masonry fireplace to accommodate insert. Approved with or
without positive flue connection. Approved with minimum
6” (152mm) diameter stainless steel listed reline system.
Ask your dealer for recommended chimney size. Country
Collection inserts are tested to UL 1482 / ULC S628-93 and
listed by OMNI-Test Laboratories, Inc.; Beaverton, OR.
Remove and clean behind unit frequently, as creosote build
up may occur rapidly.
installation ProCeDures - masonry Chimney
NOTE: Although not required, a full-length stainless steel liner is
recommended for optimum safety and performance. See your
Lennox Hearth Products dealer for details.
NOTE: When installing your stove with a positive flue connection,
be sure to leave the insulation off the surround panels (flanges) and
leave a 1/4” (6mm) airspace insulation off the surround panels
and the facing of your fireplace.
1. READ ENTIRE INSTALLATION INSTRUCTIONS.
2. Check all REQUIRED CLEARANCES as specified in the previous
section (page 7) of this installation instruction booklet.
3. Wear gloves during installation in case of sharp edges on the
stove and it’s parts
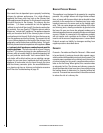
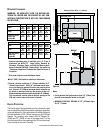
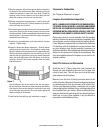
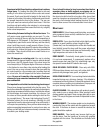
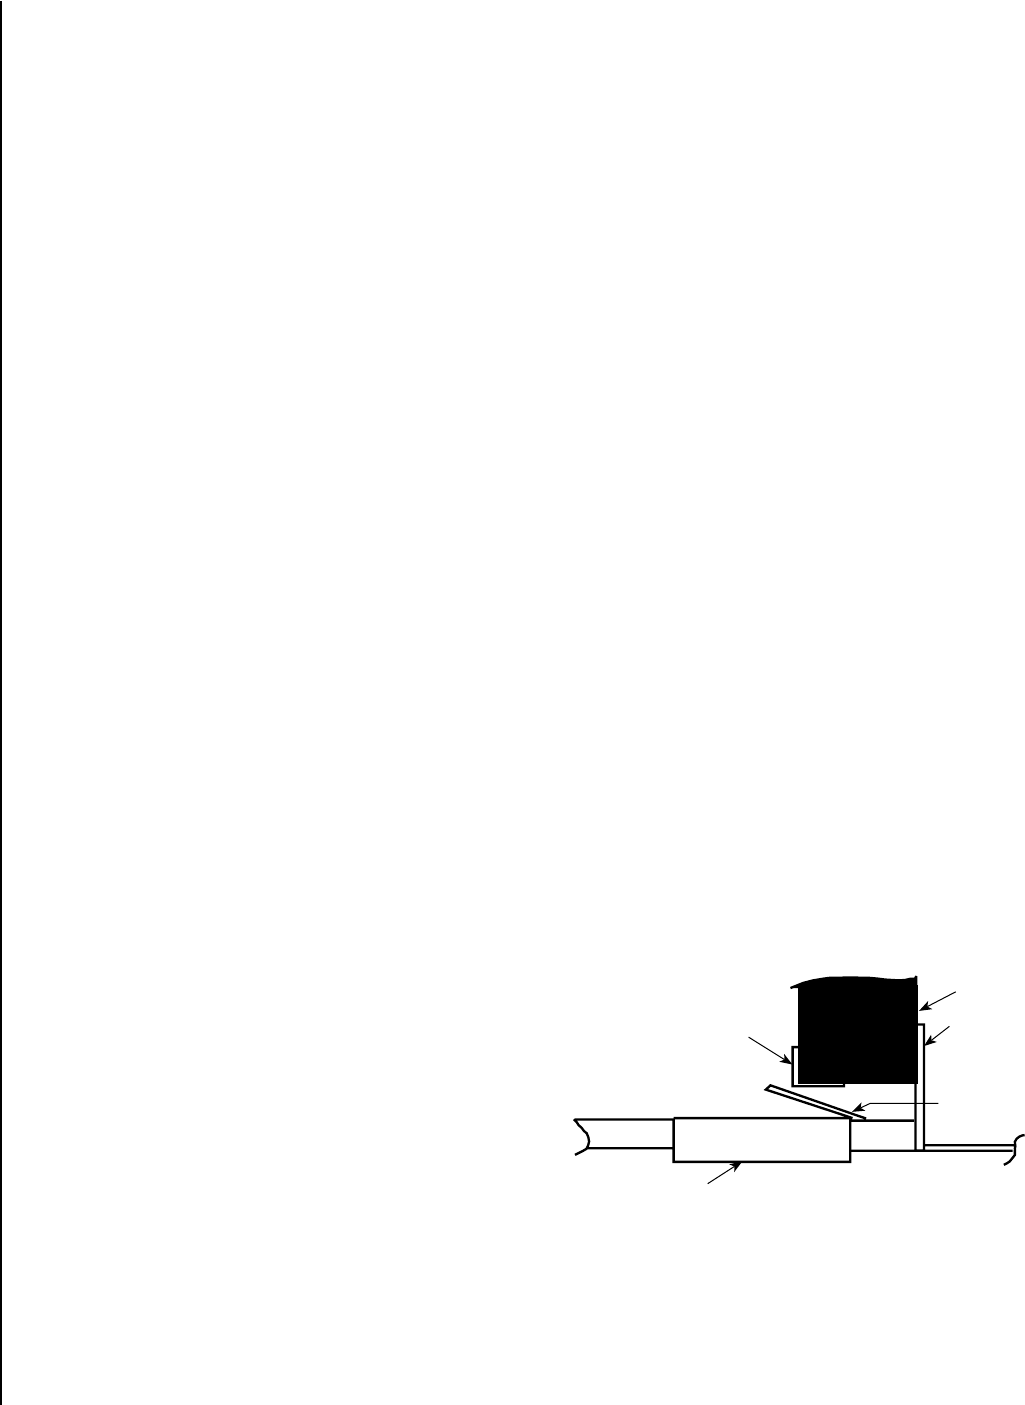
4. Determine the depth of the fireplace lintel. The lintel is the
masonry area over the fireplace opening, and is supported by
a noncombustible plate, usually of steel. The depth may vary
from a single brick width (4”/102mm) to that of several brick.
If any portion of the flue collar opening on top of the insert (as
shown in the diagram below) will project under the lintel area,
a deflector plate must be mechanically attached to the fireplace
insert to divert heat and gases away from the lintel. Consult your
dealer for the correct attachment piece. Compare lintel depth
to the distance from the flue collar opening to the fireplace to
determine if this caution pertains to your installation. If there
is sufficient clearance, a flue offset may also be used. Consult
your dealer.
5. Open or remove the existing fireplace damper. Make sure the
damper cannot fall closed.
6. Install the two 1/2” x 3” (13mm x 76mm) leveling bolts -heads
up- a few turns in the leveling nuts on each side of the outer
chamber of the insert at the lower rear corners.
7. Position the insert in the center of the fireplace opening and
push it back until the surround brackets are approximately 2”
(51mm) away from the fireplace front.
8. Install the side surround panels and push the insert up snug
against the fireplace face. Then with the location selected re-
move the surround panels and level the stove with the leveling
bolts using a 3/4” (19mm) socket, extensions (to reach the bolt
head), and a ratchet.
9. Glue the insulation around the outer edge of both the top and
side surround panels.
10. Install the surround panels loosely, align and tighten. Check
for a tight fit against the fireplace.
11. Locate the draft rod extension (5/16” [8mm] round by
11-3/4” [299mm] long), and a coupling nut (5/16”/8mm x
7/8”/22mm).
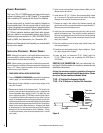
POSITIVE FLUE CONNECTION: See your authorized Len-
nox Hearth Products dealer for necessary accessories and
installation instructions.
Positive flue connectors required for installation in Canada are
available from your Lennox Hearth Products dealer. Please
use one of the part numbers indicated below.
71162 - 8" Positive Flue Connector Ring Kit
71163 - 8" to 6" Reducer w/ Positive Flue Connector
Lintel
Flue Outlet
Not to Scale
Brick Face
Insert Surround
Smoke
Deflector
Mechanically
Attached to
Insert
Figure 6