


Special offers from our partners!

Find Replacement BBQ Parts for 20,308 Models. Repair your BBQ today.
9
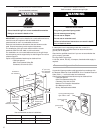
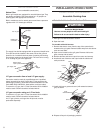
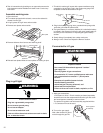
For all portable outdoor grills:
1. Lift off grill grates and set aside.
2. Remove sear plates and set aside.
3. Remove tiedowns from burners and warming shelf.
sear plate
warming shelf
remove
tiedowns
remove
tiedowns
burner
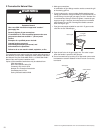
4. Reinstall sear plates. Make sure sear plates are resting on pins.
pins
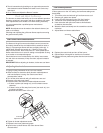
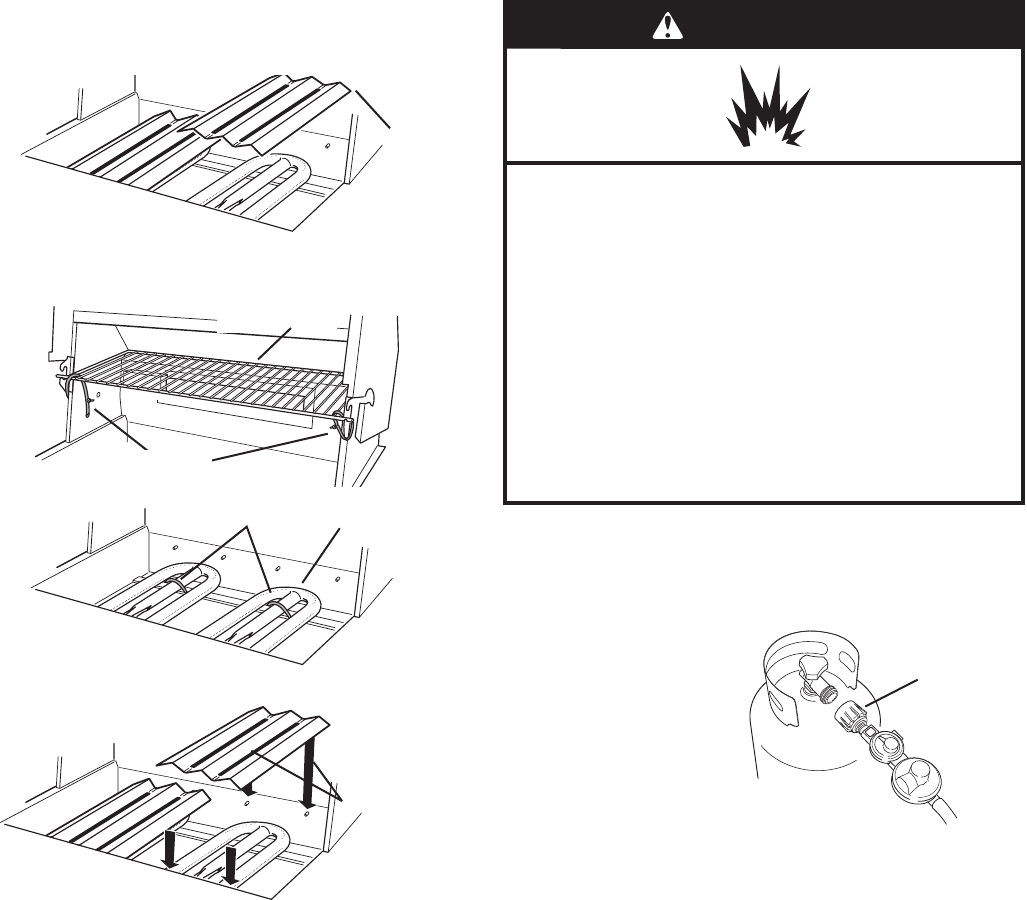
L.P./Propane: A 20 lb. L.P. tank must be purchased separately.
Install the tank into the compartment below the grill and screw the
hose/regulator assembly to tank as shown.
The pressure regulator and
hose assembly supplied with
the grill must be used.
Replacement pressure
regulator and hose assembly
specifi c to your model, is
available from your outdoor
grill dealer.
If converting to natural gas,
see conversion kit require-
ments and “Gas Supply
Requirements” section. Follow
instructions included with kit.
hose regulator
assembly
1. Turn on the gas supply. Wait a few minutes for gas to move
through the gas line.
2. Test all connections by brushing on an approved noncorrosive
leak-detection solution. Bubbles will show a leak. Correct any
leak found.
3. The ignitor battery is not factory installed. A 9 volt alkaline
battery is located in the accessory box on the grill grate. Install
battery at this time per the instructions in “Replacing the Ignitor
Battery” section.
4. Go to “Check and Adjust the Burners” section.
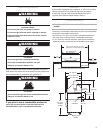
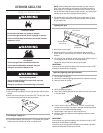
WARNING
Explosion Hazard
Use a new CSA International approved “outdoor”
gas supply line.
Securely tighten all gas connections.
If connected to LP, have a qualified person make sure
gas pressure does not exceed 11” (28 cm) water
column.
Examples of a qualified person include:
licensed heating personnel,
authorized gas company personnel, and
authorized service personnel.
Failure to do so can result in death, explosion, or fire.
Make gas connections