


Special offers from our partners!

Find Replacement BBQ Parts for 20,308 Models. Repair your BBQ today.
9
Stainless Steel Surfaces: To maintain your grill’s high
quality appearance, wash with mild detergent and
warm soapy water and wipe dry with a soft cloth
after each use. Baked on grease deposits may require
the use of an abrasive plastic cleaning pad. Use only
in direction of brushed finish to avoid damage. Do
not use abrasive pad on areas with graphics.
o Do not allow dirt and grease to accumulate on
stainless steel.
o Do not use steel wool as it will scratch the
surface.
o Many products and naturally occurring
substances in the outdoors will damage all
stainless steel finishes. Use caution so they do not
come in contact with your grill. These include, but
are not limited to, pool chemicals (chlorine and
bromine), lawn fertilizer, ice melting salts, sea
and salt water, urine, bird droppings, and tree
sap.
o Store your grill 50 to 100 feet away from a pool
as many pool chemicals will cause rust.
Cooking Surfaces: Clean cooking surfaces with a soft
bristle brush. Make sure that no loose bristles remain
on cooking surfaces prior to grilling. It is not
recommended to clean cooking surface while grill is
hot.
Cleaning the Burner Assembly
Follow these instructions to clean and / or replace parts
of the burner assembly or if you have trouble igniting the
grill.
1. Turn gas off at control knobs and LP tank.
2. Remove the cooking grates and heat diffusers.
3. Remove the Phillips head screws located at the back
end of each burner.
4. Lift each burner up and out. Unplug the electronic
igniter wire from the electrode.
We suggest three ways to clean the burner tubes. Use the
one easiest for you.
(A) Bend a stiff wire (a lightweight coat hanger works
well) into a small hook. Run the hook through each burner
tube several times.
(B) Use a narrow bottle brush with a flexible handle (do
not use a brass wire brush). Run the brush through each
burner tube several times.
(C) Wear eye protection. Use an air hose to force air into
the burner tube and out the burner ports. Check each port
to make sure air comes out each hole.
5. Use a wire brush along the entire outer surface of
burner to remove food residue and dirt.
6. Clean any blocked ports with a stiff wire such as an
open paper clip.
7. Check burner for damage. Due to normal wear and
corrosion, some holes may become enlarged. Replace
the burner if any large cracks or holes are found.
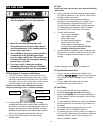
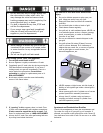
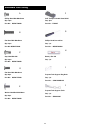
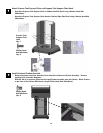
VERY IMPORTANT: Burner tubes must re-engage valve
openings (orifices). See illustration below.
8. Plug the electronic igniter wires into the burner
electrodes.
9. Carefully replace burner tubes ensuring that the tube
end seats over the gas valve as shown in the figure
above.
10. Secure burners to back of firebox with Phillips head
bolts.
11. Perform a leak test described earlier in this guide
before using your grill.
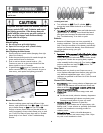
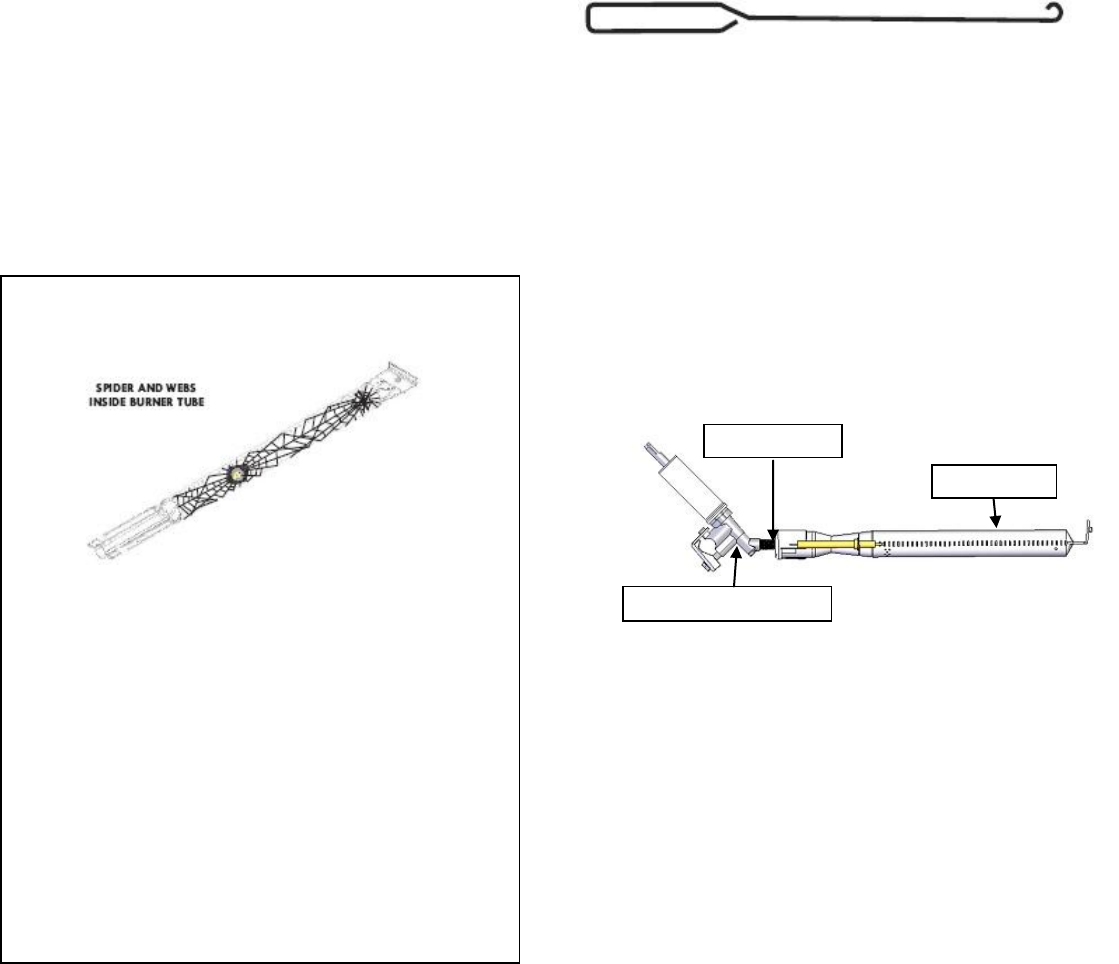
Spider Alert
If you notice that your grill is getting hard to light or
that the flame isn’t as strong as it should be, take the
time to check and clean the burner tubes.
Spiders or small insects have been known to create
“flashback” problems. The spiders spin their webs,
build nests, and lay eggs in the grill’s burner tube(s)
obstructing the flow of gas to the burner. The backed-
up gas can ignite in the burner tube behind the control
panel. This is known as a flashback and it can damage
your grill and even cause injury.
To prevent flashbacks and ensure good performance,
the burner and burner tube assembly should be
removed from the grill and cleaned before use
whenever the grill has been idle for an extended period.
Gas Valve Assembly
Valve Orifice
Burner Tube