Special offers from our partners!

Find Replacement BBQ Parts for 20,308 Models. Repair your BBQ today.
www.desatech.com
111924-01D22
OPERATING FIREPLACE
FOR YOUR SAFETY READ
BEFORE LIGHTING
WARNING: If you do not follow these instructions
damage, personal injury or loss of life.
A. This appliance has a pilot which must be lighted by hand.
When lighting the pilot, follow these instructions exactly.
B. BEFORE LIGHTING smell all around the appliance area
for gas. Be sure to smell next to the oor because some gas
is heavier than air and will settle on the oor.
WHAT TO DO IF YOU SMELL GAS
• Do not try to light any appliance.
• Do not touch any electric switch; do not use any phone
in your building.
• Immediately call your gas supplier from a neighbor's
phone. Follow the gas supplier's instructions.
C. Do not use this appliance if any part has been under water.
Immediately call a qualied service technician to inspect
the appliance and to replace any part of the control system
and any gas control which has been under water.
LIGHTING
will also be present. Open damper or window to vent
smell. This will only last a few hours.
1. STOP! Read the safety information, above.
2. Turn off all electric power to the appliance.
3. Turn wall switch to the OFF position.
4. Open lower louver panel.
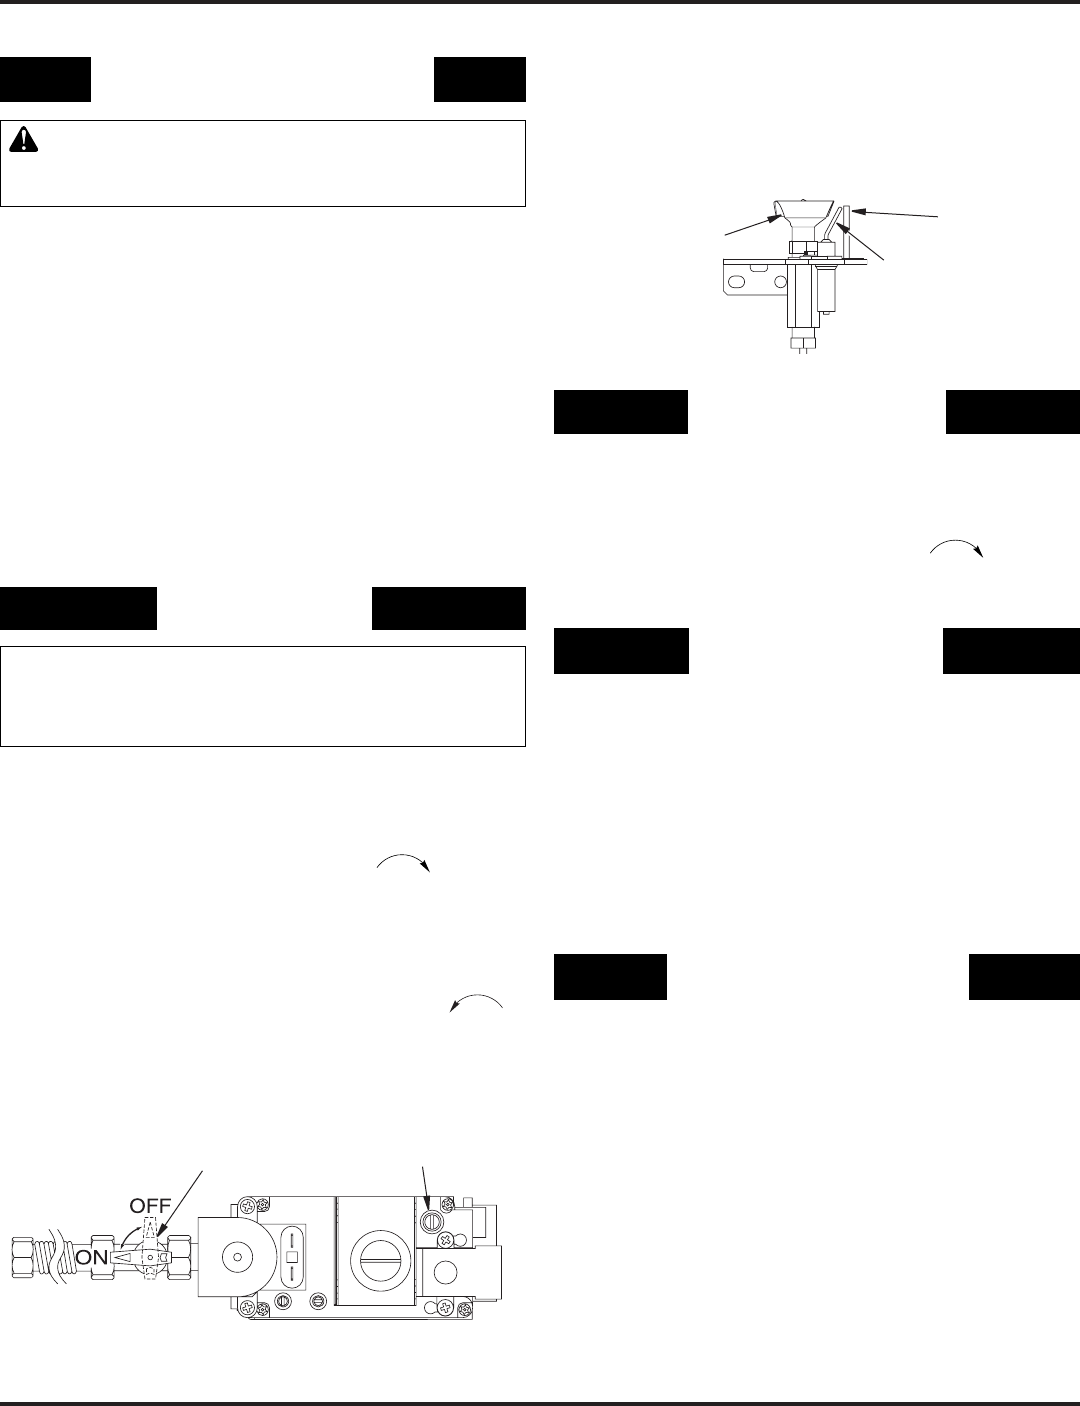
5. Turn equipment shutoff valve clockwise to the OFF
position (see Figure 47). Do not force.
6. Wait ve (5) minutes to clear out any gas. Then smell for
gas, including near the oor. If you smell gas, STOP! Follow
“B” in the safety information above. If you don’t smell gas,
go to the next step.
7. Turn equipment shutoff valve counterclockwise to
the ON position. Do not force.
8. Close lower louver panel.
9. Turn on all electric power to the appliance.
10. Turn the wall switch to the ON position.
Figure 47 - Turning Equipment Shutoff Valve to the OFF
Position
Equipment Shutoff Valve
Adjustment Screw
Figure 48 - Pilot
Sensing
Rod
Pilot Burner
Ignitor
TO TURN OFF GAS
1. Turn off the wall switch.
2. Turn off all electric power to the appliance if service is to
be performed.
3. Open lower louver panel.
4. Turn equipment shutoff valve clockwise to OFF. Do
not force.
5. Close lower louver panel.
OPTIONAL REMOTE
OPERATION
Note: The WRC receiver and hand-held remote control kit
must be purchased separately (see Accessories, page 32). Follow
installation instructions on page 20.
1. Turn equipment shutoff valve to ON position. You can
now turn the burner on and off with the hand-held remote
control unit.
IMPORTANT: Be sure to press the ON/OFF buttons on the
hand-held remote control unit for up to 3 seconds to assure
proper operation.
2. Press the ON/OFF button to turn the burner on and off.
OPERATING OPTIONAL
Locate the blower controls by opening the lower louver panel
on the replace. Blower controls are located on the left side of
the switch bracket to the left just inside the louver panel.
The BK manual blower and the BKT thermostatically-controlled
blower have an ON setting and an OFF setting. The blower
will only run when the switch is in the ON position. In the OFF
position, the blower will not operate.
Note for BKT Only: If you are using BKT blower with optional
thermostat (wall mounted or remote control) for the replace,
your replace and blower will not turn on and off at the same
time. The replace may run for several minutes before the blower
turns on. After the heater modulates to the pilot position, the
blower will continue to run. The blower will shut off after the
rebox temperature decreases.
The blower helps distribute heated air from the replace. Peri-
odically check the louvers of the rebox and remove any dust,
dirt, or other obstructions that will hinder the ow of air.
11. Visually locate the pilot. The ignitor should begin to spark and
the main burner should ignite once ame appears at pilot.
• If lighting the appliance for the rst time each season,
it may take several attempts before the supply gas can
reach the pilot and main burners.
• If the appliance will not stay lit after several attempts,
follow the instructions To Turn Off Gas To Appliance, and
call your service technician or gas supplier.


