


Special offers from our partners!

Find Replacement BBQ Parts for 20,308 Models. Repair your BBQ today.

9
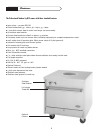
Cleaning and Maintenance
GENERAL
New units are wiped clean at the factory to remove any visible signs of dirt, oil, grease remaining from the man-
ufacturing process. They should be washed thoroughly with hot soapy water to remove any installation dust or debris
before being used for food preparation. Also wash any accessories shipped with the Tandoor.
Any piece of equipment works better and last longer when maintained properly and kept clean. Tandoor is no
exception. The Tandoor must be kept clean during the working day and thoroughly cleaned at the end of each day.
DAILY CLEANING
During the day, all stainless steel body parts should be wiped regularly with hot soapy water. At the end of
each day, a liquid cleaner designed for this material should be used. Remove and thoroughly clean drip pan.
The Tandoor should be checked and adjusted periodically by a qualified service personnel as part of a regular
kitchen maintenance program. This service should include the removal of any built up grease in control boxes.
CAUTION: Do not use steel wool, abrasives clothes, cleansers, or powders. If it is necessary to scrape stain-
less steel to remove encrusted material, soak the area with hot cloths to loosen the material then
use a wood or nylon scraper.
Do not use a metal knife, spatula, or any other metal tool to scrape
stainless steel. Scratches made by these types of instruments are difficult to remove.
REPLACING PARTS
The following should be performed by a qualified service technician.
CCaauuttiioonn:: BBeeffoorree sseerrvviicciinngg,, bbee ssuurree ttoo sshhuutt ggaass ssuuppppllyy ttoo
“
OOFFFF
”
To Replace Burners:
1) Disconnect the pilot tubing from the safety valve.
2) Remove drip pan.
3) Remove the two 1/4” bolts underneath and towards the front of the Tandoor.
4) Drop the burner frame and remove burners.
To replace the pilot, follow the same steps as replacing the burner. Once the burner is out then change the
pilot. To gain access to the manual valves for replacement, remove the six (6) screws from the front panel and remove
the front panel.