


Special offers from our partners!

Find Replacement BBQ Parts for 20,308 Models. Repair your BBQ today.
CALL TOLL FREE 1-866-NEUTON1 13
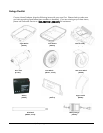
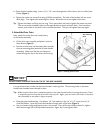
Rea
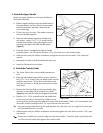
r
mounting
plate
Center scre
w
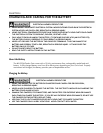
• Open the blue hardware bag. Insert a 1/4" x 1/2" screw through each of the holes in the rim of the lower
bucket (Figure 1).
• Tighten the center two screws first using a Phillips screwdriver. The ends of the buckets will now more
easily align. Then tighten the remaining four screws. Be careful not to over-tighten the screws.
Tip: Tighten the screws until they are just snug. Don’t press down too hard or tighten the screws too much.
This can cause the threaded inserts (in the upper bucket) to loosen and spin freely. If an insert does
loosen, push it back in and lock it into its recessed position. Then you can tighten the screw again.
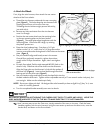
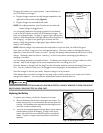
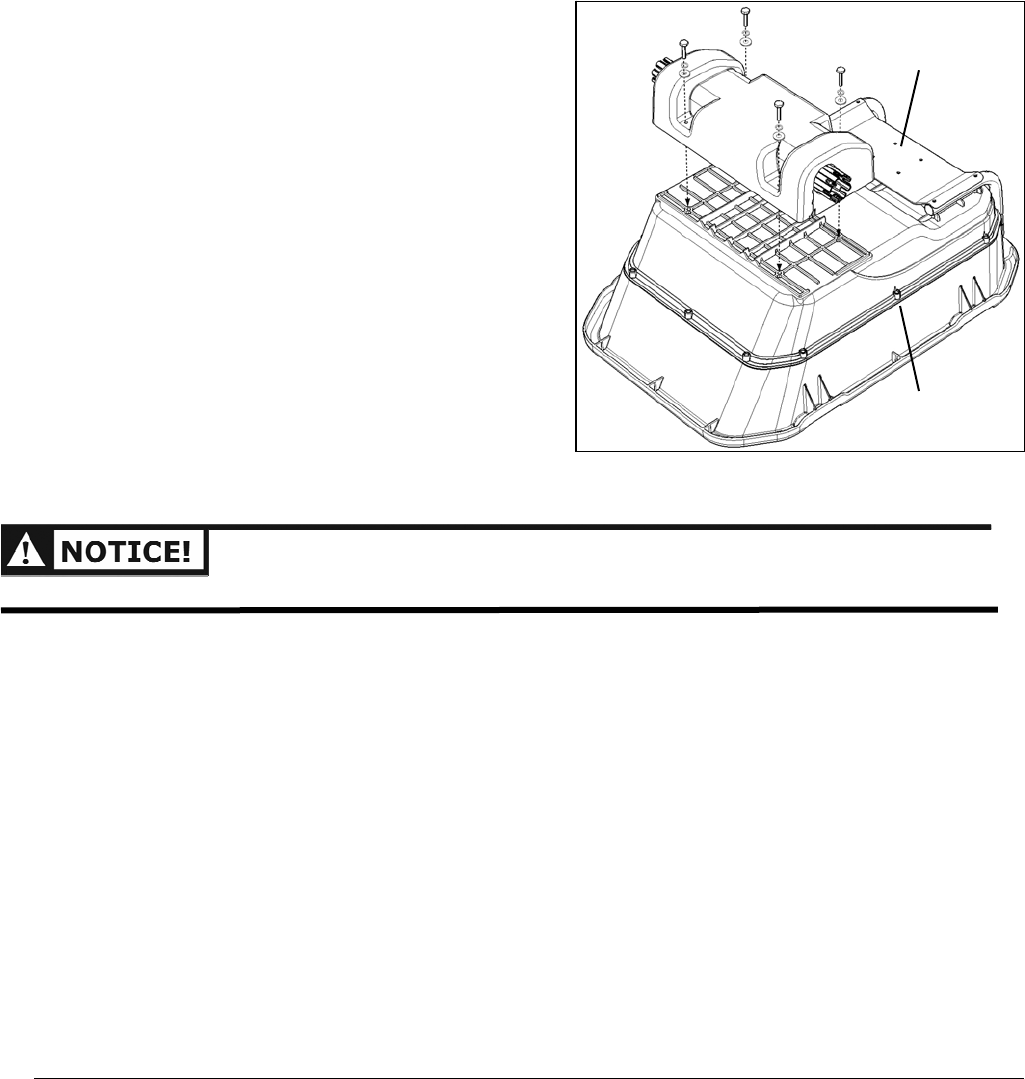
3. Attach the Drive Train
Now, attach the entire drive train and battery
to the bucket assembly.
• Lift the drive train assembly and place it onto the
lower bucket (Figure 2).
• Face the wire harness and the battery door towards
the rear mounting plate (attached to lower handle
assembly). Make sure that the wire harness is
routed through the slot in the drive train housing.
DO NOT PLACE THE DRIVE TRAIN ON TOP OF THE WIRE HARNESS.
Line up the drive train’s holes with the lower bucket’s receiving holes. The receiving holes on the lower
bucket have threaded inserts already in them.
Tip: Make sure the drive train is seated properly on the lower bucket before inserting the screws. There
is a specific position that the drive train lines up with. Again, you can look in the holes in the drive
train assembly to see when it aligns properly.
• Open the green hardware bag. First place a 1/4" lock washer on the 1/4" x 1-1/2" screw, then a 1/4"
small flat washer.
Insert the screws and washers through each of the holes (Figure 2).
• Use your hands to align and loosely screw in the screws. Once all four are loosely screwed in, tighten
them down snugly with a Phillips head screwdriver. Again, don’t over-tighten them.
Figure 2. Attaching the drive train.