


Special offers from our partners!

Find Replacement BBQ Parts for 20,308 Models. Repair your BBQ today.

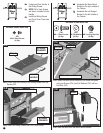
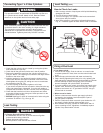
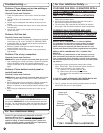
Lighting Main Burners
CAUTION
DO NOT touch hot grill parts with bare hands! You MUST use
protective gloves.
CAUTION
Be certain the gas is shut off at the L.P. cylinder valve anytime
the grill is not in use.
1. Turn all burner control knob(s) to off.
2. After burner flame goes out, turn off fuel supply. For an L.P.
cylinder, turn the L.P. cylinder knob in a clockwise direction until
it stops.
Shutting Off the Grill
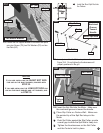
CAUTION
Use a LONG wooden match. Make sure all burner controls are
off except one being lighted. If a long-reach match or lighter is
not accessible, there is a match extension provided. Insert a
match in the holder end of the extension, strike the match and
insert it through a match-lighting hole located underneath the
control panel, directly under the burner to be lit.
1. Strike and place the burning match near the BURNER being
operated.
2. Turn on BURNER CONTROL KNOB while holding match near
burner.
3. The other burners can be ignited by turning them on one at a
time after first burner is lighted.
Match Lighting
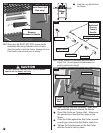
Lighting Rotisserie Burner
Igniter Lighting
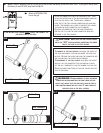
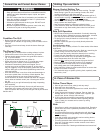
1. Turn on Rotisserie Burner Gas Control knob to high. (Fig. 19)
2. Press the igniter switch until the flame ignites.
3. If the flame doesn’t immediately light, turn off control knob and
wait five minutes for gas to clear.
4. Repeat steps 1 through 3.
5. If the burner does not light on second try, turn off knob and
try match-lighting the burner.
CAUTION
Use a LONG wooden match. Make sure all burner controls are
off except one being lighted. Strike the match, and place the
burning match near the burner screen beside the electrode tip.
1. Strike and place the burning match near the ROTISSERIE BURNER
SCREEN.
2. Turn on ROTISSERIE BURNER CONTROL KNOB while holding
match near the burner screen.
Match Lighting
CAUTION
Use a LONG wooden match. Make sure all burner controls are off
except one being lighted. Strike the match and place the burning
match near the burner gas port holes, from below the fryer.
Removing the Fryer Grease Pan will make it easier to access the
Fryer Burner. Be sure to replace the Fryer Grease Pan as soon
as the burner stays lit.
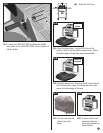
Fryer Burner Lighting
Igniter Lighting:
1. Make sure all valves or OFF.
2. Turn on the cylinder valve.
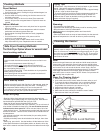
3. Push in and turn on the Fryer
Control Knob counterclockwise
to START. (Fig. 24b).
4. Continue to depress and hold
the Fryer Control Knob.
5. Press the igniter switch until
the flame ignites.
6. After burner ignition, continue
to hold Fryer Control Knob in for
15-30 seconds then rotate Fryer
Control Knob to HIGH setting.
7. If the flame does not immediately light, turn off Fryer Control Knob
and wait for five minutes for gas to clear.
8. Repeat steps 3 through 6.
9. If the burner does not light after trying again, turn off Fryer Control
Knob and try match lighting the burner.
HINT: If the igniter fails to light the fryer burner, adjust electrode tip
with needle-nose pliers. A spark must jump near a gas opening in the
burner when igniter is activated. Use care not to damage the ceramic
insulator on electrode.
Match Lighting
1. Make sure all valves or OFF.
2. Turn on the cylinder valve.
3. Strike and place the burning match near the burner gas port holes,
from below the fryer.
4. Push in and turn on the Fryer Control Knob counterclockwise to
START. (Fig. 24b).
5. Continue to depress and hold the Fryer Control Knob.
6. After burner ignition, continue to hold Fryer Control Knob in for 15-
30 seconds then rotate Fryer Control Knob to HIGH setting.
24b
Fryer
Control
Knob
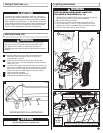
CAUTION
• Before removing spit from grill, make sure gas
control knobs are turned to “OFF”. Use protec-
tive gloves or tools when removing the spit to
avoid burn hazard from spit, food or hot juices.
CAUTION
• DO NOT OPERATE THE GRILL WITH THE ROTISSERIE
HANDLE ON THE SPIT ROD.
Igniter Lighting
1. Turn on any or all main burner gas control knobs to high. (Fig. 19)
2. Press the igniter switch until the flame ignites.
3. If the flame does not immediately light, turn off control knobs and
wait five minutes for gas to clear.
4. Repeat steps 1 through 3.
5. If the burner does not light on second try, turn off knobs and
try match-lighting the burner.
38