


Special offers from our partners!

Find Replacement BBQ Parts for 20,308 Models. Repair your BBQ today.
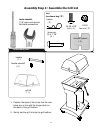
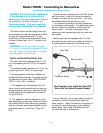
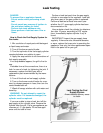
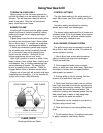
IGNITER LIGHTING SYSTEM
The Igniter System consists of an igniter unit,
a gas-collector box, two ceramic electrodes,
and lead wires. Gas is collected in the metal
collector box located at the burner. When the
igniter knob is turned, an electric spark is creat-
ed at the ceramic electrodes. The gas is then
ignited by the spark.
To test: Watch the electrode tip(s) inside the
gas collector while activating the igniter. To
avoid a possible shock, do not touch the burner
or metal parts on igniter system while perform-
ing igniter test. A visible spark should jump
from the electrode. The spark gap is set when
the electrode is installed.
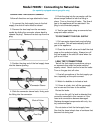
If there isn’t a spark, check the lead wires and
connections. The igniter wires should be kept
away from the grill bottom. Also check that the
ceramic electrodes in the collector box are not
broken.
Sometimes dirt and rust at and around the
electrode(s) can prevent an igniter spark. Clean
them with a degreaser or warm soapy water,
and dry. Remove rust from electrode tip(s) and
metal surfaces by lightly sanding with an emery
cloth or fine-grain sandpaper.
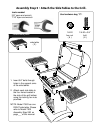
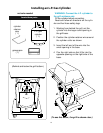
LIGHTING INSTRUCTIONS
(Read all the steps before beginning.)
STEP 1. Check the burner venturi tubes for
blockage from an insect nest (see, “CLEANING
THE BURNER VENTURI T U B E S ” ) .
STEP 2. Ensure that both of the burner-control
knobs are in the OFF position.
STEP 3. OPEN GRILL LID
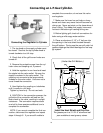
WARNING: Attempting to light the grill with the
lid down could cause an explosion.
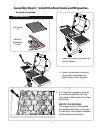
STEP 4. Go behind the grill and turn on the
fuel supply valve. One counter-clockwise turn is
generally enough to open the valve.
CAUTION: Do not stand with head or arms over
the grill.
STEP 5. To light using the igniter:
Push in and turn the right burner-control
knob counter-clockwise to the high setting.
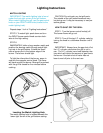
STEP 6.
Immediately turn the igniter control knob
CLOCKWISE until you hear 4 or 5 clicks.
The burner should light.
Note: Turning the knob in the wrong direction
may loosen it. If this happens, simply press the
knob on firmly and turn it CLOCKWISE.
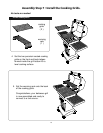
STEP 7.
If the burner fails to light properly, turn the burn-
er-control knob off. Also turn off the L.P. cylinder
knob. Wait five minutes before attempting to light
the burner again. This will allow time for released
gas to disperse.
HINT: If the burner does not light after trying
again, turn off burner-control knob, the L.P. cylin-
der knob and try match lighting the grill once the
gas has cleared.
Lighting Instructions
25
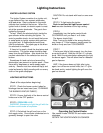
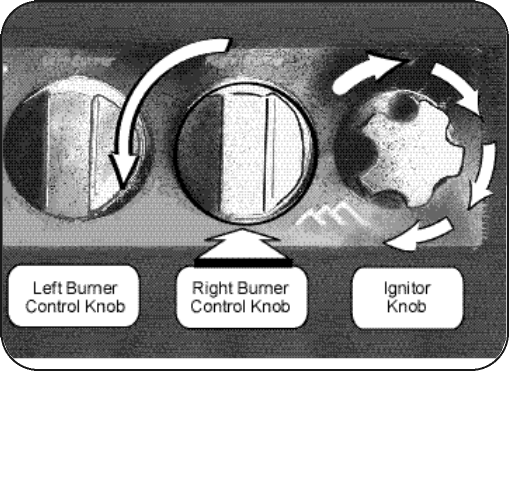
Operating the Control Knobs
Gas control knobs PRESS IN and rotate counter-
clockwise.
ROTATE THE IGNITER KNOB CLOCKWISE.