


Special offers from our partners!

Find Replacement BBQ Parts for 20,308 Models. Repair your BBQ today.

A
1
1
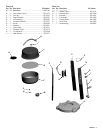
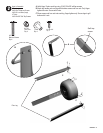
Items to Assemble
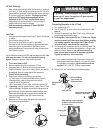
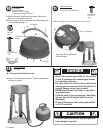
1 Grill Bottom
1 Control Leg
1 Ignitor
2 #10-24x1” Machine Screws
2 #10-24 Lock Nuts
2 T-Nuts
2 #10-24x3/8" Self-Tap Screws
Before Beginning Assembly
• Remove all contents from box. Lay cardboard on the ground when unpacking, assemble grill parts on the cardboard to avoid
scratching surfaces.
• Carefully read and follow all assembly instructions, paying particular attention to parts orientation.
• Easily find fasteners by referring to each item (shown actual size) at the start of each step.
• Minimum tools...for assembly of your grill include screwdrivers (Phillips), adjustable wrench and pliers. A 3/8” nut driver would be
ideal.
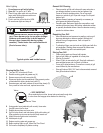
• You may fill your LP gas tank prior to assembly. The tank must also have the safety cap installed onto the tank when not in use, See
Use & Care section.
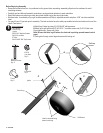
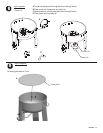
A Unfold leg. Fasten leg using (2) #10-24x3/8” self-tap screws.
B Attach leg to grill bottom with (2) #10-24 X 1” machine screws and (2) #10-24 lock nuts.
Finger tighten only. Secure with t-nuts.
Note: Be sure that hole in grill bottom for electrode is pointing upward toward control
panel.
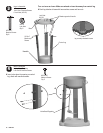
C Push ignitor through control leg and secure with locking nut.
Hole for electrode facing
toward control leg.
Grill Bottom
Ignitor
Control Leg
Machine Screws
Qty: 2
#10-24x1”
#10-24
Lock Nuts
Qty: 2
T-Nuts
Qty: 2
#10-24x3/8"
Qty: 2
B
C C
8 • 06601295
Self-tap
screw