


Special offers from our partners!

Find Replacement BBQ Parts for 20,308 Models. Repair your BBQ today.
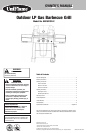
Outdoor Gas Grill Model No. GBC621CR-C
Contact 1.800.762.1142 for assistance. Do not return to place of purchase.
page no.
7
Direct Cooking
1. Light burners per lighting instructions.
2. Set burners to desired level and allow temperature to be reached.
3. Place food directly over burners.
4. With lid open or closed, cook untill desired internal temperatures are acheived.
Indirect Cooking
Ideal for roasts and larger cuts of meat.
1. Remove cooking grid.
2. Place metal tray in center, on heat plates.
3. Replace cooking grid.
4. Light burners.
5. Turn center burner off. Set ouside burners to desired level and allow temperature to
be reached.
6. Place food on cooking grid, directly over metal tray.
7. With lid closed, cook until desired internal temperatures are achieved.
Tips For Better Cook Outs and Longer Product Life
1. Spray or coat cooking surfaces with vegetable oil before cooking to avoid sticking.
2. Place vegetables or delicate foods into aluminum foil pouches.
3. Use a quality grill brush after each event to keep cooking surfaces clean and rust free.
4. Empty grease pan after every use.
CAUTION: Do not cover grill until it is completely cool to the touch.
Cleaning and Care
Caution
1. All cleaning and maintenance should be done when grill is cool
and with the fuel supply disconnected.
2. DO NOT clean any grill part in a self cleaning oven. The extreme heat
will damage the finish.
Notices
1. Abrasive cleaners will damage this product.
2. Never use oven cleaner to clean any part of grill.
3. Do not clean any grill part in a self cleaning oven. The extreme heat will damage
the finish.
Cleaning Surfaces
1. Wipe surfaces clean with mild dishwashing detergent or baking soda.
2. For stubborn surfaces use a citrus based degreaser and a nylon scrubbing brush.
3. Rinse clean with water.
Cleaning Main Burner
1. Turn gas off at the control knobs and LP gas tank.
2. Remove cooking grates and heat plates.
3. Remove burner by removing the fasteners securing the burner to the grill bottom.
4. Lift burner up and away from gas valve orifice.
5. Disconnect wire from spark electrode.
6. Clean inlet (venturi) of burner with small bottle brush or compressed air.
7. Remove all food residue and dirt on burner surface.
8. Clean any clogged ports with a stiff wire (such as an opened paper clip)
9. Inspect burner for any damage (cracks or holes). If damage is found, replace with new
burner.
10. Reinstall burner, check to insure that gas valve orifice is correctly positioned inside
burner inlet (venturi). Also check position of spark electrode.
Operating Instructions
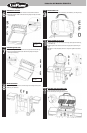
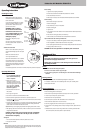
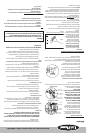
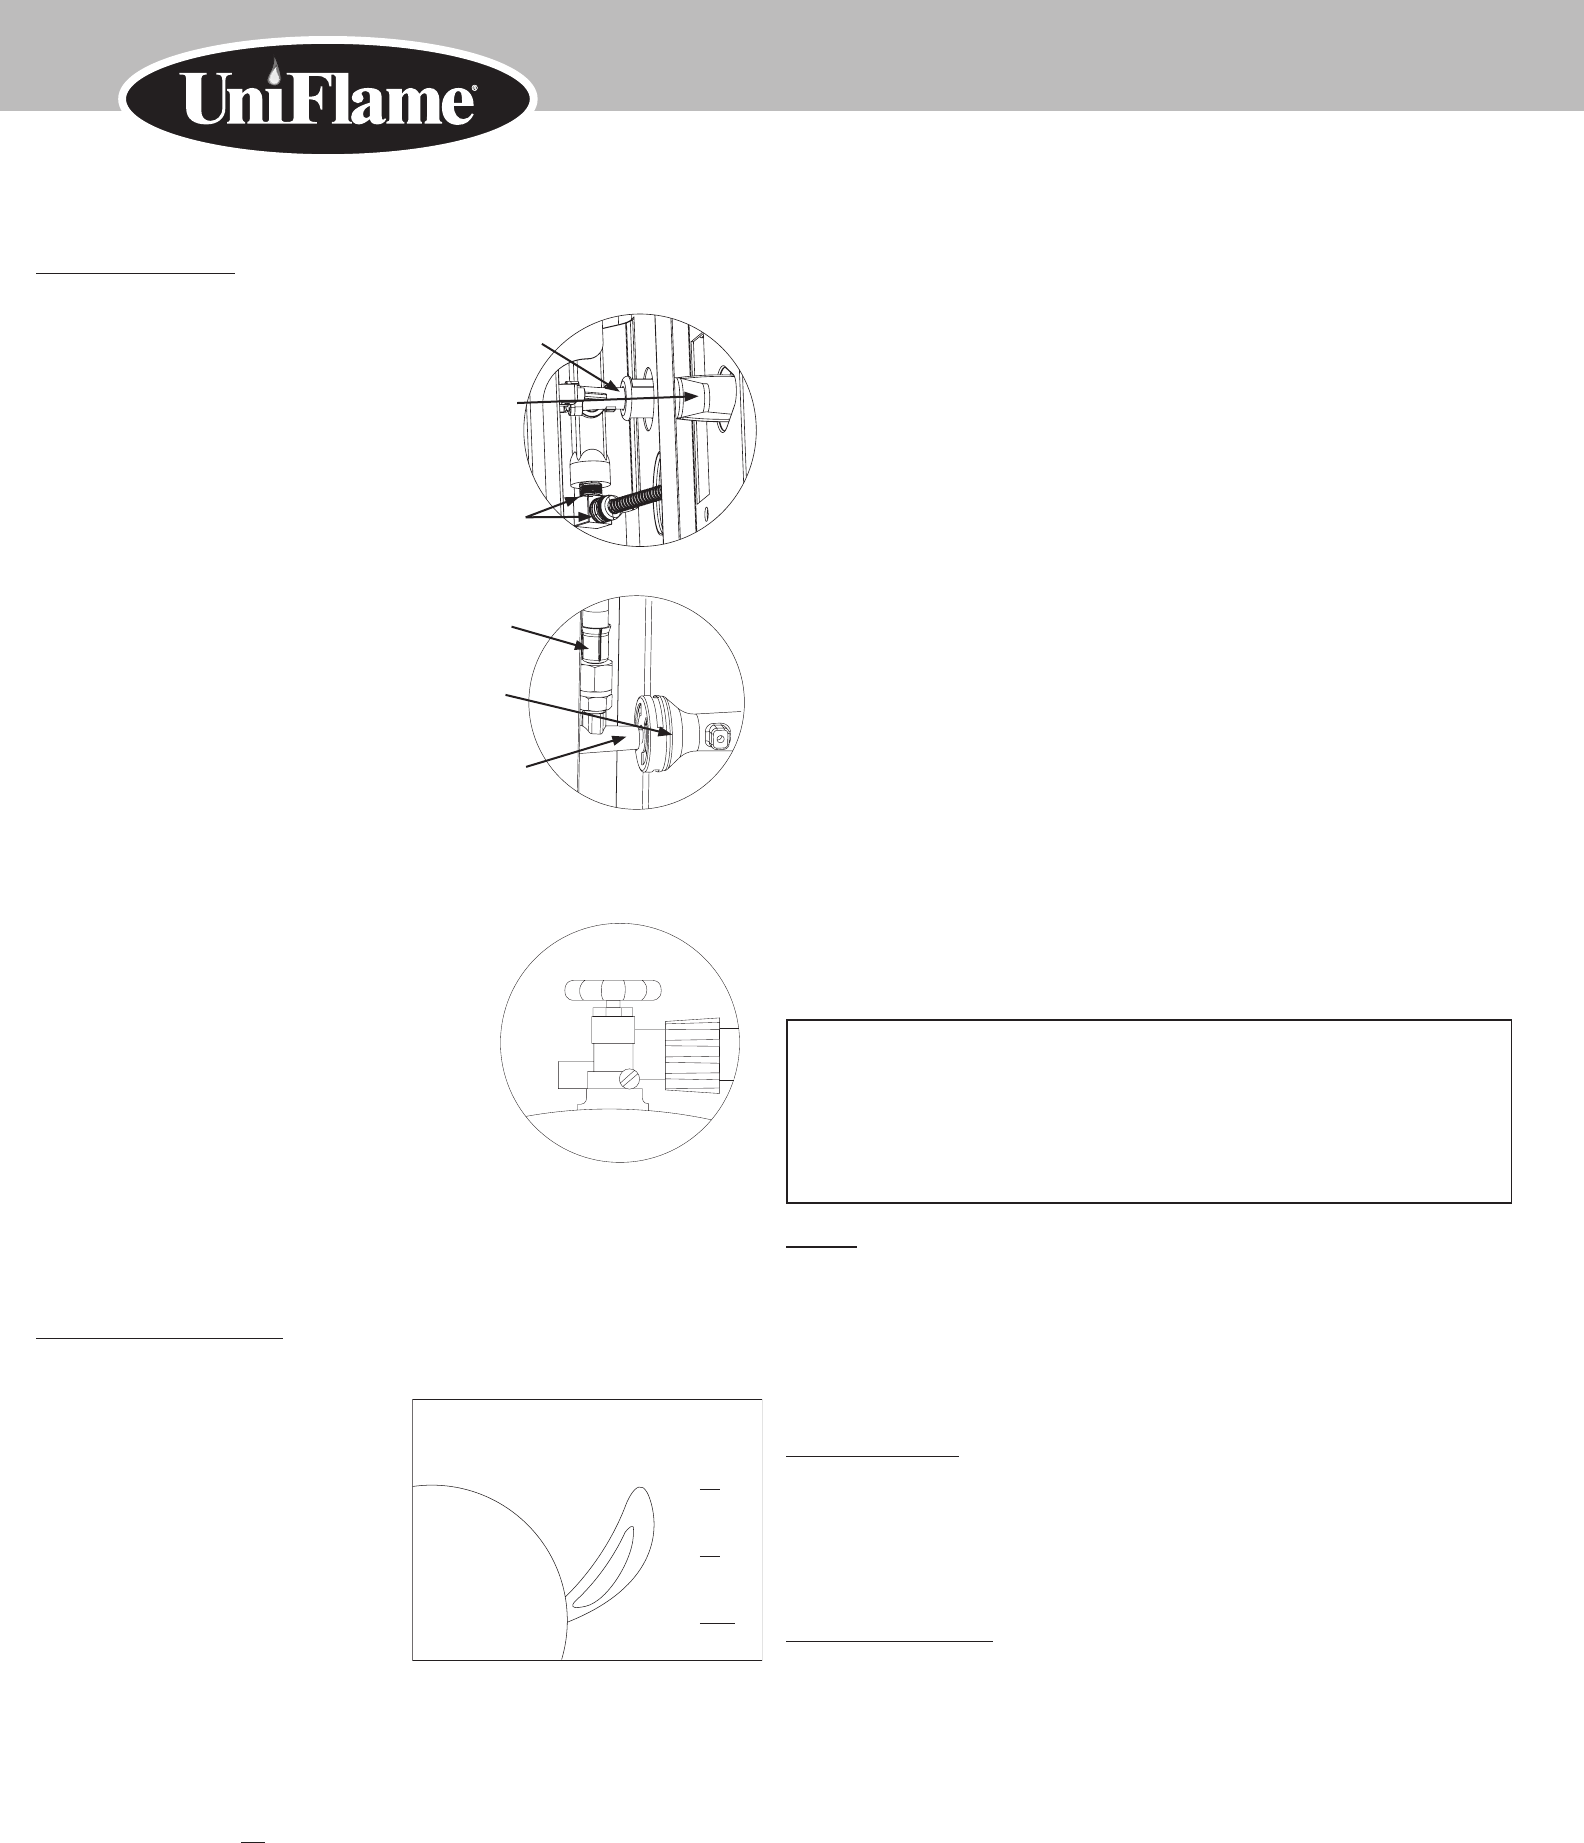
Checking for Leaks
Burner Connections
Make sure the regulator valve and hose
connections are securely fastened to the
burner and the tank.
If your unit was assembled for you, visually
check the connection between the burner
pipe and orice. Make sure the burner
pipe ts over the orice.
WARNING: Failure to inspect
this connection or follow these
instructions could cause a re
or an explosion which can cause
death, serious bodily injury, or
damage to property.
Please refer to diagram for proper
installation.
If the burner pipe does not rest ush to
the orice, please contact 1.800.762.1142
for assistance.
Tank/Gas Line Connection
Make 2-3 oz. of leak solution by mixing one
part liquid dishwashing soap with three parts
water.
Make sure control knobs are off.
Turn LP gas tank ON at valve.
Spoon leak check solution at all “x” locations
If any bubbles appear turn LP gas tank OFF,
reconnect and re-test. If you continue to see
bubbles after several attempts, disconnect LP
gas source and contact 1.800.762.1142 for
assistance.
If no bubbles appear after one minute turn tank OFF, wipe away solution and proceed.
Operating Main Burners
Lighting
1. Open lid. Attempting to light the
burner with the lid closed may
cause an explosion!
2. Make sure there are no
obstructions of airflow to the gas
unit. Spiders and insects can nest
within and clog the burner / venturi
tube at the orifice. A clogged
burner tube can lead to a fire
beneath the appliance.
3. All control knobs must be in the
OFF position.
4. Turn on gas at LP gas tank.
5. Push and turn control knob counterclockwise to HIGH.
6. Press the electronic igniter button and hold for 5 seconds to light burner.
7. If ignition does not occur in 5 seconds, turn burner control knob OFF, wait 5 minutes,
and repeat lighting procedure.
8. If igniter does not light burner, use a lit match secured with the lighting rod provided
to light burners manually. Access the burners through the cooking grid and heat
plates. Position the lit match near side of the burner.
Important: Always use the lighting rod provided when lighting burners with a match.
9. After lighting, observe the burner flame, make sure all burner ports are lit and flame
height matches illustration.
CAUTION: If burner flame goes out during operation, immediately
turn the gas “OFF” and open lid to let the gas clear for about 5
minutes before re-lighting.
Turning Off
1. Turn all control knobs clockwise to the OFF position one at a time.
2. Turn gas off at LP tank.
Initial Use
Before cooking on this grill for the first time, operate the grill for about 15 minutes with
the lid closed and the gas turned on “HIGH.” This will “heat clean” the internal parts and
dissipate odor from the manufacturing processes.
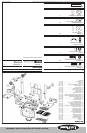
X
X
X
X
X
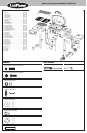
Main Burners
Gas Valve
with orice
Burner
Venturi
Gas
Connections
Side Burner
Gas Valve
with orice
Gas
Connections
Burner
Venturi
1/2"
12.7 mm
6.4mm
0mm
1/4"
0"
Burner
Main burner proper flame height.
Flame