Special offers from our partners!

Find Replacement BBQ Parts for 20,308 Models. Repair your BBQ today.

Outdoor Gas Grill Model No. GBC621CR-C
Contact 1.800.762.1142 for assistance. Do not return to place of purchase.
page no.
3
Assembly Instructions
DO NOT RETURN PRODUCT TO STORE.
For assistance call 1.800.762.1142 toll free. Please have your owner’s manual and serial
number available for reference.
For Easiest Assembly:
• To avoid losing any small components or hardware, assemble your product on a hard level
surface that does not have cracks or openings.
• Clear an area large enough to layout all components and hardware.
• When applicable, tighten all hardware connections by hand first. Once the step is
completed, go back and fully tighten all hardware.
• Follow all steps in order to properly assemble your product.
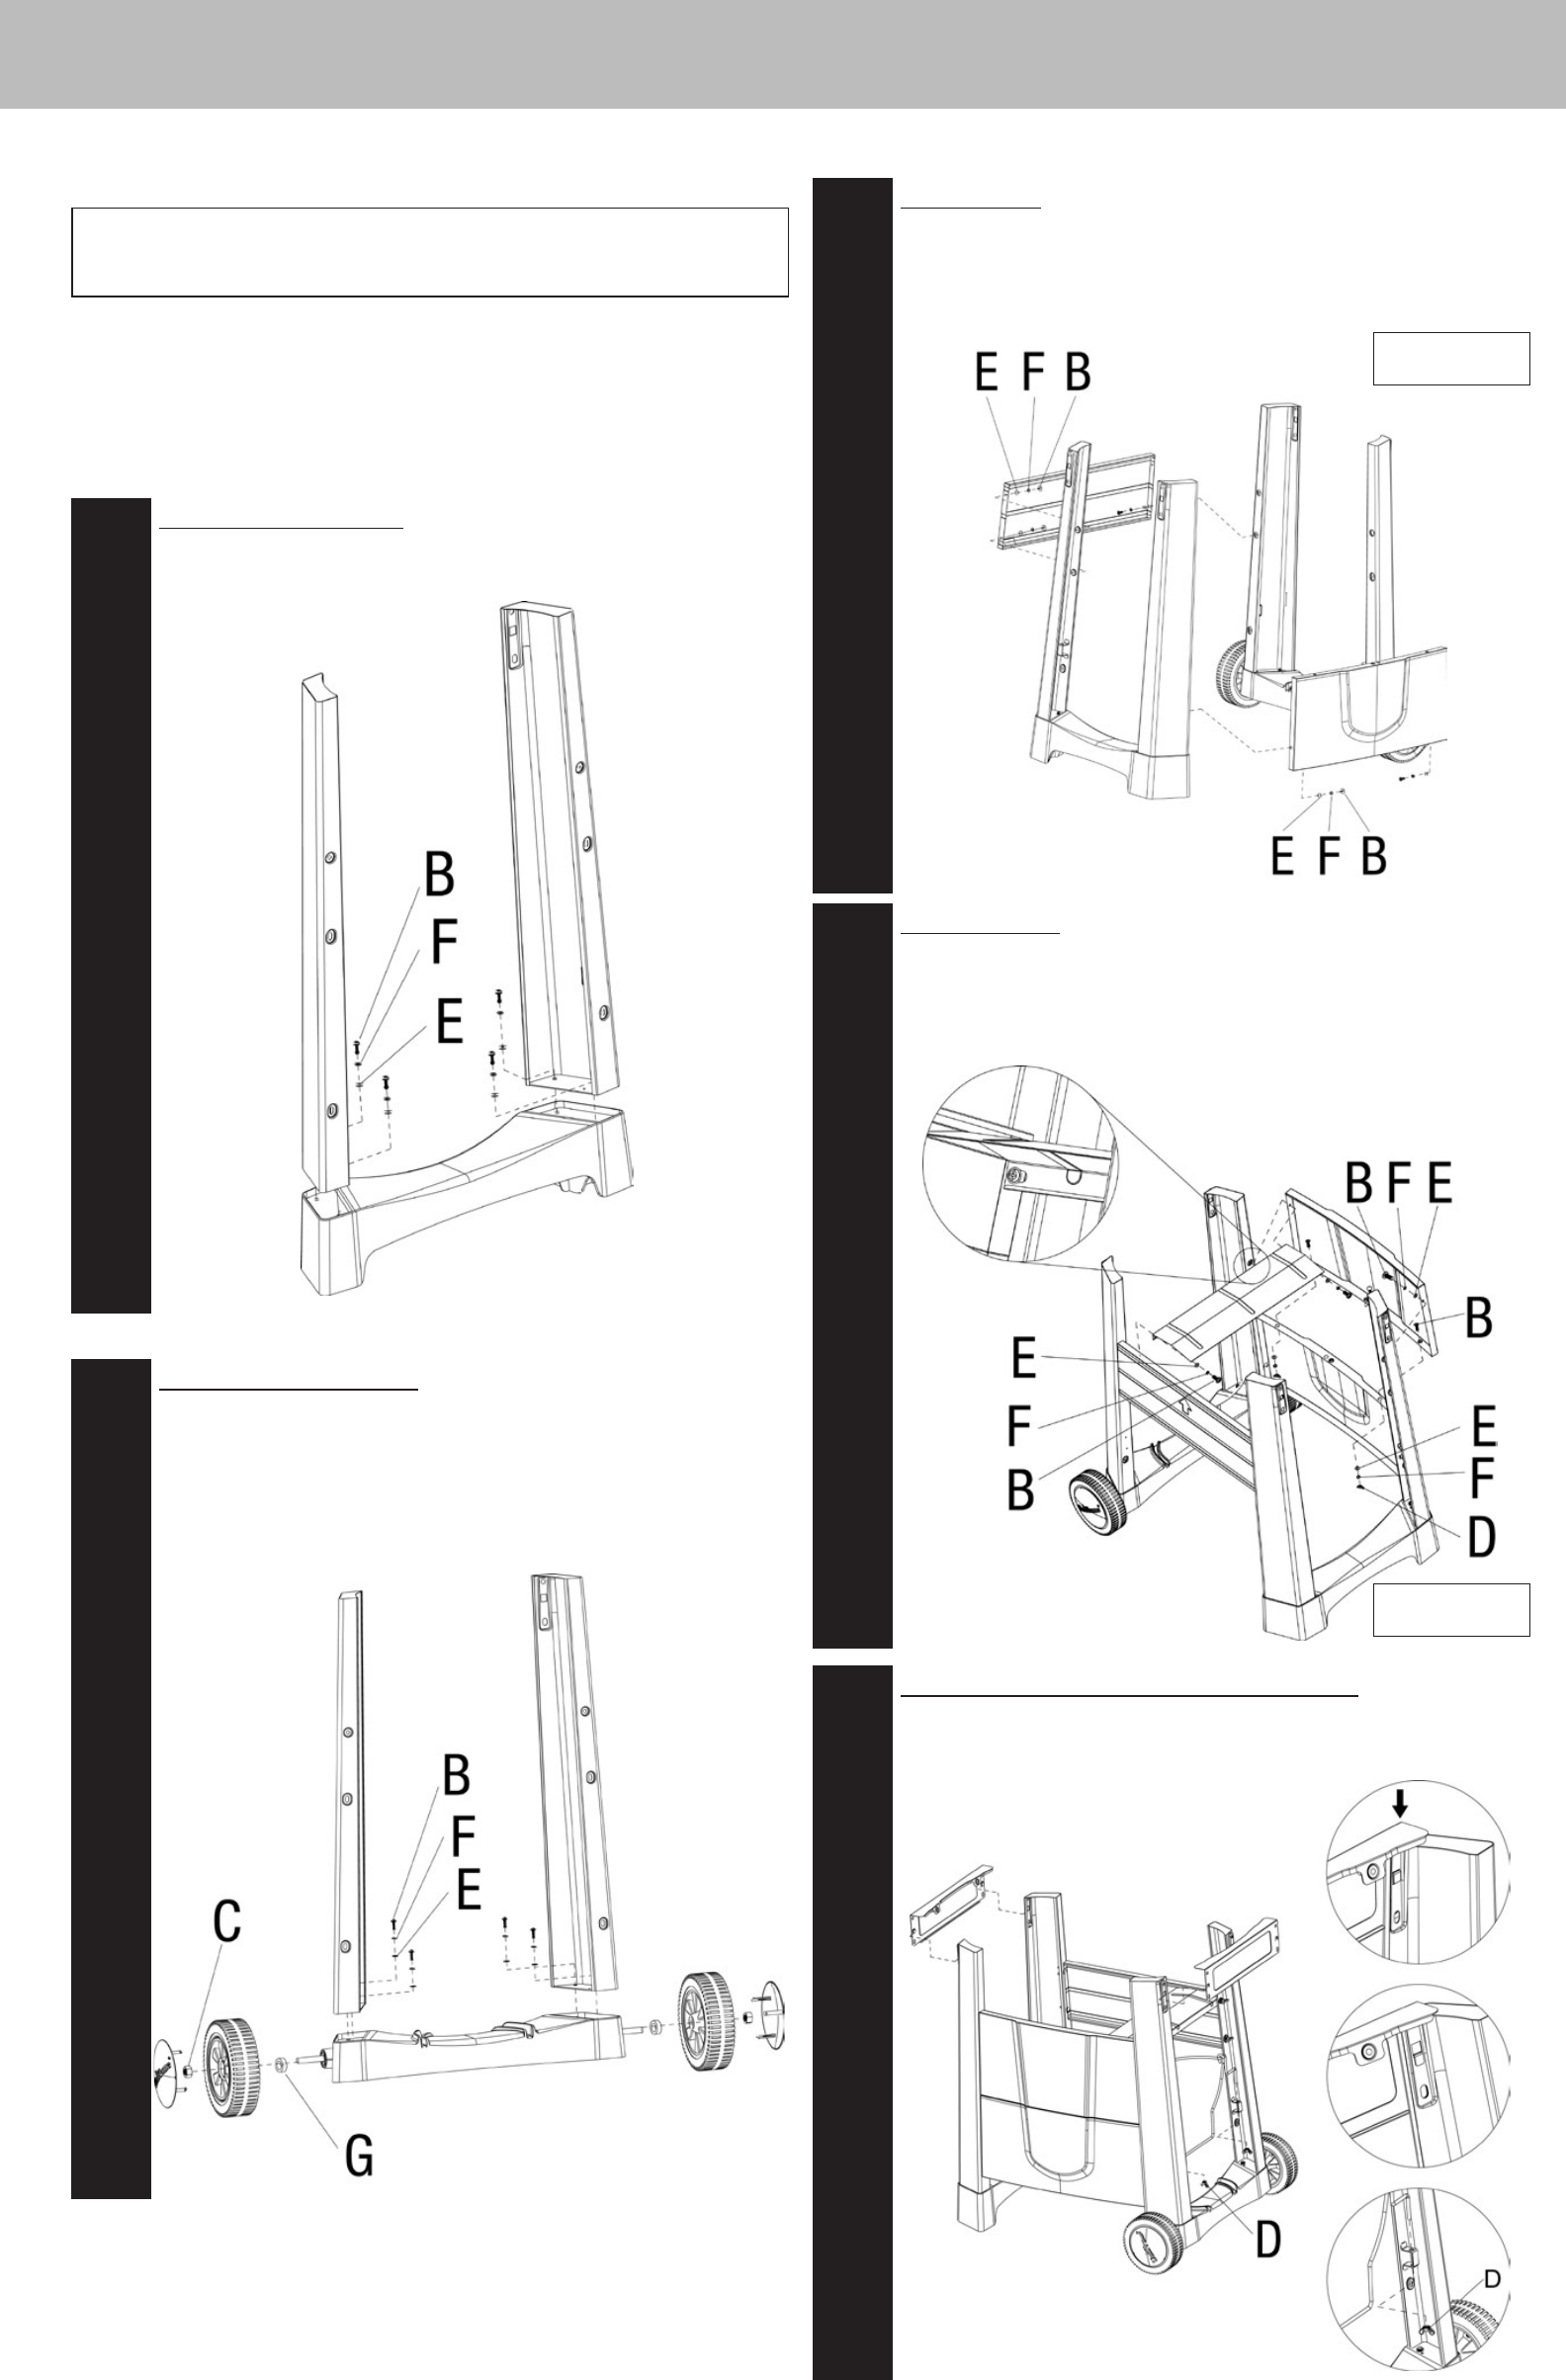
Step
1
Assemble left cart frame
Attach left front and rear legs to frame support using 4 sets of large screws (B),
lock washers (F), and washers (E).
Step
2
Assemble right cart frame
A. Attach right front and rear legs to LP tank support using 4 sets of large screws
(B), lock washers (F), and washers (E).
B. Insert axle into LP tank support.
C. Insert rubber spacer (G) and wheels onto axle. Secure using 2 nuts (C).
D. Place hub caps onto wheels.
Step
5
Attach frame braces and LP tank support wire
A. Insert frame braces into slots on left and right cart frames.
B. Attach LP tank support wire to right cart frame using 2 wing nuts (D).
Step
3
Assemble cart
A. Attach back frame support to left and right legs using 3 sets of large screws (B),
lock washers (F), and washers (E).
B. Attach front bottom panel to left and right legs using 2 sets of large screws (B),
lock washers (F), and washers (E).
Step
4
Assemble cart 2
A. Attach front top panel and LP tank heat resistant plate to left and right legs using
3 sets of large screws (B), lock washers (F), and washers (E).
B. Secure front bottom panel to front top panel using 2 sets of large screw (B), lock
washer (F), washer (E), and wing nuts (D).
Note: image is shown
from front.
Note: image is shown
from back.


