


Special offers from our partners!

Find Replacement BBQ Parts for 20,308 Models. Repair your BBQ today.
GOLD
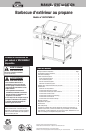
Outdoor LP Gas Barbecue Grill Model No. GBC1076WE-C
Contact 1.800.762.1142 for assistance. Do not return to place of purchase.
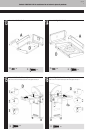
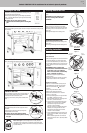
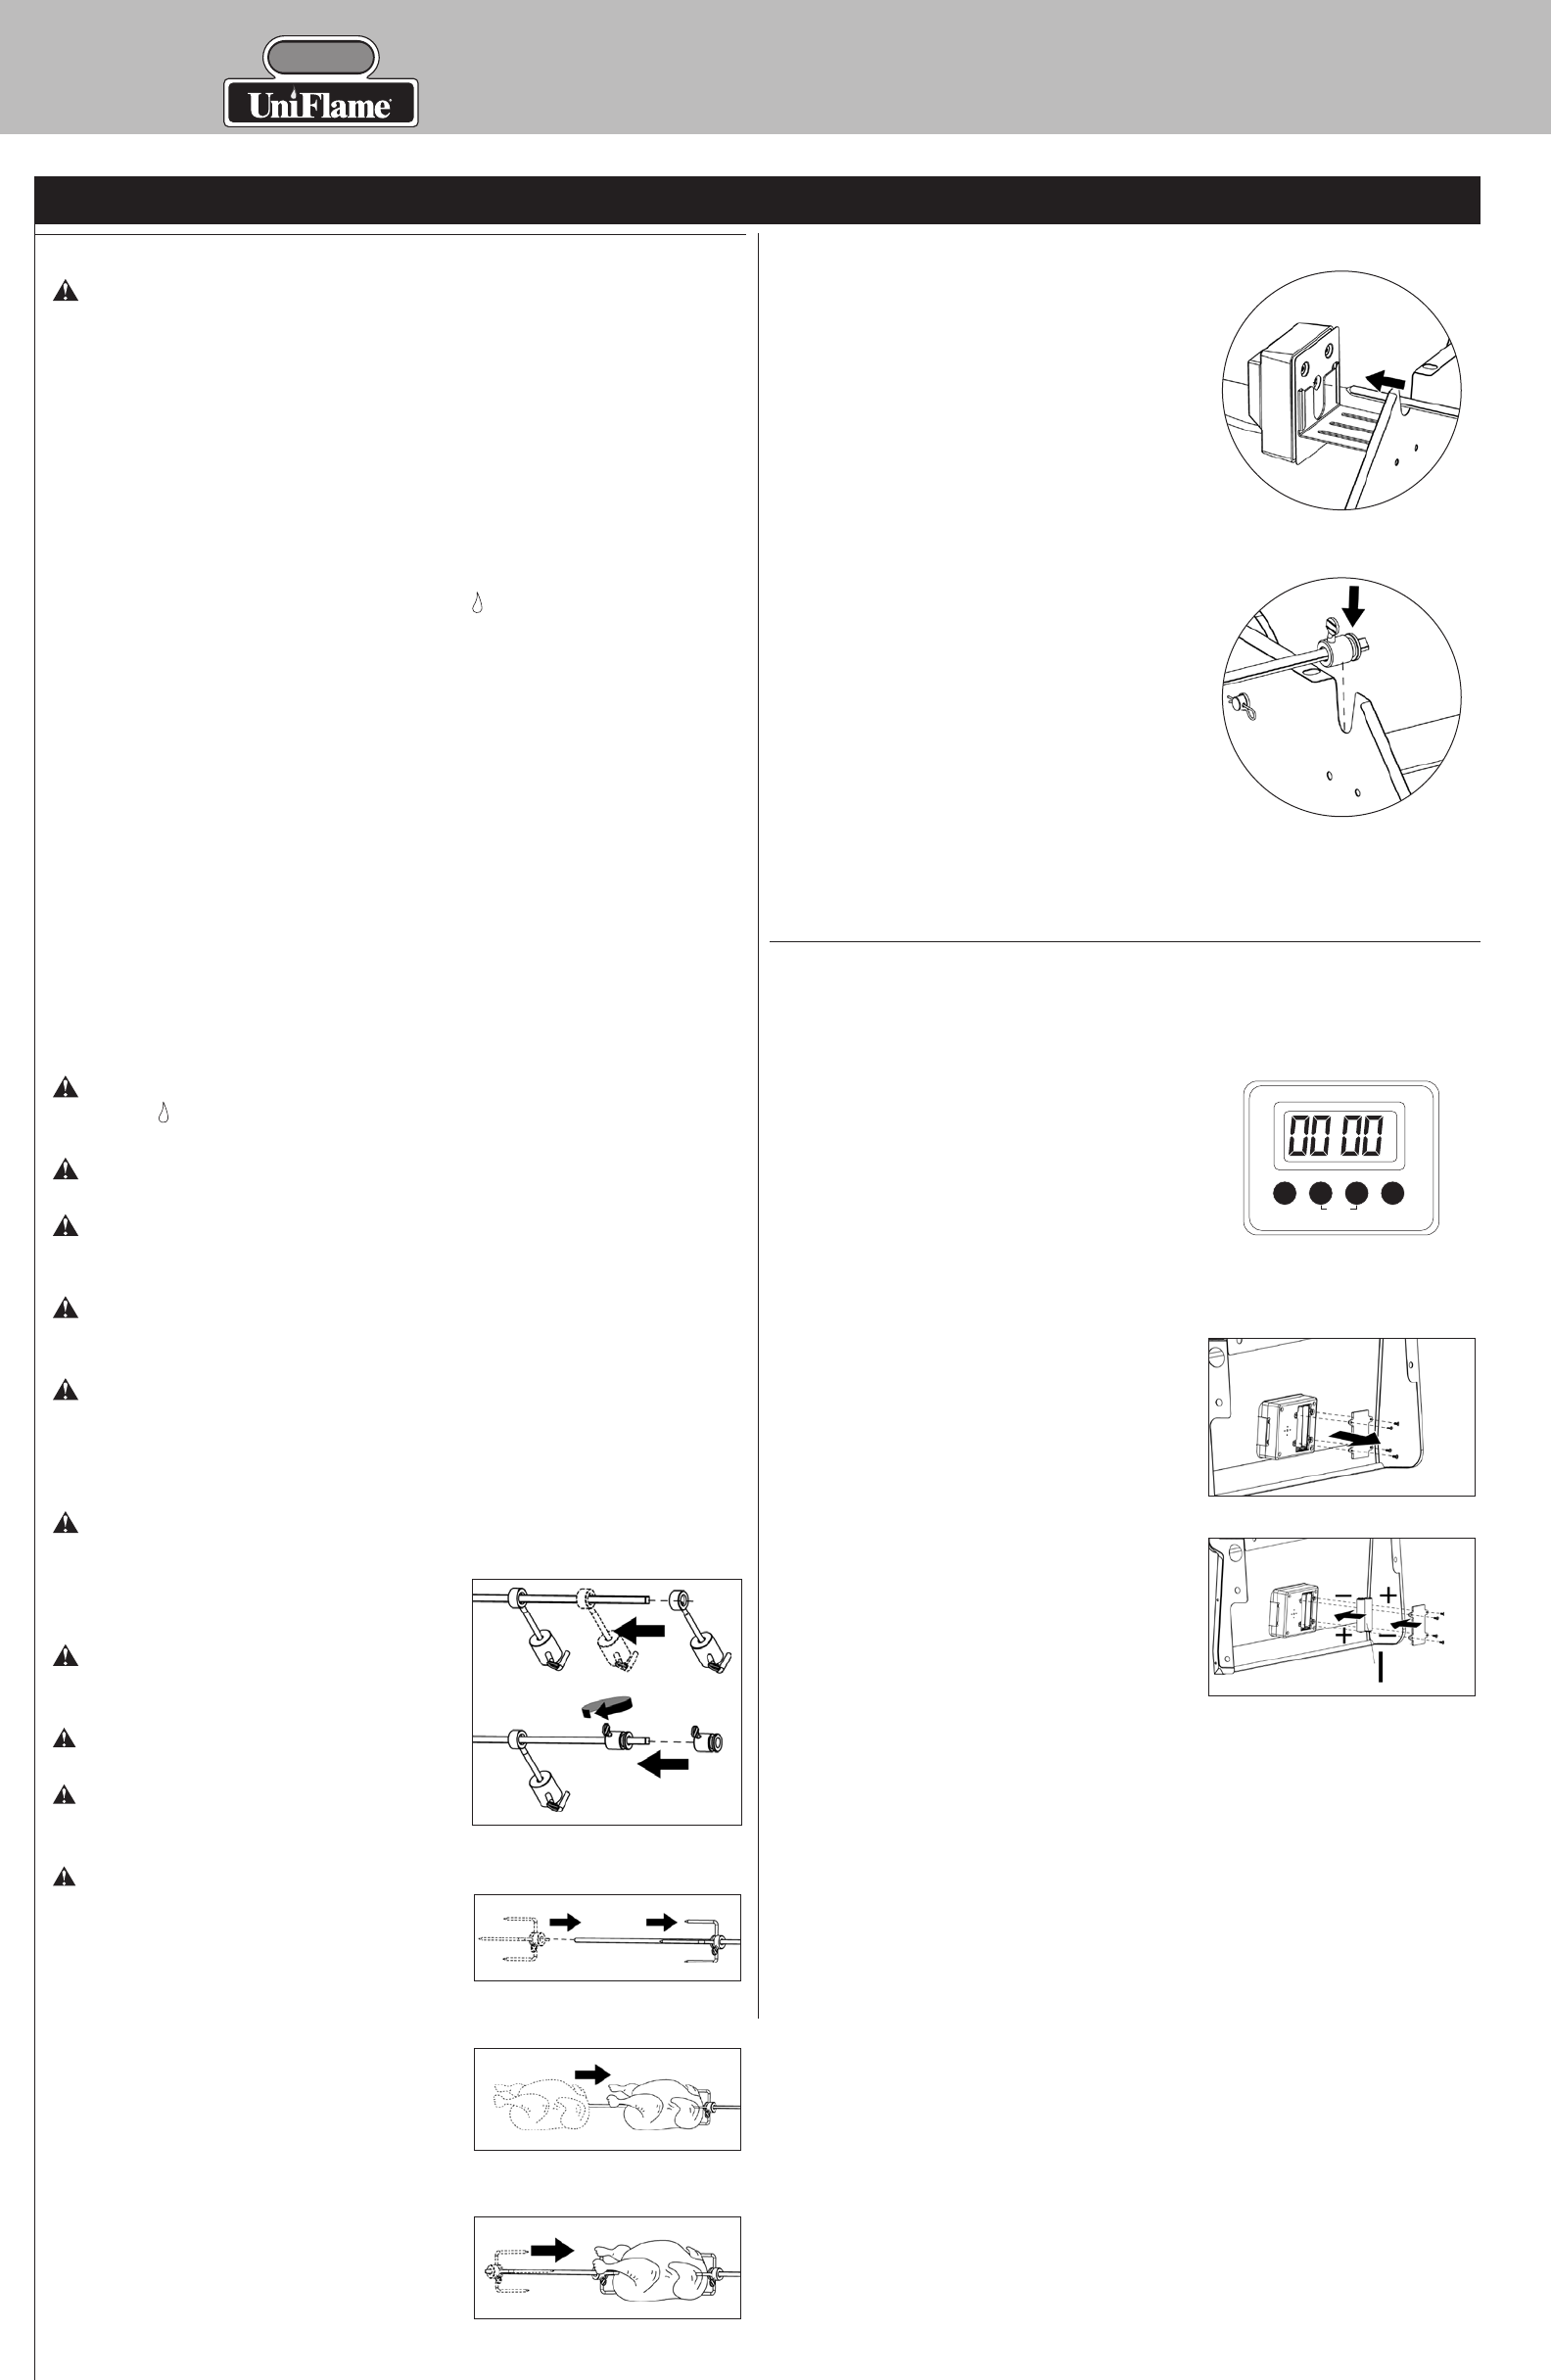
7. Insert rotisserie rod into rotisserie motor and place
other end of rotisserie rod into groves on bottom
bowl. (Figure 17 and 18)
8. Turn rotisserie motor “ON” to test food placement.
Note: Heavy side of meat or poultry should
rotate down towards the bottom bowl. Adjust
counterweight if needed for a proper balance. If
meat or poultry still does not rotate properly, remove
food and remount food for a proper balance.
9. Light grill per “Infrared Back Burner” lighting
instructions.
10. After grill is lit and temperature is set, keep lid
closed.
Rotisserie Cooking Tips
1. Meats (except for poultry and ground meats) should
be brought to room temperature prior to cooking.
2. Use cooking string to tie around the uneven shaped
meat or poultry.
3. If saving the dripping for gravy, place a dispolable
aluminum drip pan directly under the food and on
top of the heat plates.
4. Food preperation steps are the same for rotisserie
cooking as they are for regular grilling.
5. If meat or polutry is too large or do not rotate properly on the rotisserie, the meat should be
removed from the rotisserie and indirectly cook.
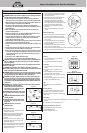
Operating Digital Timer
Count-Up
1. Press “START/STOP” button. Timer will begin
counting up from 0:00.
2. Press “START/STOP” button. Timer will stop.
Count-Down
1. Press “MIN” button to set desired number of
minutes.
2. Press “SEC” button to set desired number of
seconds.
3. Press “START/STOP” button. Timer will begin
counting down from the pre-set time.
4. When timer reaches “0:00” a loud beep will sound
for up to 1 minute.
5. To stop count-down at any time or stop alarm from
sounding, press “START/STOP” button.
Light
Press “LIGHT” button. LCD will illuminate for 10
seconds.
Resetting the timer
If you have stopped timer during count-up or count-
down mode, you can reset timer back to 0:00 by
pressing and holding the two buttons indicated by the
“RESET” lines.
Auto Shut-off
1. To increase battery life, digital timer will automatically shut off when not in use after 3
minutes.
2. To turn it back on press “START/STOP” button
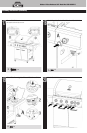
Replacing the batteries (See Figure 20)
1. Remove digital timer back cover, as shown.
2. Replace AAA batteries (2).
3. Replace digital timer back cover.
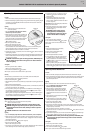
Operating Rotisserie
WARNING: When using electrical appliances, basic safety precautions
should always be used, including the following:
1. Always attach Rotisserie to grill first, then plug cord into a grounded
outlet. To disconnect, turn Rotisserie “OFF” then remove plug from outlet.
2. Most grill surfaces and accessories are hot during and after cooking. Use
caution around grill, wear flame retardant BBQ mitt.
3. Do not use accessory attachments on Rotisserie not suppied by the
manufacturer. This may cause injuries. Do not use this appliance for other
than intended use.
4. Never cover bottom of your grill bowl with aluminum foil, sand or any
grease absorbent substance.
5. Should a grease fire occur, turn burners to (OFF) position, turn LP gas
tank valve “CLOSED”, leave lid CLOSED until fire is out.
6. To protect against electrical shock, do NOT immerse electrical cord, plug
or motor in water or expose to rain. Protect electrical elements from
burners, hot grill surfaces and grease.
7. Do NOT operate rotisserie with a damaged cord or plug, or if the rotisserie
malfunctions or has been damaged in any manner.
8. Do NOT let children operate grill or rotisserie, and do NOT let children play
nearby.
9. Unplug rotisserie motor from electrical outlet when not in use and before
cleaning. Allow to cool before adding or removing parts.
10. When rotisserie cooking, place a drip pan of some sort under the food to
be cooked. This will capture the drippings and keep grill clean of excess
grease which could cause a fire. Use caution when moving a drip pan
containing hot oils.
11. The motor is set for 120VAC, 50/60 Hz current.
12. This rotisserie is for use outdoors only and with this grill only.
CAUTION: If burner flame goes out during operation, immediately turn
the gas (OFF) and open lid to let the gas clear for about 5 minutes
before re-lighting.
WARNING: Keep rotisserie motor electric cord away from the heated
surface of the grill.
WARNING: The rotisserie motor must be electrically grounded in
accordance with local codes or, in the absence of local codes, with the
National Electric Code, ANSI/NFPA 70-1990.
WARNING: Do NOT operate the rotisserie with a damaged cord or plug,
or if the Rotisserie malfunctions or has been damaged in any manner.
Call our Customer Care at 1.800.762.1142 for replacement.
WARNING: The power supply cord has a 3-prong grounded plug. For
your personal safety do not remove the grounding prong. It must be
plugged into a mating 3-prong grounding type receptacle, grounded
in accordance with the National Electrical Codes and local codes and
ordinances.
WARNING: If an extension cord is used it must be properly grounded
and suitable for use with outdoor
appliances. Keep the extension cord
connection dry, off of the ground and
out of the reach of children.
WARNING: When rotisserie motor is not
in use remove and store in a dry indoor
area.
WARNING: OUTDOOR USE ONLY. DO NOT
EXPOSE TO RAIN.
CAUTION: Risk of Electric Shock. Keep
extension cord connection dry and off
the ground
WARNING: Use only on properly
grounded outlet.
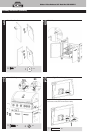
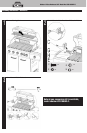
Attaching Meat or Poultry
1. Attach rotisserie motor per “Assembly Instructions
– Rotisserie” instructions.
2. Insert and secure rotisserie counterweight and
rotisserie handle onto rotisserie rod. (Figure 13)
3. Insert one rotisserie fork onto rotisserie rod.
(Figure 14)
4. Push rotisserie rod through the middle of the food
and insert the food evenly into the prongs of the
rotisserie fork. (Figure 15)
5. Center food on rotisserie rod. Tighten rotisserie fork.
6. Insert remaining rotisserie fork onto rotisserie rod
and insert rotisserie fork prongs into food. Tighten
rotisserie fork. (Figure 16)
Operating Instructions (continued)
Figure 13
Figure 14
Figure 15
Figure 16
Figure 19
Digital Timer
START/STOP
MIN
RESET
SEC LIGHT
M S
Figure 20
Remove Digital Timer Back
Replace Digital Timer Back
Figure 17
Figure 18