


Special offers from our partners!

Find Replacement BBQ Parts for 20,308 Models. Repair your BBQ today.
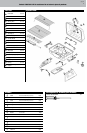
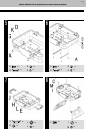
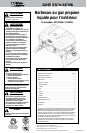
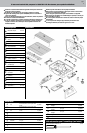
Outdoor LP Gas Barbecue Grill Model No. GBT10039L / 0184543
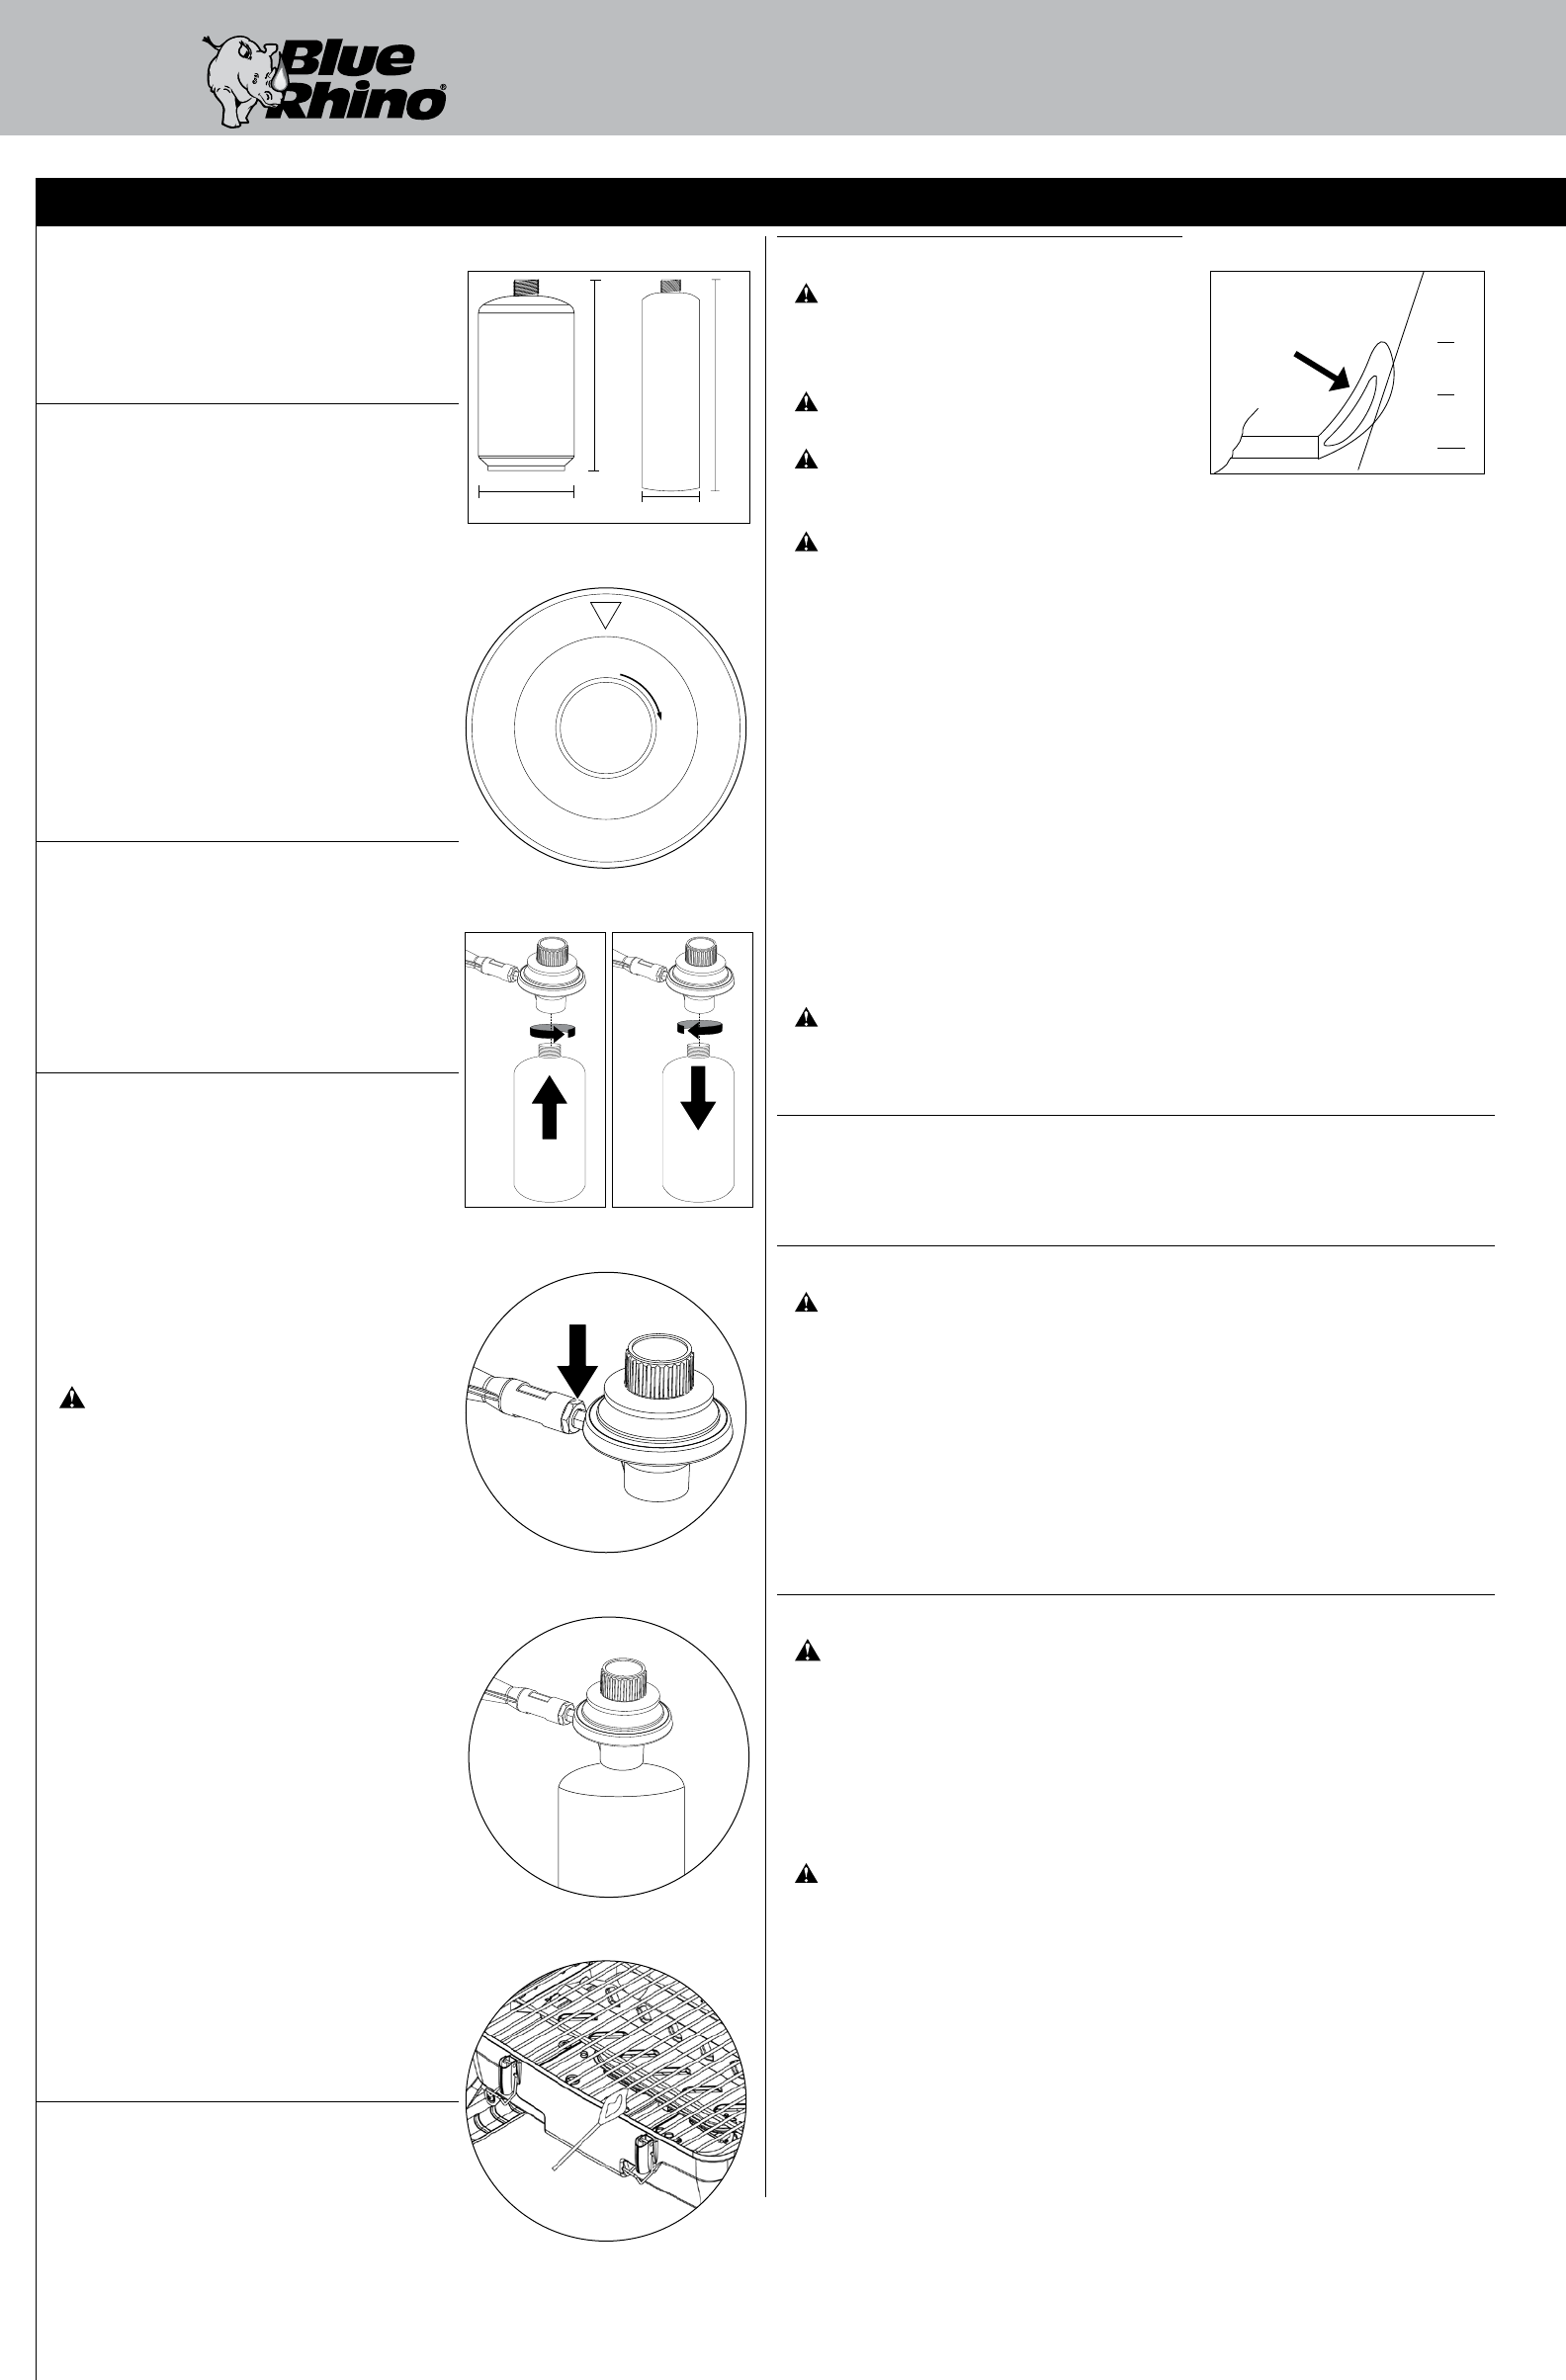
Lighting Instructions
Caution: Keep outdoor gas cooking
appliance area clear and free from
combustible materials, gasoline and
other flammable vapors and liquids.
Caution: Do not obstruct the flow of
combustion and ventilation air.
Caution: Check and clean burner/
venturi tubes for insects and insect
nests. A clogged tube can lead to a fire beneath the grill.
Caution: Attempting to light the burner with the lid closed may cause
an explosion.
-AKE SURE ALL LABELS PACKAGING AND PROTECTIVE FILMS HAVE BEEN REMOVED FROM THE GRILL
/PEN LID DURING LIGHING
-AKE SURE THERE ARE NO OBSTRUCTIONS OF AIRFLOW TO THE GAS UNIT 3PIDERS AND INSECTS CAN NEST
WITHIN AND CLOG THE BURNER VENTURI TUBE AT THE ORIFICE
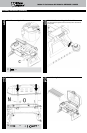
#ONNECT ,0 GAS TANK PER h#ONNECT ,0 'AS 4ANKv INSTRUCTIONS
4HE REGULATORCONTROL KNOB MUST BE IN THE “,/#+/&&v POSITION &IGURE
4URN THE CONTROL KNOB TO
“
()'(v
0RESS THE )GNITER BUTTON REPEATEDLY TO TIMES TO LIGHT BURNER
)F IGNITION DOES NOT OCCUR IN SECONDS TURN REGULATORCONTROL KNOB TO “,/#+/&&v position,
WAIT MINUTES AND REPEAT LIGHTING PROCEDURE
)F IGNITER DOES NOT LIGHT BURNER USE A LIT MATCH TO LIGHT BURNER MANUALLY !CCESS THE BURNER
THROUGH THE HOLE IN BOTTOM BOWL AS INDICATED &IGURE
4URN THE REGULATORCONTROL KNOB TO
“
,/7v AND POSITION THE LIT MATCH NEAR SIDE OF THE BURNER
!FTER LIGHTING OBSERVE THE BURNER FLAME -AKE SURE ALL BURNER PORTS ARE LIT AND FLAME HEIGHT
MATCHES ILLUSTRATION &IGURE
Caution: If burner flame goes out during operation, immediately turn
the regulator/control knob “LOCK/OFF” and open lid to let the gas clear
for 5 minutes before re-lighting.
Turning Off
4URN REGULATORCONTROL KNOB TO THE “,/#+/&&v POSITION &IGURE
$ISCONNECT ,0 GAS TANK PER h$ISCONNECT ,0 'AS 4ANKv INSTRUCTIONS AND PROPERLY STORE TANK
Cooking
Caution: Do not leave grill unattended while preheating or burning off food
residue on
“HIGH”. If grill has not been cleaned, a grease fire can occur.
/PEN LID AND IGNITE BURNER PER h,IGHTING )NSTRUCTIONSv
#LOSE LID AND PREHEAT GRILL ON
“
()'(v
!DJUST REGULATORCONTROL KNOB TO DESIRED TEMPERATURE
7EARING PROTECTIVE GLOVES LIFT LID BY HANDLES AND USE LONG HANDLE TONGS TO PLACE FOOD ONTO
COOKING GRIDS ABOVE THE LIT BURNERS
7ITH LID OPEN OR CLOSED COOK UNTIL DESIRED INTERNAL FOOD TEMPERATURES ARE ACHIEVED
4URN GRILL h/&&v BY TURNING REGULATORCONTROL KNOB TO THE “,/#+/&&v POSITION 2EMOVE ,0 GAS
TANK PER h$ISCONNECT ,0 'AS 4ANKv INSTRUCTIONS AND PROPERLY STORE TANK
Controlling Flare-ups
Caution: Putting out grease fires by closing the lid is not possible.
s $O NOT USE WATER ON A GREASE FIRE 4HIS CAN CAUSE THE GREASE TO
splatter and could result in serious burns, bodily harm or other
damage. If a grease fire develops, turn regulator/control knob
“OFF/LOCK”.
s $O NOT LEAVE GRILL UNATTENDED WHILE PREHEATING OR BURNING OFF FOOD
residue on “HIGH”. If grill has not been cleaned, a grease fire can
occur that may damage the product.
WARNING: When cooking, fire extinguishing materials shall be readily
accessible. In the event of an oil/grease fire, do not attempt to
extinguish with water. Use type BC dry chemical fire extinguisher or
smother with dirt, sand or baking soda.
&LAREUPS ARE A PART OF COOKING MEATS ON A GRILL AND ADDS TO THE UNIQUE FLAVOR OF GRILLING
Excessive flare-ups can over cook your food and cause a dangerous situation for you
and your grill.
Important: %XCESSIVE FLAREUPS RESULT FROM THE BUILDUP OF GREASE IN THE BOTTOM OF YOUR GRILL
If excessive flare-ups occur, DO NOT POUR WATER ONTO THE FLAMES
If grease fire occurs, close the lid AND turn the regulator/control knob to h,/#+/&&v, until the
GREASE BURNS OUT 5SE CAUTION WHEN OPENING THE LID AS SUDDEN FLAREUPS MAY OCCUR
4HIS GRILL IS DESIGNED TO OPERATE WITH A ONE POUND
v OR v HIGH DISPOSABLE OZ OR OZ
PROPANE GAS TANK $/4 #YLINDER &IGURE
DO NOT ATTEMPT TO REFILL ANY ONE POUND
(16.4 oz. or 14.1 oz.) PROPANE GAS TANKS!
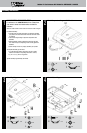
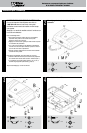
Connect LP Gas Tank
Only cylinders marked “propane” may be used.
Note 3OME LB CYLINDERS MAY FORM FROST WHEN NEAR
EMPTY
-AKE SURE THE REGULATORCONTROL KNOB IS IN THE
“,/#+/&&v POSITION &IGURE
Lubricate the threads of the regulator/control knob
WITH PETROLEUM JELLY ,INE UP THREADS ON ,0 GAS
TANK WITH REGULATORCONTROL KNOB
)NSERT AND ROTATE ,0 GAS TANK CLOCKWISE UNTIL
THEY FIT SNUGLY TOGETHER (!.$ 4)'(4%. /.,9 "E
CAREFUL NOT TO CROSS THREADS WHEN SCREWING IN
canister
&IGURE
4EST FOR LEAKS SEE h#HECKING FOR ,EAKSv SECTION
Disconnect LP Gas Tank
4URN THE REGULATORCONTROL KNOB TO THE h,/#+/&&v
POSITION &IGURE
2OTATE ,0 GAS TANK COUNTERCLOCKWISE UNTIL IT IS
LOOSE &IGURE
3TORE THE ,0 GAS TANK IN A PROPER LOCATION PER ,0
GAS TANK INSTRUCTIONS
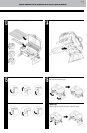
Checking for Leaks
Burner Connections
-AKE SURE THE REGULATORCONTROL KNOB IS SECURELY
FASTENED TO THE BURNER
.OTE 4HE BRASS NUT SHOULD BE TO TURN PAST
TIGHT 4HE REGULATOR WILL ROTATE EVEN WHEN THE
BRASS NUT IS TIGHTENED
)F YOUR UNIT WAS ASSEMBLED FOR YOU VISUALLY CHECK
THE CONNECTION BETWEEN THE BURNER AND REGULATOR
CONTROL KNOB &IGURE
WARNING: Failure to inspect
this connection or follow these
instructions could cause a fire or an
explosion which can cause death,
serious bodily injury or damage to
property.
)F THE BURNER AND REGULATORCONTROL KNOB DO NOT
FIT PROPERLY OR IF YOU HAVE ANY QUESTIONS PLEASE
CONTACT FOR ASSISTANCE
Tank/Gas Line Connection
-AKE OZ OF LEAK SOLUTION BY MIXING ONE PART
LIQUID DISHWASHING SOAP WITH THREE PARTS WATER
-AKE SURE REGULATORCONTROL KNOB IS IN THE h,/#+
/&&v POSITION &IGURE
3POON SEVERAL DROPS OF SOLUTION OR USE SQUIRT
BOTTLE AT ALL h8v LOCATIONS &IGURES
A )F ANY BUBBLES APPEAR REMOVE THE ,0 GAS TANK
and reconnect, making sure the connection is
SECURE
B )F YOU CONTINUE TO SEE BUBBLES AFTER SEVERAL
ATTEMPTS REMOVE THE ,0 GAS TANK PER
h$ISCONNECT ,0 'AS 4ANKv INSTRUCTIONS AND
CONTACT FOR ASSISTANCE
C )F NO BUBBLES APPEAR AFTER ONE MINUTE WIPE
AWAY SOLUTION AND PROCEED
First Use
-AKE SURE ALL LABELS PACKAGING AND PROTECTIVE
FILMS HAVE BEEN REMOVED FROM THE GRILL
2EMOVE MANUFACTURING OILS BEFORE COOKING ON THIS
grill for the first time by operating the grill for at
LEAST MINUTES ON
“
()'(v WITH THE LID CLOSED
4HIS WILL hHEAT CLEANv THE INTERNAL PARTS AND
DISSIPATE ODORS
Figure 1
1 lb
453 g
7.75 in. / 19,7 cm
3.875 in. / 9,8 cm
2.9 in. / 7,4 cm
1 lb
453 g
10.6 in. / 26,9 cm
Figure 2
LOCK
OFF
OFF
LOW
MED
HIGH
PUSH
TO
TURN ON
Figure 3a Figure 3b
Figure 4
X
Figure 5
X
X
&IGURE
Match
&IGURE
1/2"
12,7'mm
6,4'mm
0'mm
1/4"
0"
Flame
Operating Instructions