


Special offers from our partners!

Find Replacement BBQ Parts for 20,308 Models. Repair your BBQ today.
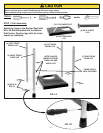
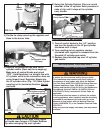
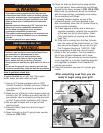
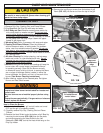
Cylinder
Retainer Clip
Cylinder
Carry Handle
To avoid pinching in next step, keep fingers
and hands near corners of Cylinder Retainer
Clip when swinging Clip over cylinder.
6) Swing the Cylinder Retainer Clip over round
shoulder of the LP cylinder. Exert pressure at
ends of clip until it stops at the cylinder
carry handle.
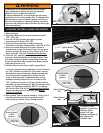
Cylinder
Retainer Clip
Rotate
Cylinder
13
FIG. 11A
FIG. 11D
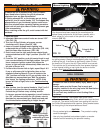
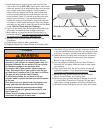
5) Remove the protective cap from the LP
cylinder nozzle. (Save cap for re-capping.)
Make sure all control Knobs are turned
“OFF”. Hold Regulator in a straight line with
LP cylinder valve so the connection does not
cross thread. Insert Regulator Nipple into
the LP cylinder valve. (Fig. 11C) Hand tighten
coupling nut in clockwise direction. Do not
use tools.
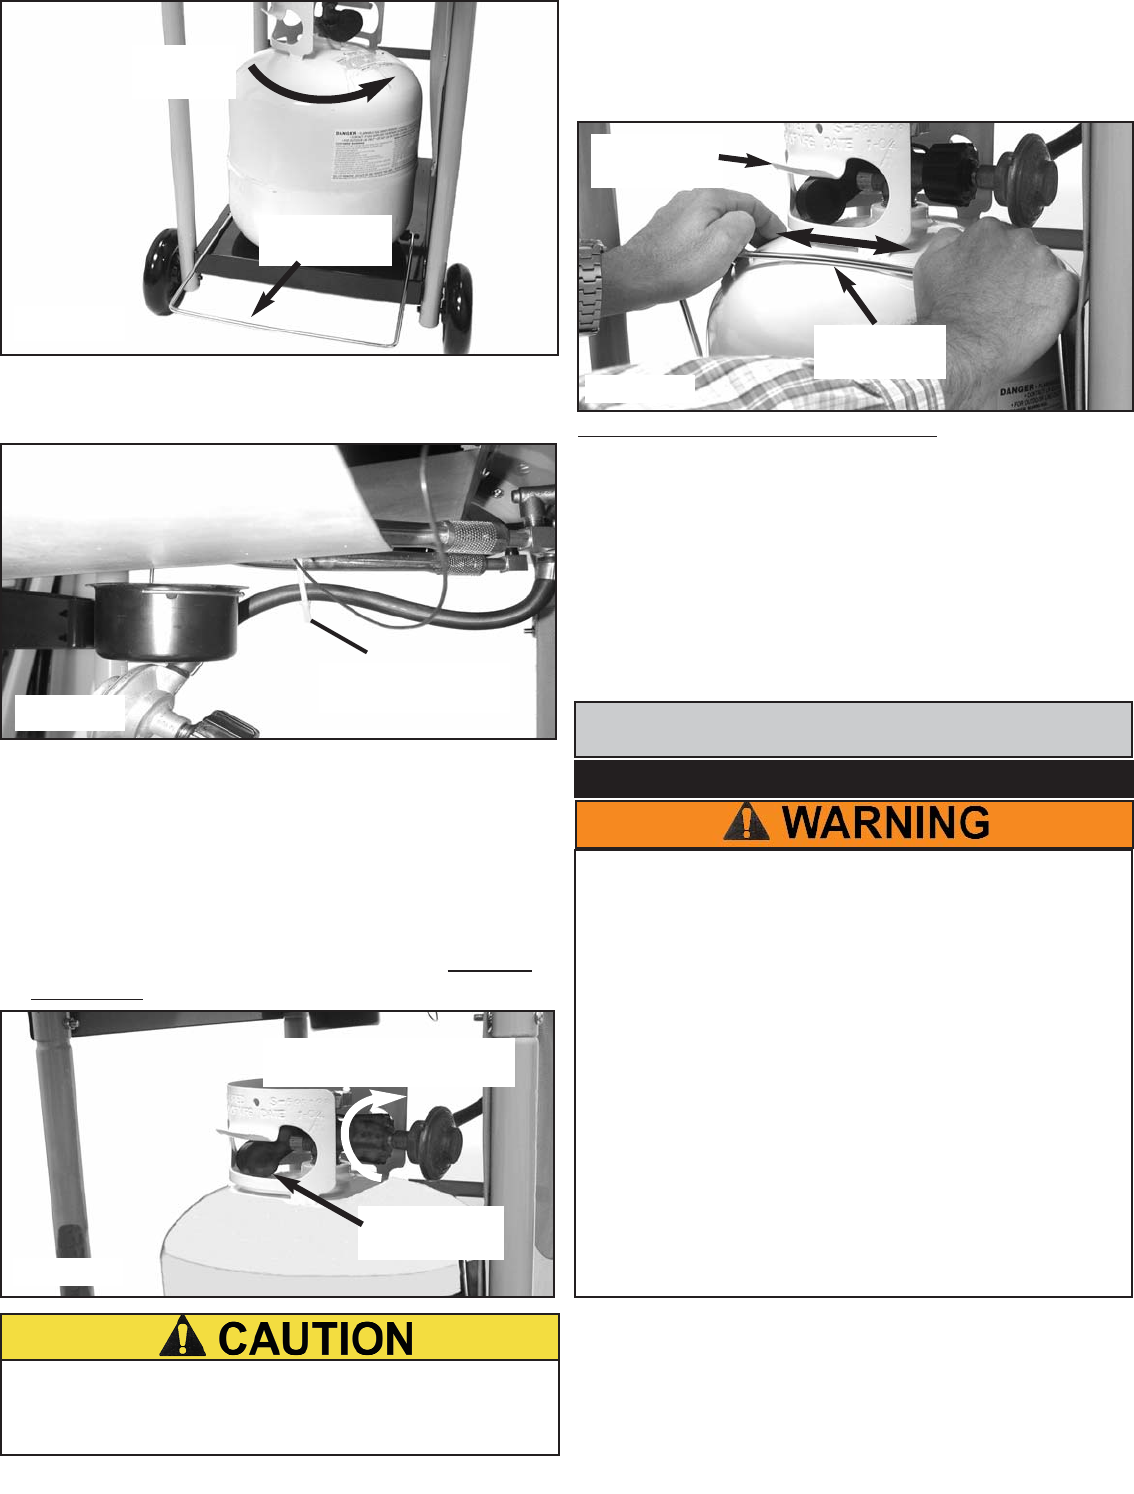
Disconnecting LP
gas cylinder:
1) Turn all control knobs to the “off” position
and turn the handle on the LP gas cylinder
clockwise until it stops.
2) Turn coupling nut on regulator counter-
clockwise until regulator is released from the
threaded LP cylinder gas nozzle.
3) Replace the protective cap over LP cylinder
gas nozzle.
To reduce the risk of serious bodily injury or death:
· This installation must conform with local codes or, in
the absence of local codes, with either the National
Fuel Gas Code, ANSI Z223.1/NFPA 54 Natural Gas and
Propane Installation Code, CSA B149.1, or Propane
Storage and Handling Code, B149.2 or the Standard for
Recreational Vehicles, ANSI A 119.2/NFPA 1192 and
CSA Z240 RV Series, recreational Vehicle Code, as
applicable.
· If an external electrical source is utilized, the outdoor
cooking appliance, when installed, must be electrically
grounded in accordance with local codes or, in the
absence of local codes, with the National Electrical
Codes, ANSI/NFPA 70, or the Canadian Electrical Code
CSA C22.1.
· Keep any electrical supply cord away from any heated
surfaces.
BEFORE USING YOUR GAS GRILL
INSTALLATION CODES
Hand tighten coupling
nut in clockwise direction
FIG. 11C
Remove
Protective Cap
FIG. 11B
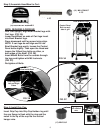
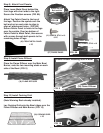
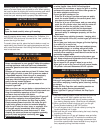
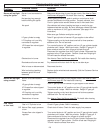
Cut regulator Hose
Tie Clamp
4) Cut the tie clamp securing the regulator and
Hose to the burner tube.