


Special offers from our partners!

Find Replacement BBQ Parts for 20,308 Models. Repair your BBQ today.

14
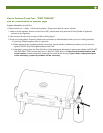
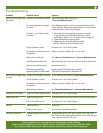
Care and Maintenance
Cleaning the Grill
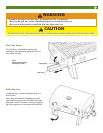
Drip Tray:
Remove the Drip Tray under the grill bowl after the grill has cooled completely. Scrape away food and fat residue from
the Drip Tray. Empty and wash the Drip Tray with hot soapy water and a cloth.
Grill Body:
Remove excess grease and/or fat with a soft plastic or wooden scraper. Do not use steel wool or other abrasive cleaners
that can scratch painted, porcelain-coated or stainless steel surfaces. It is not necessary to remove all the grease from
the body. When grill is cool, wipe it down with paper towels or soft damp cloth. On painted grills, if rust appears, clean
and buff the affected area with steel wool. Touch up bare metal with a high heat paint specified for barbeque grills.
Follow paint manufacturer’s instructions for use.
Cooking Grid/Warming Rack/Flavor Activator:
Clean the residue off with a baking soda and water solution. For stubborn stains, use a non-abrasive scouring powder.
Do not use steel wool or other abrasive cleaners that can scratch the plated, porcelain-coated or stainless steel sur-
faces. This can cause foods to stick on the Cooking Grids.
All Other Cleaning:
For further cleaning, use hot soapy water and a cloth, or nylon-bristled brush only. Do not immerse the Gas Controls in
water. (Avoid getting water in the Burner holes.)
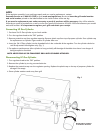
Burner:
Burning off the residue after cooking will keep the Burner clean with normal usage, provided the Burner is operat-
ing correctly. Clean the Burner annually, or whenever heavy build-up is found, to ensure that there are no signs of
blockage (debris, insects) in the Burner portholes, the primary air inlet, or the neck of the Burner. See How to Clean
the Burner.
CAUTION
!
To reduce risk of injury from laceration hazard, wear protective gloves when handling parts with sharp edges.
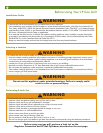
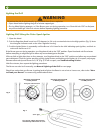
Fig. 8
Fig. 7
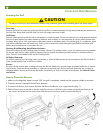
How to Clean the Burners
1. Make sure the Regulator Knob is turned “Off”, the grill is completely cooled and the propane cylinder is removed.
2. Carefully remove Cooking Grid and Flavor Activator.
3. To remove the Burner, first remove the Bolts that fasten the Burner to its support bracket (figs. 7).
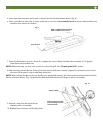
4. Slide U-Tube burner to the left so that the end of the burner is off of the valve nozzle and inside the firebowl. Lift
the venturi end of the burner up first then slide the burner out from under the electrode (Fig. 8).