Special offers from our partners!

Find Replacement BBQ Parts for 20,308 Models. Repair your BBQ today.

Buy Weber Grill Parts. It couldn't be easier. Find your Weber parts here.
8
Step 12
Check that items are secured
Note - Although the following items were factory
assembled, check that they have not loosened during
shipping and handling.
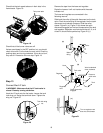
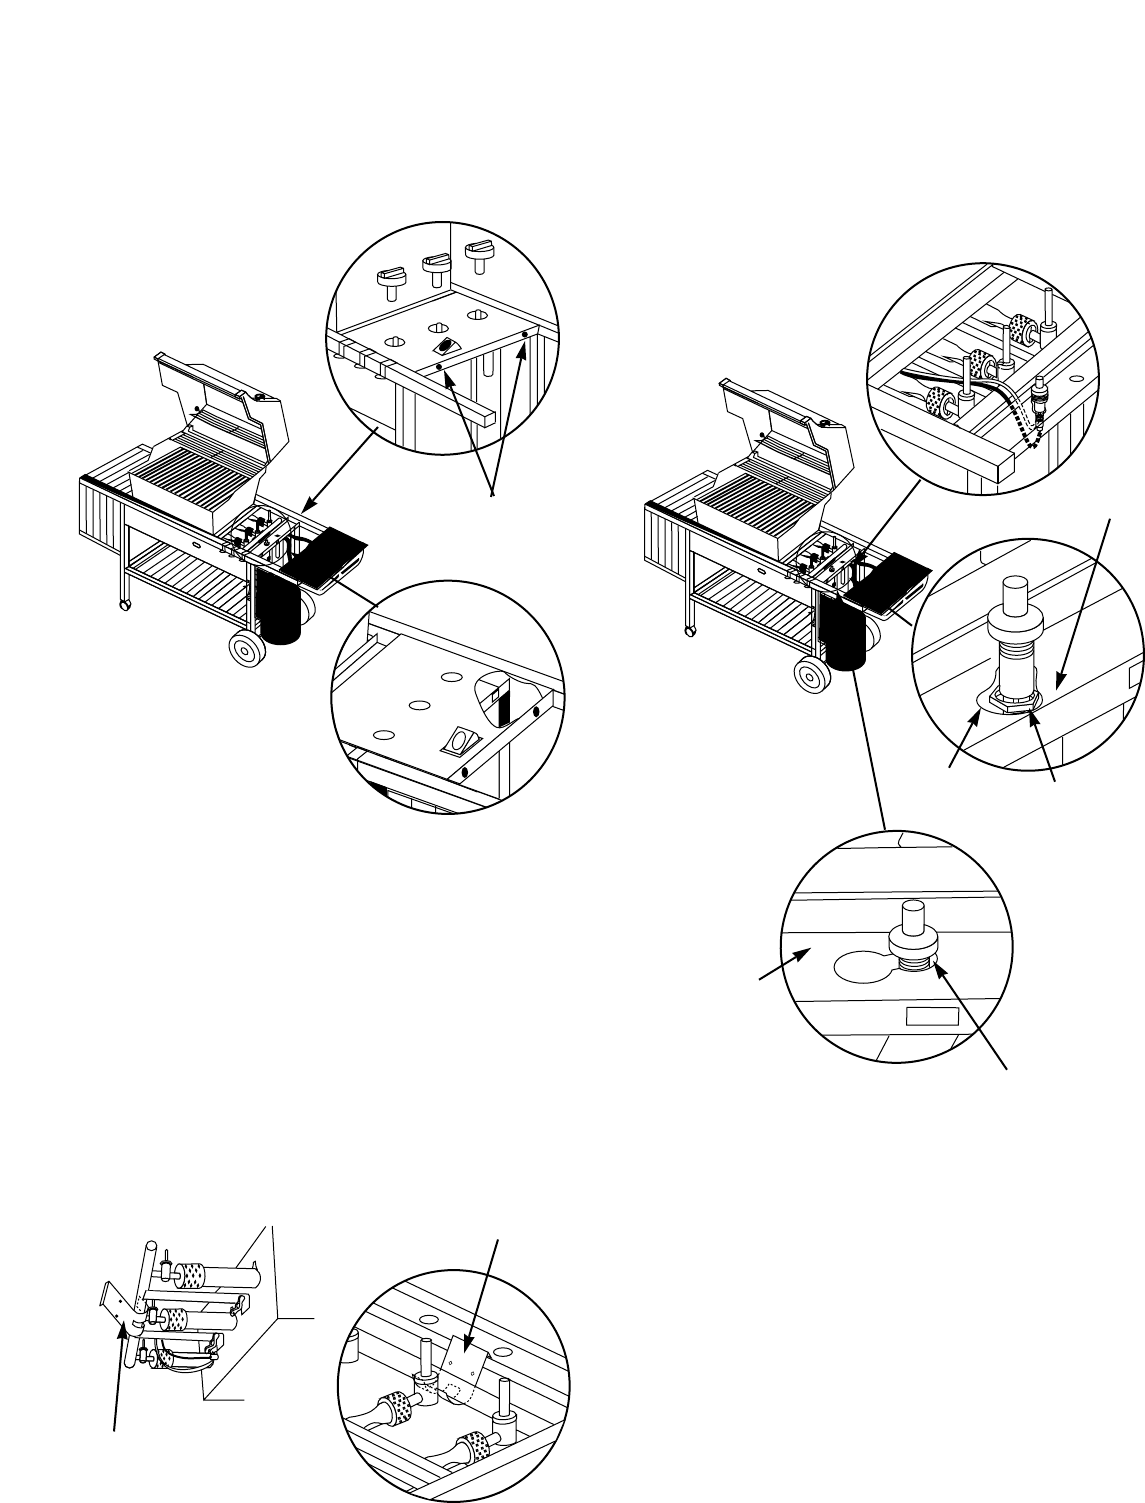
Remove the tape from the manifold bracket.
Check that the bracket is securely hooked onto the
frame brace and under the manifold at the center burner
valve. Figure 16.
If it is loose lift the bracket, manifold and cooking box
slightly as a unit and reposition onto the frame brace.
Check that the igniter is secure in the frame brace and
has not shifted out of the key hole. Figure 17.
If it is loose, slide the igniter into the rear of the key hole.
Carefully tighten the igniter lock nut with an adjustable
wrench or pliers.
Figure 16
Figure 17
Manifold Bracket
Manifold Bracket
Igniter lock nut
Keyhole in
frame brace
Small part of keyhole
in frame brace
Frame brace
Frame brace
(a)
(b)
(c)
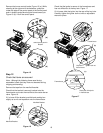
Figure 15
(a)
(b)
control panel push-in
buttons
Remove the burner control knobs. Figure 15 (a). While
standing at the right end of the barbecue, grasp the
under the edge of the control panel at the control panel
push-in buttons and slide along the frame toward you.
Figure 15 (b). Lift off the control panel.


