


Special offers from our partners!

Find Replacement BBQ Parts for 20,308 Models. Repair your BBQ today.
Buy Weber Grill Parts. It couldn't be easier. Find your Weber parts here.
17
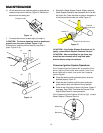
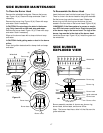
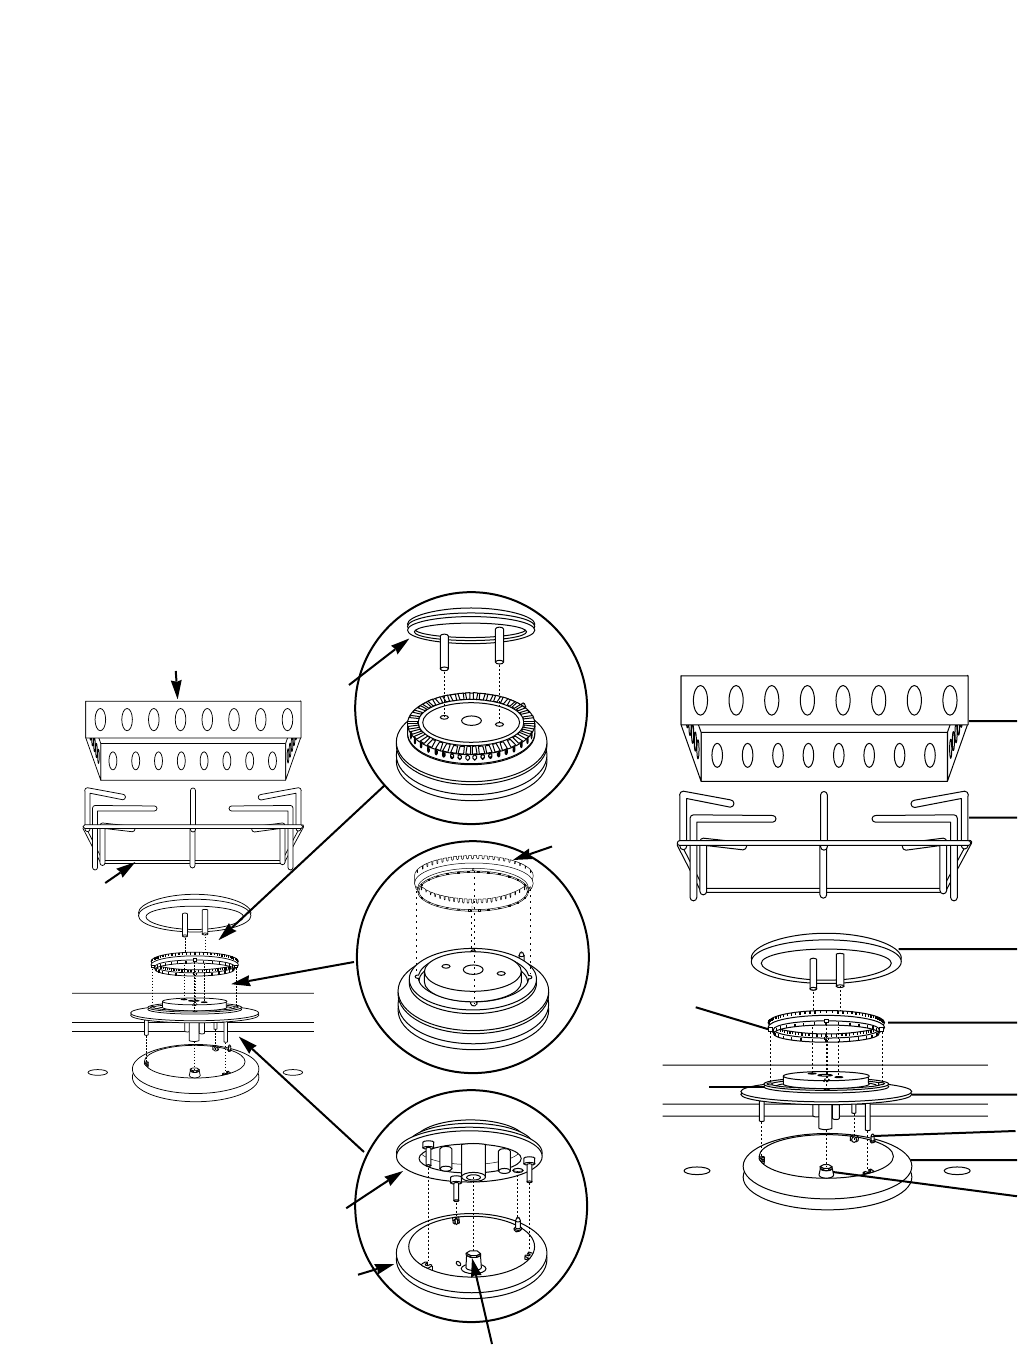
Figure 19
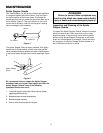
To Clean the Burner Head
Remove the windshield and grate. Remove the burner
cap. Figure 19 (a). Clean with soap and water. Soak if
necessary.
Remove the burner ring. Figure 19 (b). Clean with soap
and water. Soak if necessary.
ƽCAUTION: Do not enlarge the slots in the burner
ring. Only clean with a cloth and soap and water.
Remove the burner head. Figure 19 (c). Clean with soap
and water. Soak if necessary.
Wipe out the burner base with a damp cloth and soap
and water.
ƽCAUTION: Avoid getting water or dust in the burner
orifice.
Clean the ignition electrode with a damp cloth and soap
and water.
(a)
(c)
(b)
Burner cap
Burner ring
Burner head
Burner base
SIDE BURNER MAINTENANCE
Windshield
Grate
To Reassemble the Burner Head
Insert the burner head into the burner base. Figure 19 (c).
There is a hole in the burner head for the igniter electrode.
Set the burner ring onto the burner head. Rotate the
burner ring until the four lugs on the burner ring are
seated in the four slots on the burner head. Figure 19 (b).
ƽWARNING: If the flame pattern is uneven or erratic,
turn OFF the burner control knob. Check the position
of the burner ring to the burner head. The lugs of the
burner ring must be in the slots of the burner head.
Install the burner cap. Figure 19 (a). Install the grate and
the windshield.
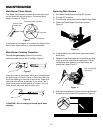
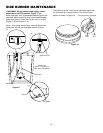
SIDE BURNER
EXPLODED VIEW
Windshield
Grate
Burner cap
Burner ring
Burner head
Burner base
Burner orifice
Igniter electrode
Burner orifice
Lug
Slot
Burner assembly consists of: burner cap, burner ring,
burner head, burner base, and burner orifice.
Note: The burner head has a hole in it that fits over the
igniter electrode.