


Special offers from our partners!

Find Replacement BBQ Parts for 20,308 Models. Repair your BBQ today.
8
9
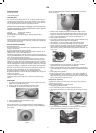
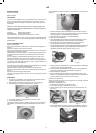
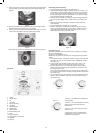
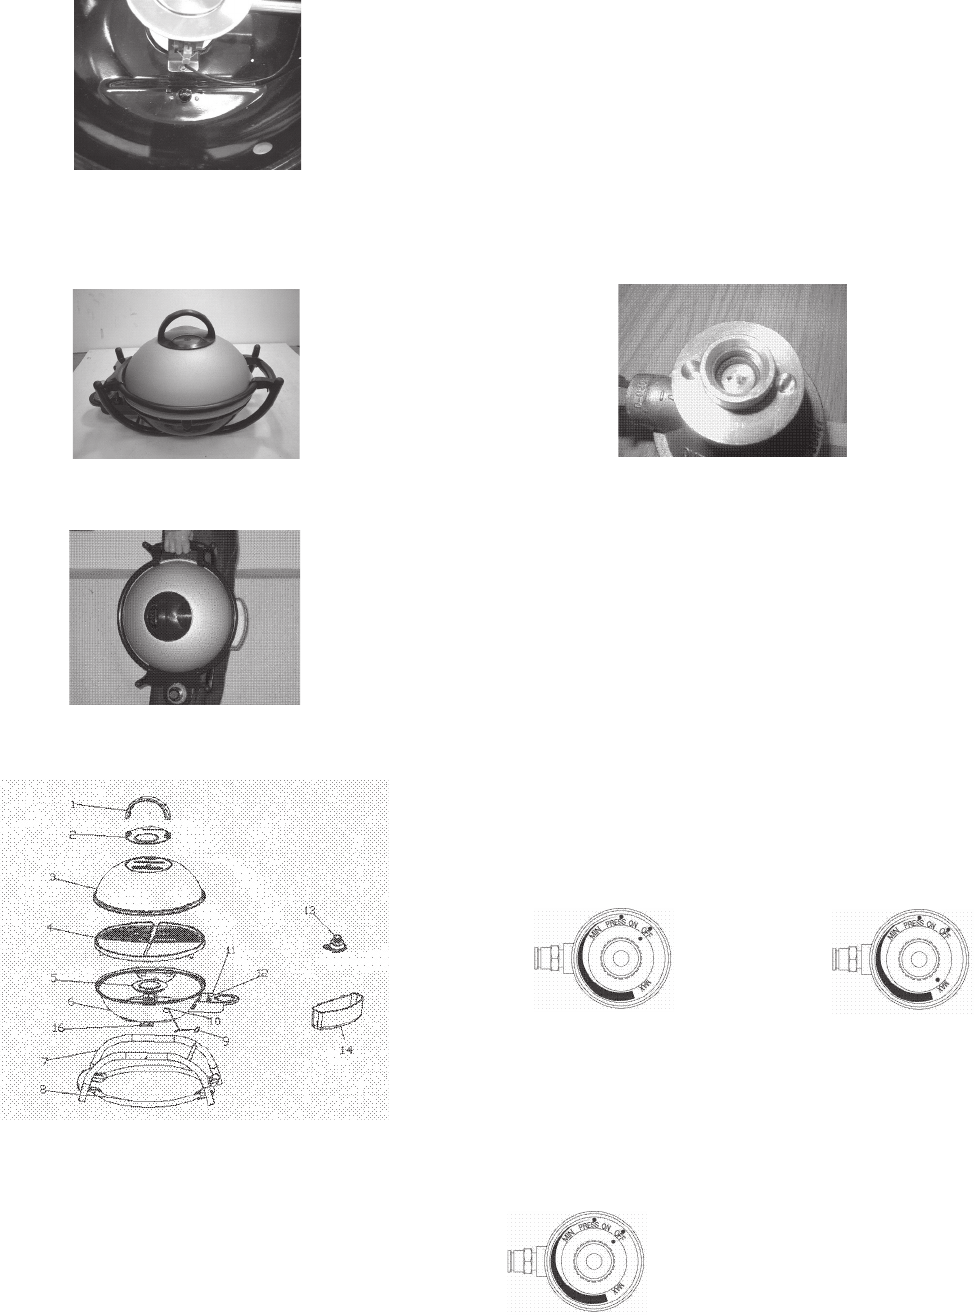
4. Place the grill base onto the support stand making sure the grill base
locating hole aligns with the locator peg on the support stand. See
Figure 8.
Figure 8
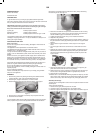
5. Place the grill plate onto the grill base, making sure to align the grill
plate drain channel with the notch in the grill base.
6. Place the lid over the grill plate and fold the retainer ring over the lid
until it snaps into position, securing all parts. See Figure 9
Figure 9
7. The grill can be carried in the storage position as shown in Figure 10.
Figure 10
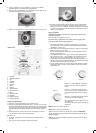
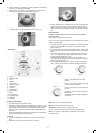
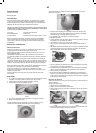
Grill Parts:
1. Handle
2. Handle Base
3. Lid
4. Grill Plate
5. Burner Assembly
6. Grill Body
7. Stand Assembly
8. Retainer Ring
9. Match Holder
10. Flame Viewing Hole
11. Panel
12. Ignitor Assembly
13. Temperature Control Knob
13. Regulator
14. Drip Tray
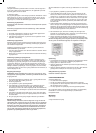
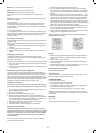
Connecting the Gas Cartridge
1. Turn the regulator Control Knob to the OFF Position.
2. Check that the regulator adaptor cartridge seal, shown in Figure 11 is
in place and is in good condition before connecting the gas cartridge.
Do not use the grill if the seal is damaged or worn. In the event that
the seal is damaged, it must be replaced with a new seal, see ‘Repla
-
cing the regulator adapter cartridge seal
3. Connect the gas cartridge by screwing it the gas cartridge clockwise
onto the regulator adapter, firmly so that it seals on the adaptor seal
Notes
• Make sure that the gas cartridge is screwed in straight and is not
cross threaded
• Only Hand tighten the cartridge, do not use tools
4. Check for gas leaks by smelling for gas and listening for a hissing
sound, which indicates that gas, may be leaking. If there is a leak it
must be detected and stopped before using the grill. Do not try to
detect leaks using a flame, use soapy water.
Figure 11
Information for use
CAUTION: accessible parts may become very hot. Keep young children
away from the appliance.
Use gloves if the appliance is hot.
Before each use, check for gas leaks, see “Connecting the gas canister”
section
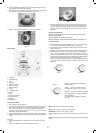
1. Turn regulator Knob to “PRESS ON” position and push the knob down
(see Figure 12), then turn the regulator knob to “MAXIMUM” position.
(see Figure 13).
2. To light, rapidly push the Ignitor button down until it ‘clicks’. Use
Flame Viewing Hole to be sure all burner ports light and stay lit.
3. If Ignitor does not work, turn the regulator Knob to “OFF” position.
Remove Grill Plate to allow the gas to dissipate or wait five minutes,
then repeat steps 1 and 2.
If the igniter fails to operate the burner can be lit using a match fitted
to the match holder. Insert the lit match through the flame viewing hole
and repeat step 1.
4. You can adjust the gas consumption by turning the Knob between the
positions “MIN” and “MAX”. The width of arrow symbolizes the gas
consumption rate.
Figur 14
The mark ”•” of PRESS ON symbolizes the
closing position.
The mark ”•” of OFF symbolizes the closing
position which the knob could not be
pushed down.
The mark ”•” on knob means the position
where you turn.
The tip point of the bow symbolizes the
smallest flame. The full range of the bow
symbolizes the large flame.
Figur 12
Figur 13