


Special offers from our partners!

Find Replacement BBQ Parts for 20,308 Models. Repair your BBQ today.
127
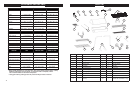
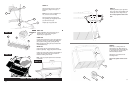
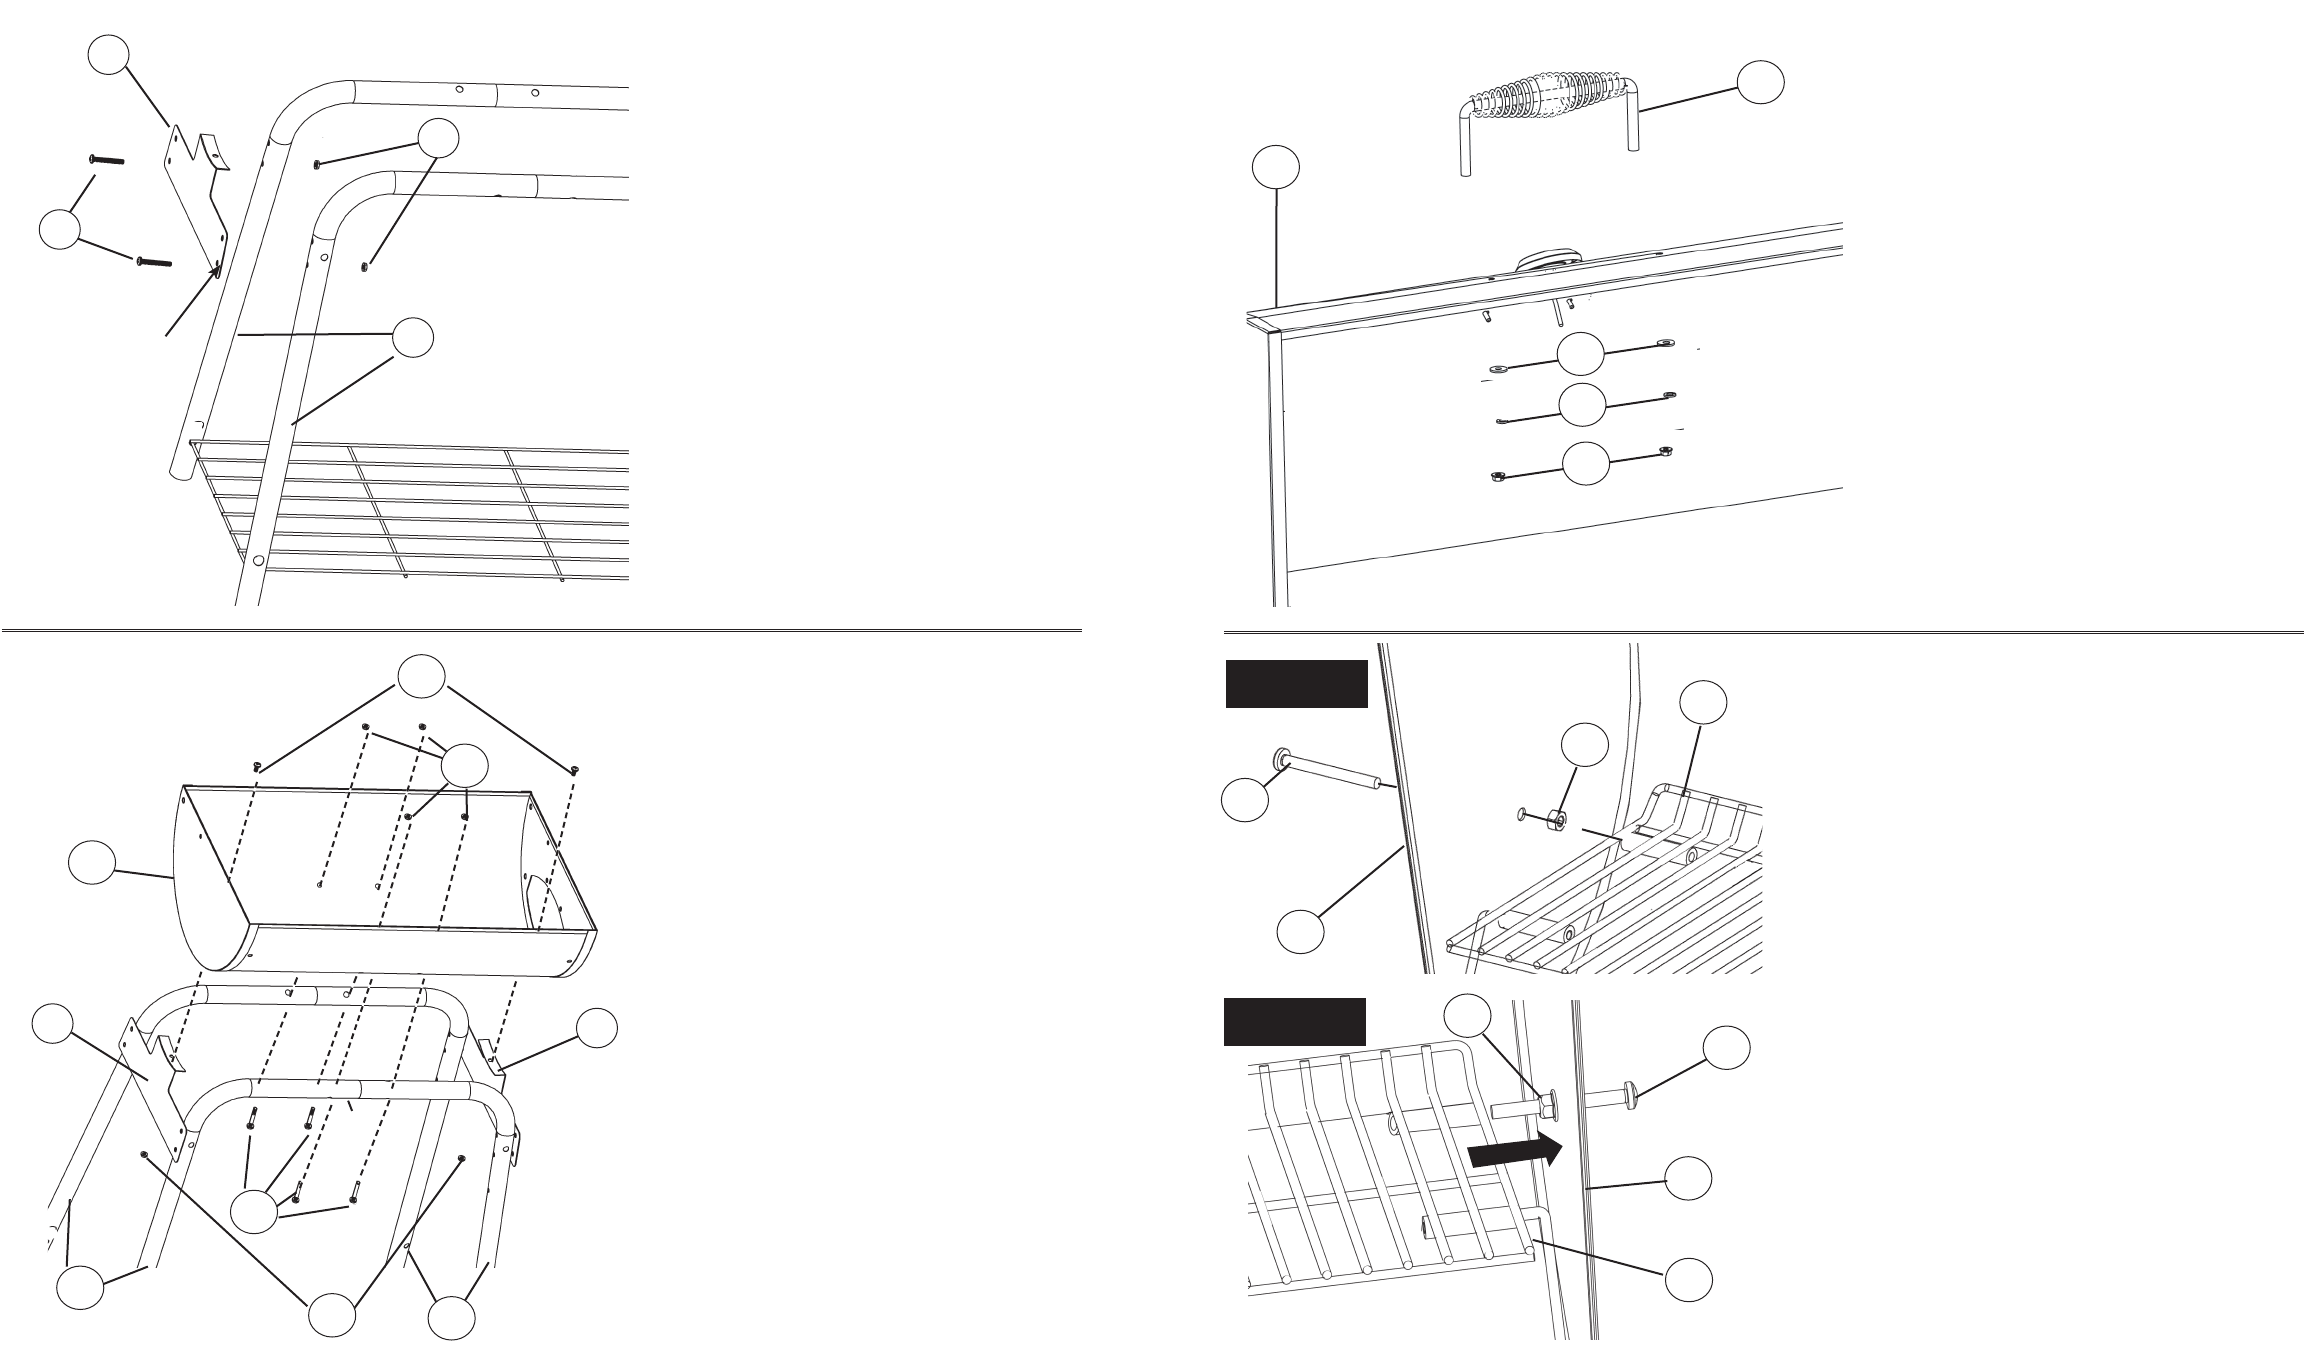
STEP 5.
Note: Attach only using
hardware shown.
Use phillips head screws (B) and hex
flange nuts (D) on second hole in leg
bracket (10) to attach left long leg (9).
Do not attach hardware to first hole.
This will be used for side shelf attach-
ment in STEP 9.
Do not fully tighten screws at this
time.
9
D
10
B
SECOND HOLE
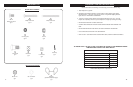
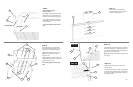
STEP 15.
Secure handle (22) to grill lid (1)
using flat washers (G) lock washers
(H) and hex flange nuts (D).
22
1
H
D
G
STEP 6.
Place grill body (2) onto assembled
legs with smoker box opening on the
same side as the right short legs (8).
Tightly secure grill body to legs using
phillips head screws (B), and hex
flange nuts (D).
Attach grill body (2) to leg brackets (10)
using phillips head screws (A), and hex
flange nuts (D) as shown.
Do not fully tighten screws at this
time.
A
D
B
10
10
8
9
D
D
5
C
1
STEP 16a.
Insert warming rack support bolt (C) into hole on
the left side of grill lid (1). Thread hex flange nut
(D) onto bolt and tighten. Slide warming rack (5)
eyelet onto end of support bolt.
Note: Warming rack should have some play and
move freely.
STEP 16a.
STEP 16b.
Slide warming rack to the far left to but up
against grill lid.
On right side of grill lid (1) hold hex flange nut in
place with hand and thread rack support bolt (C)
through nut, guiding warming rack (5) onto sup-
port bolt as shown.
C
1
D
5
STEP 16b.
2