


Special offers from our partners!

Find Replacement BBQ Parts for 20,308 Models. Repair your BBQ today.
6
13
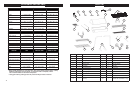
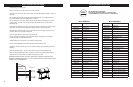
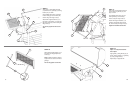
STEP 3.
Attach leg bracket (10) to right short
legs (8) as shown using phillips head
screws (B) and hex flange nuts (D).
Do not fully tighten screws at this
time.
B
8
D
10
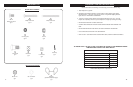
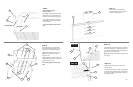
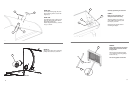
STEP 18b.
Position charcoal tray lifter (16) on side supports in
grill body as shown. Use cooking grate lifting tool
(24) to place cooking grates (3) into grill body.
Note: Cooking grate lifting tool (24) included with
model 20043011 only.
GRILL IS READY FOR USE
STEP 18a.
Position adjustable charcoal rack lifter (16) on
charcoal rack (15) as shown in Figure E.
Repeat step on opposite end.
STEP 18a.
FIGURE E
16
16
15
STEP 18c.
Insert grease clip (23) up through large hole in
bottom of grill body. Engage clip end in small hole.
Position an empty metal container (not included) on
grease clip so it rests snugly. The container is
needed to collect grease run-off.
Note: Clip may require adjustment to fit diameter
of container.
23
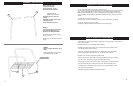
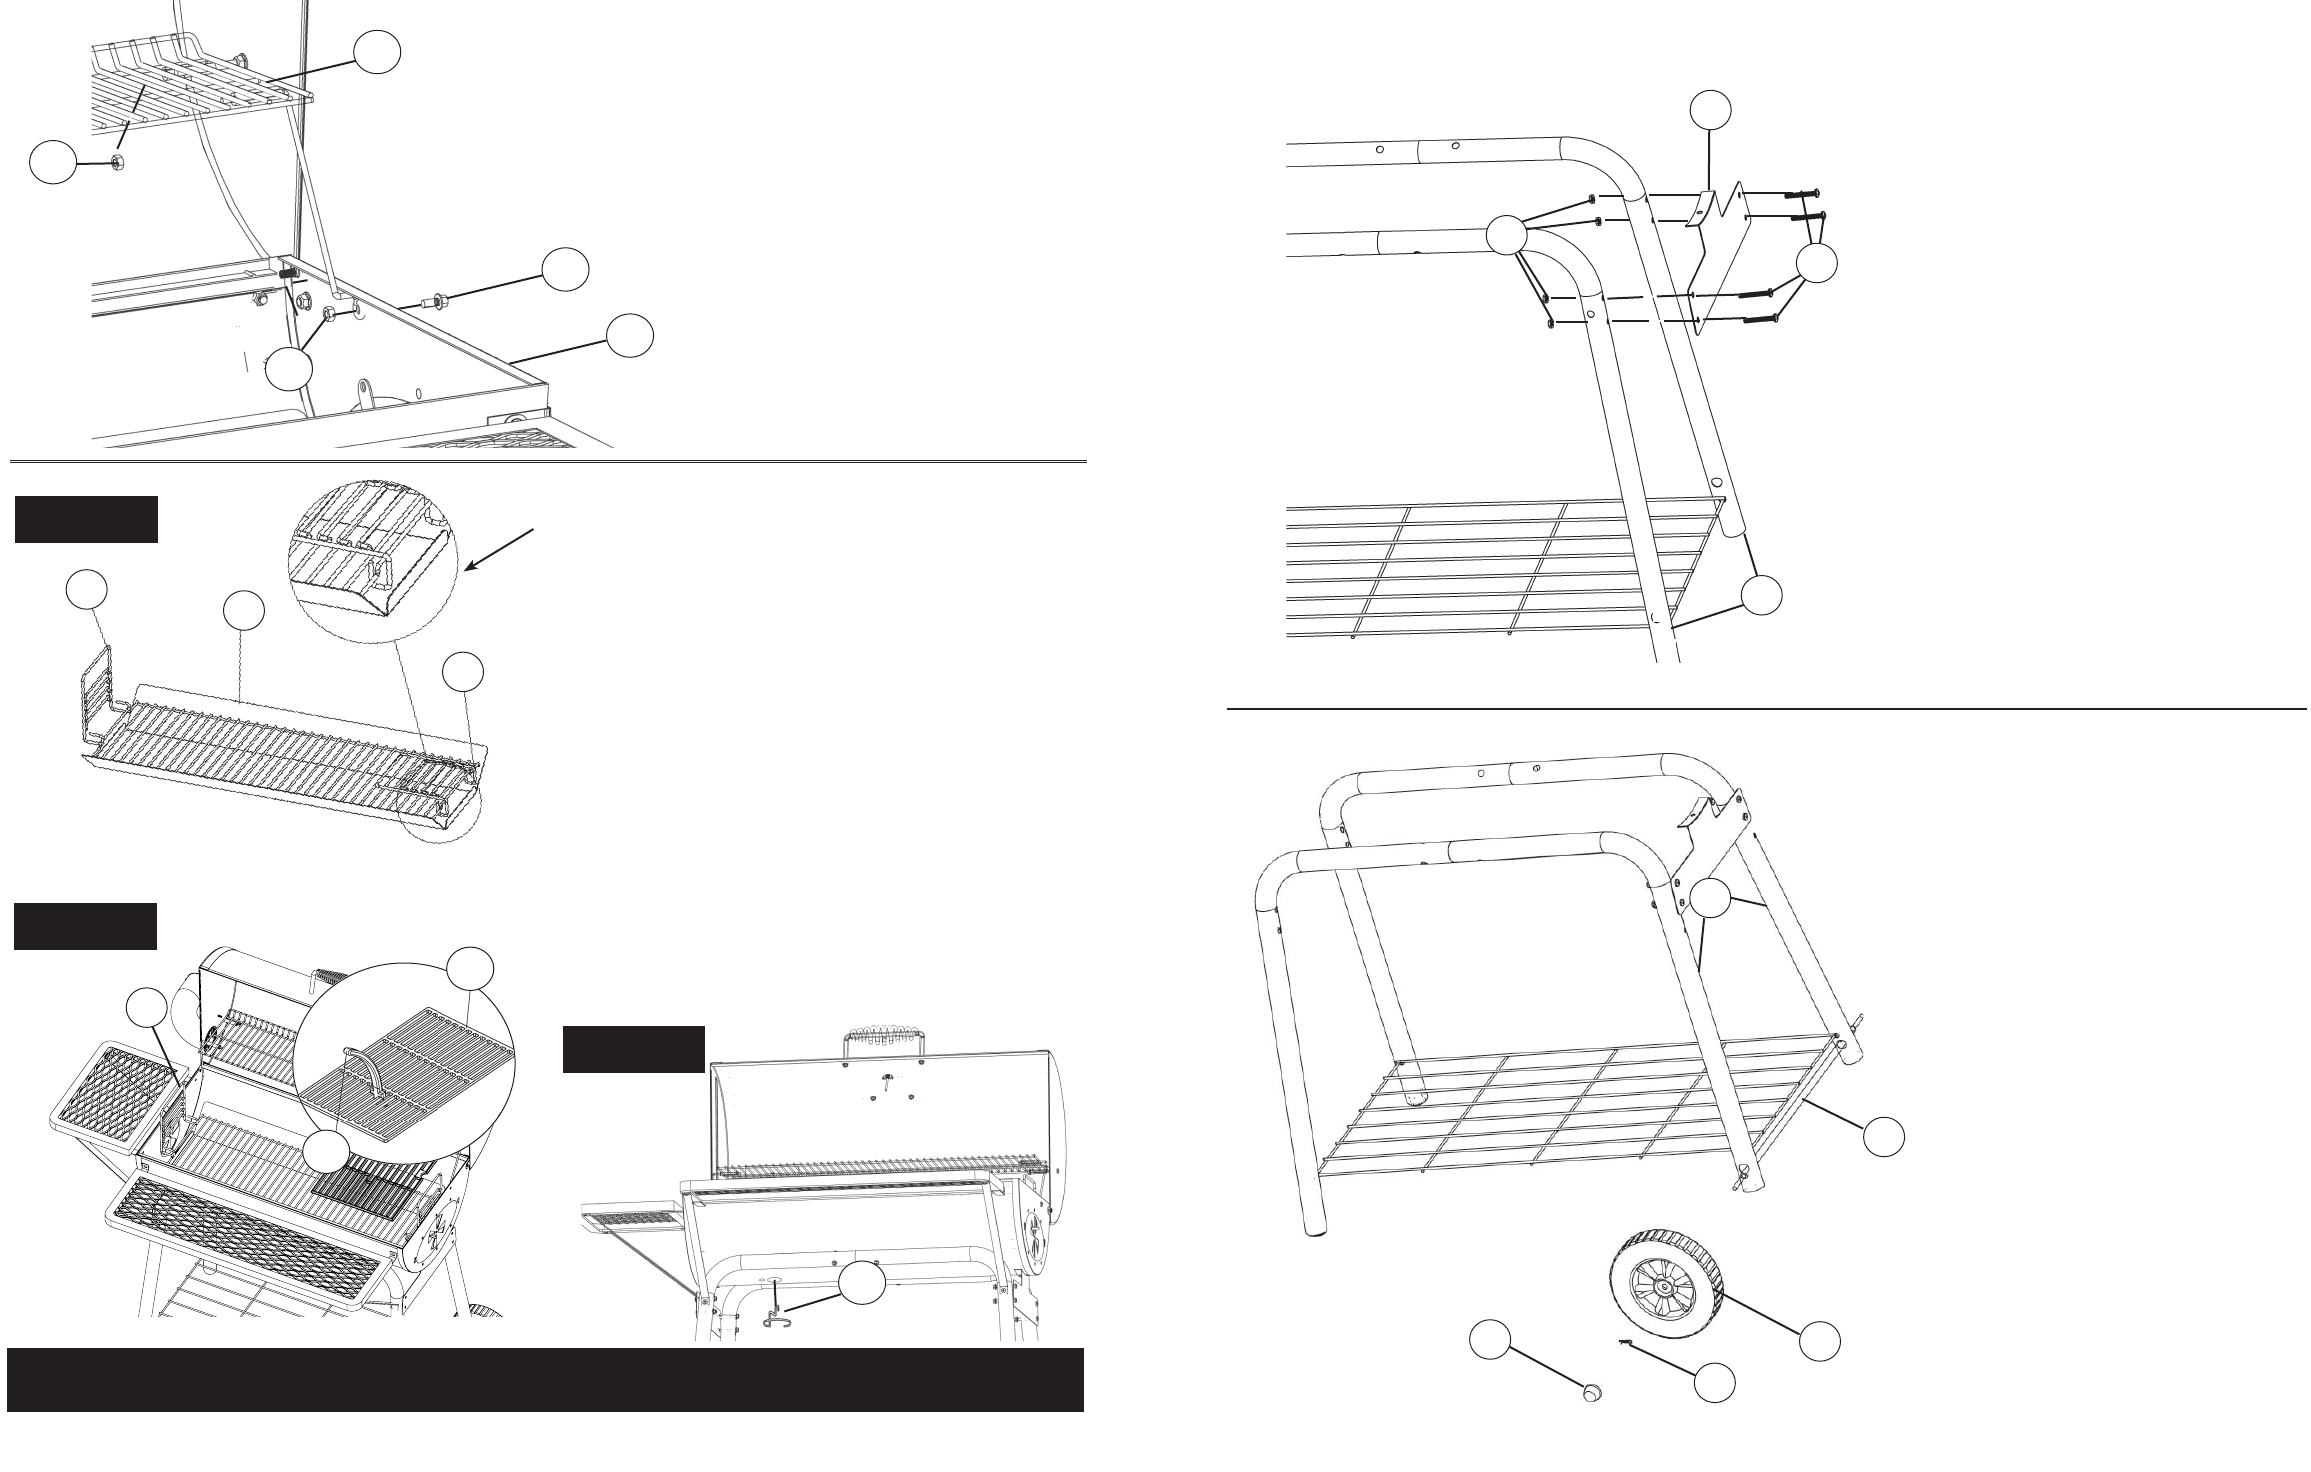
STEP 4.
Insert axle (11) through holes on
short right legs (8). Slide wheel (13)
onto axle and secure using cotter clip
(I). Snap axle cap (12) onto end of
wheel assembly as shown.
Repeat step on opposite side for
remaining wheel.
Do not fully tighten screws at this
time.
11
13
I
12
8
E
5
2
A
E
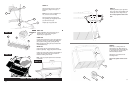
STEP 17.
Secure warming rack (5) to rack sup-
port bolt (C) using lock nut (E) as
shown.
Note: Be sure not to overtighten lock
nut, as rack is to mover freely.
Secure warming rack support arm
onto grill body (2) using
phillips screw
(A) and hex lock nut (E).
Repeat step on opposite side.
16
24
3
STEP 18b.
STEP 18c.