


Special offers from our partners!

Find Replacement BBQ Parts for 20,308 Models. Repair your BBQ today.
10
5
• Avoid bumping or impacting grill.
• Keep your hands, hair and face away from burning charcoal.
• This grill has an open flame. Be careful of loose hair and clothing during operation. They may catch fire.
• Use protective gloves when handling this grill or working with fire. Use protective gloves or long, sturdy fireplace
tools when adding wood or charcoal.
• Do not allow anyone to conduct activities around this grill during or following its use until the unit has cooled. This
grill is HOT during operation and remains HOT for a period of time following its use.
• Fatty foods like hamburgers can have excess grease that can cause flare ups. When cooking fatty foods, use
caution when opening lid and during cooking to avoid being burned.
• Be careful when removing food from grill. All surfaces are HOT and may cause burns. Use protective gloves or
long, sturdy cooking tools.
• Never use glass, plastic or ceramic cookware on this grill.
• The use of alcohol, prescription or non-prescription drugs may impair the user’s ability to properly assemble or
safely operate this grill.
• Grill lid and base are HOT while in use and during cooling process.
• Do not remove ash can while ashes and charcoal are HOT.
• Air dampers are HOT while the grill is in use and during cooling; wear protective gloves when adjusting.
• Never overfill charcoal grate. This can cause serious injury as well as damage the unit.
• Only use charcoal lighting fluid, never use gasoline, alcohol or other highly volatile fluids to ignite the charcoal.
These fluids can explode causing injury or death.
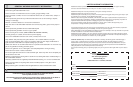
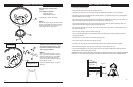
REMINDER: NEVER OPERATE THIS GRILL UNDER ANY OVERHEAD CONSTRUCTION. MAINTAIN A MINIMUM
DISTANCE OF 10 FT (3M) FROM OVERHEAD CONSTRUCTION, WALLS OR RAILS. SEE DIAGRAM BELOW.
Wall
Rails
Overhead
Construction
10 ft (3m)
10 ft (3m)
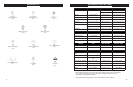
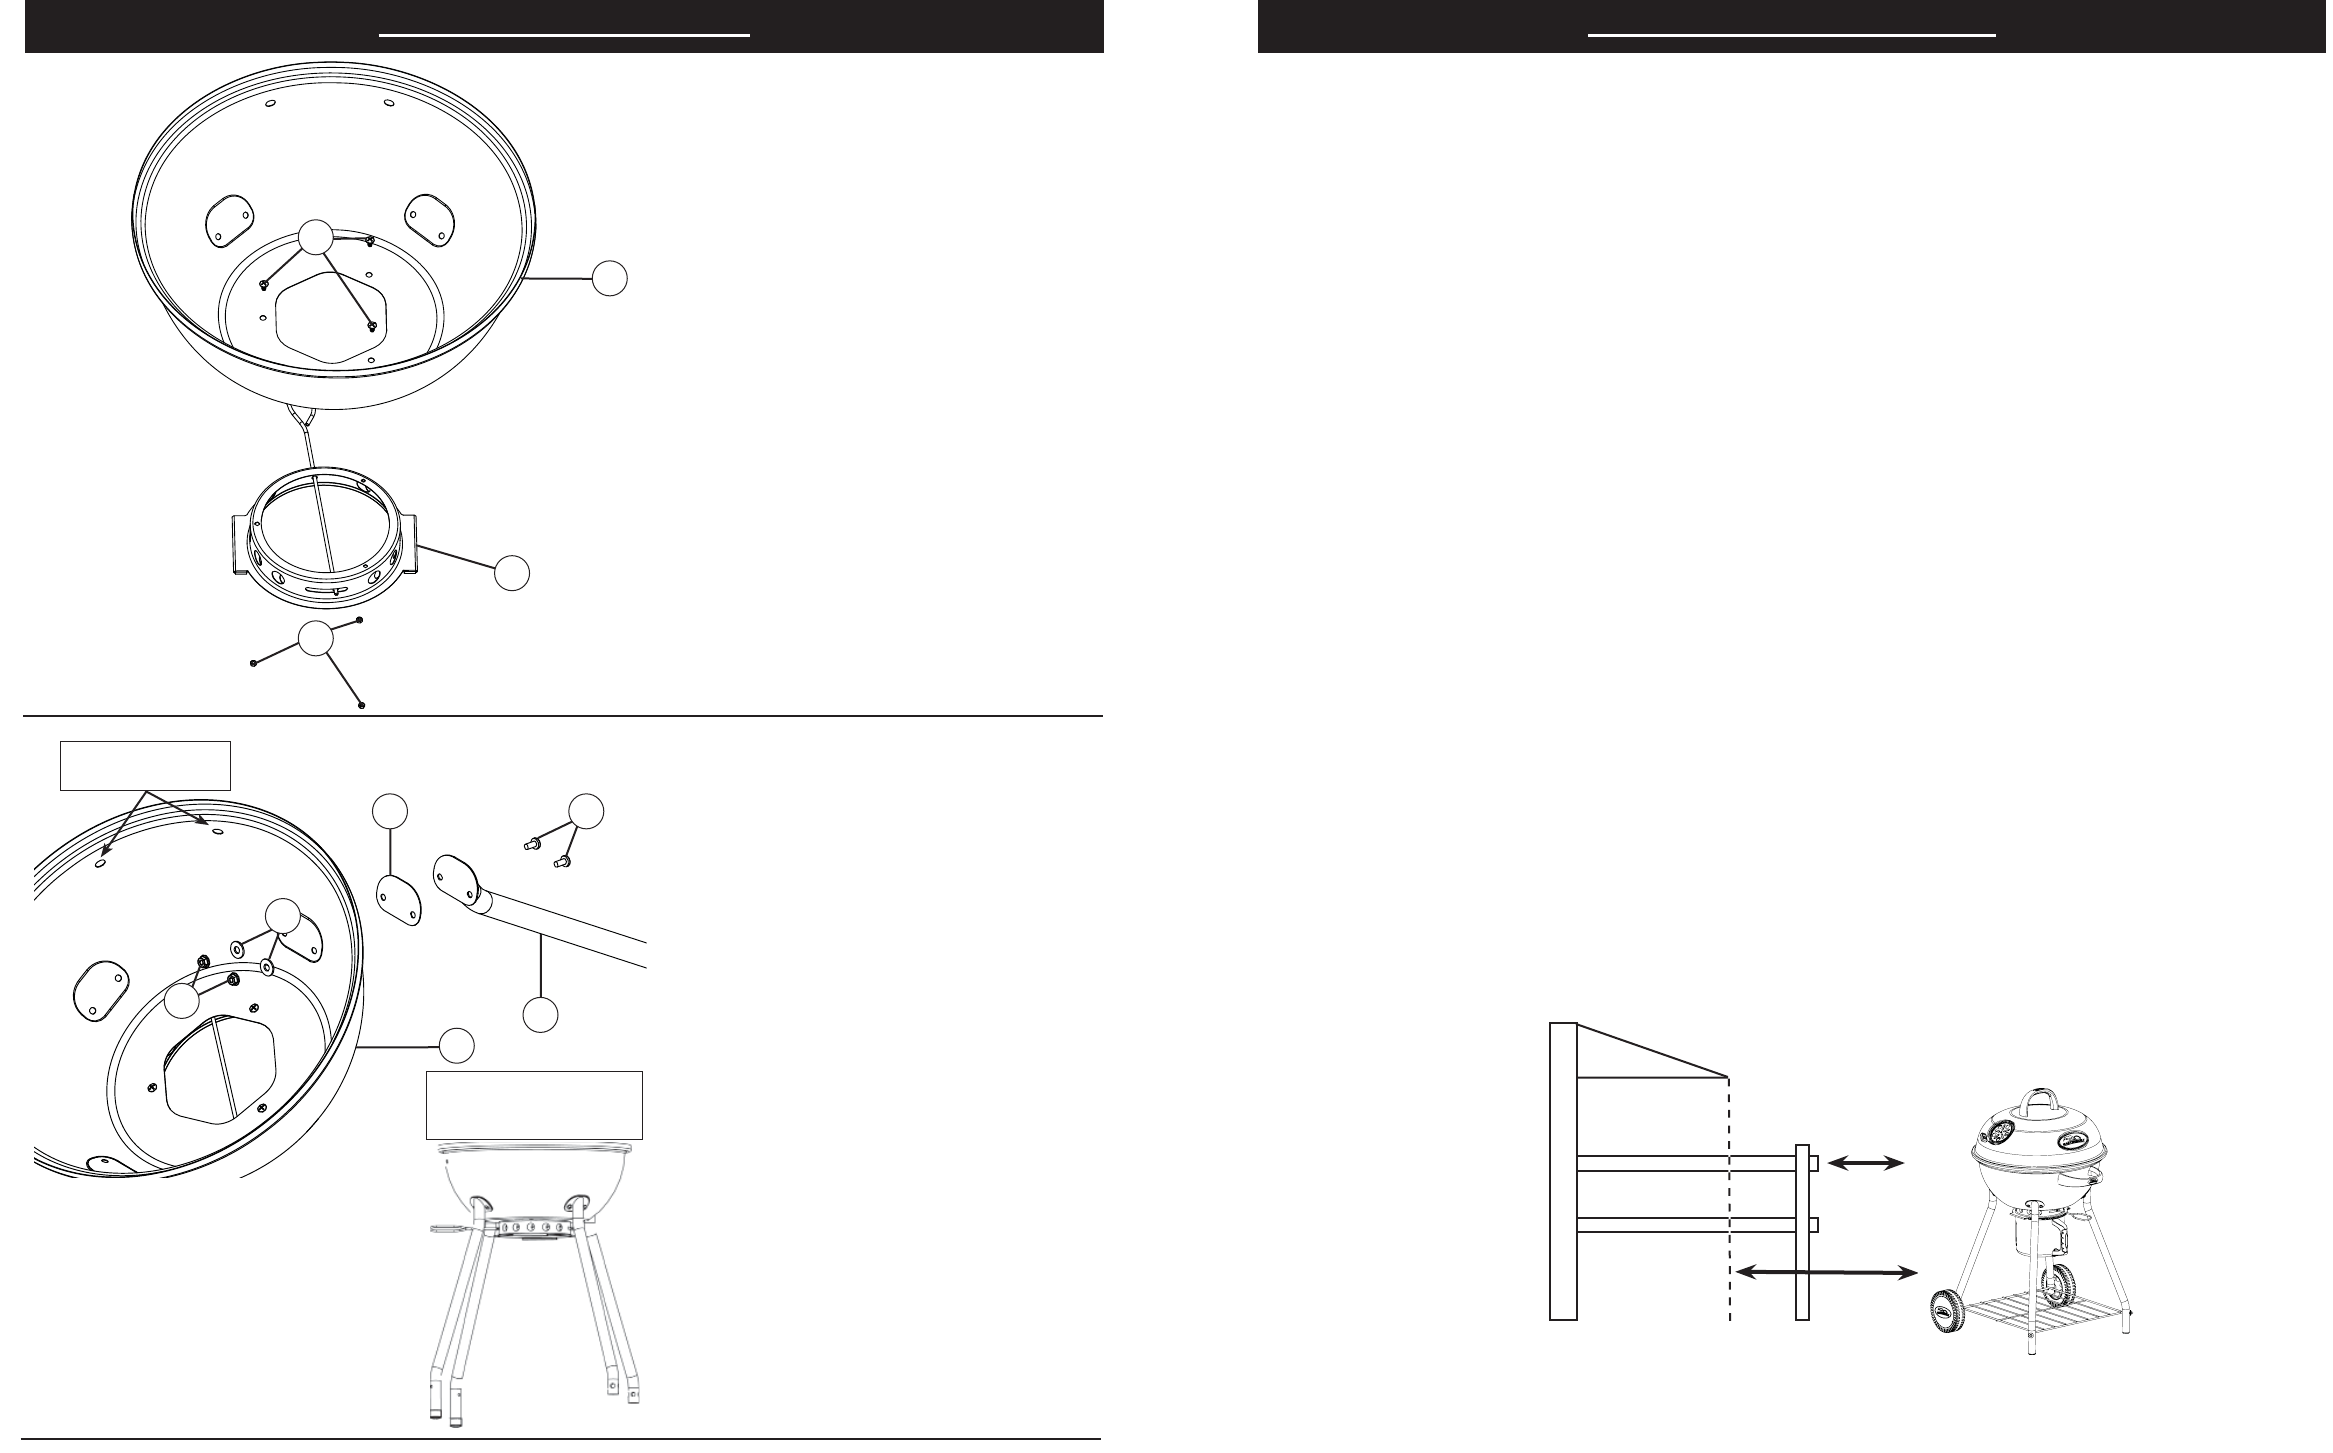
Assistance may be required for this step.
Do not tighten screws all the way. Legs
may need to be adjusted when storage
shelf is attached in STEP 3.
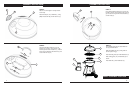
STEP 2.
Place heat insulation washers (I) on long
legs (4) as shown. Align holes in long legs
with holes in kettle base (2). Insert phillips
head screws (A) through holes on legs.
Secure with aluminum flat washers (G) and
serrated flange nuts (D).
Repeat step with short legs on rear side of
kettle base.
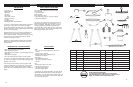
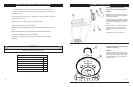
Tools needed for assembly:
Adjustable Wrench
Phillips Head Screwdriver
Before assembly read instructions
carefully.
Assemble grill on a clean, flat surface.
STEP 1.
Align ash can spacer ring (7) with holes in kettle
base (2). Insert phillips head screw (B) through
kettle base (2) into ash can spacer ring (7) as
shown. Secure with hex lock nut (C).
B
C
7
2
2
Front of kettle base has
two holes for base handle
I
A
GRILL OPERATION CAUTIONS
ASSEMBLY INSTRUCTIONS
When all four legs are attached,
two long legs will be in front with
two short legs in rear.
G
D
4