


Special offers from our partners!

Find Replacement BBQ Parts for 20,308 Models. Repair your BBQ today.
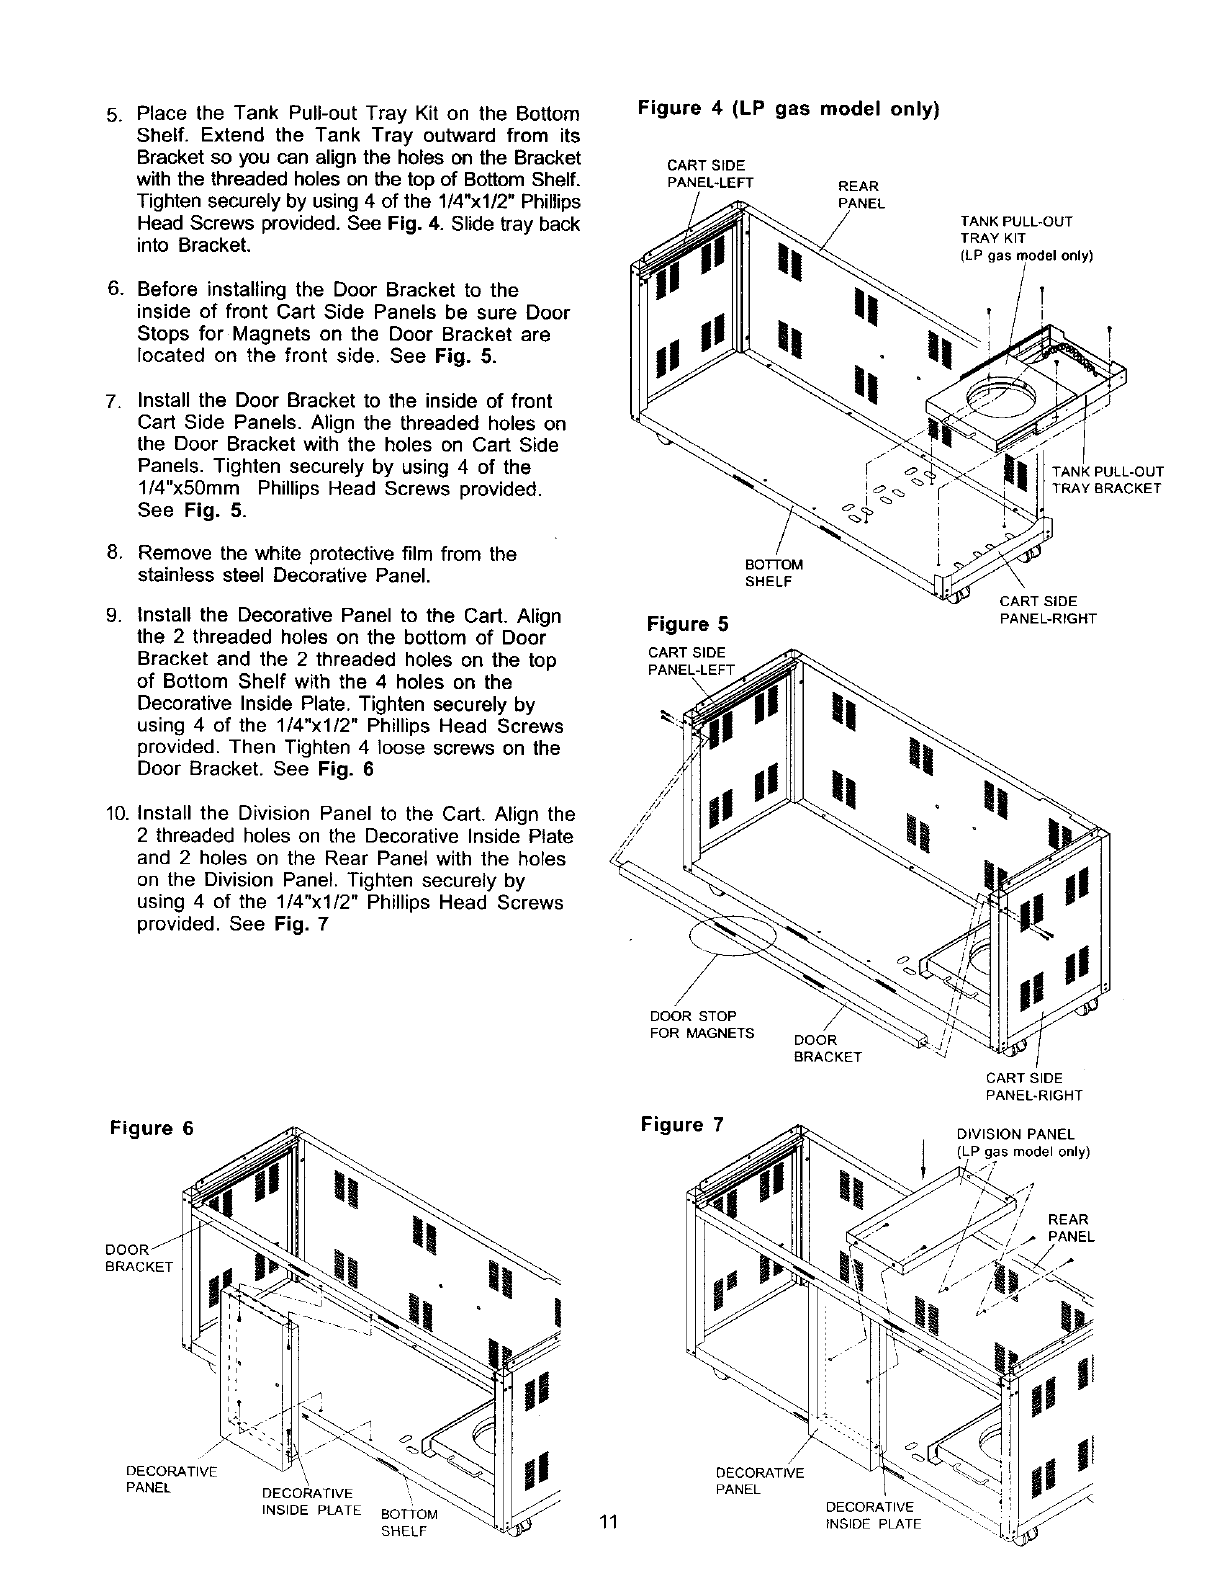
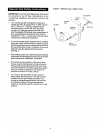
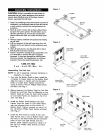
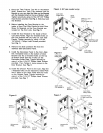
5. Place the Tank Pull-out Tray Kit on the Bottom
Shelf. Extend the Tank Tray outward from its
Bracket so you can align the holes on the Bracket
with the threaded holes on the top of Bottom Shelf.
Tighten securely by using 4 of the 1/4"x1/2" Phillips
Head Screws provided. See Fig. 4. Slide tray back
into Bracket.
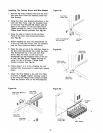
6. Before installing the Door Bracket to the
inside of front Cart Side Panels be sure Door
Stops for Magnets on the Door Bracket are
located on the front side. See Fig. 5.
7.
Install the Door Bracket to the inside of front
Cart Side Panels. Align the threaded holes on
the Door Bracket with the holes on Cart Side
Panels. Tighten securely by using 4 of the
l/4"x50mm Phillips Head Screws provided.
See Fig. 5.
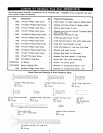
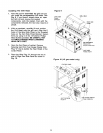
8. Remove the white protective film from the
stainless steel Decorative Panel.
g.
Install the Decorative Panel to the Cart. Align
the 2 threaded holes on the bottom of Door
Bracket and the 2 threaded holes on the top
of Bottom Shelf with the 4 holes on the
Decorative Inside Plate. Tighten securely by
using 4 of the 1/4"xl/2" Phillips Head Screws
provided. Then Tighten 4 loose screws on the
Door Bracket. See Fig. 6
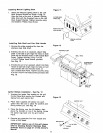
10. Install the Division Panel to the Cart. Align the
2 threaded holes on the Decorative Inside Plate
and 2 holes on the Rear Panel with the holes
on the Division Panel. Tighten securely by
using 4 of the 1/4"x1/2" Phillips Head Screws
provided. See Fig. 7
Figure 6
BRACKET
J_
DECORATIVE _\
PANEL DECORATIVE
INSIDE PLATE
BOTTOM
SHELF
Figure 4 (LP gas model only)
CART SIDE
PANEL*LEFT REAR
PANEL
BOTi-OM
SHELF
Figure 5
CART SIDE
PANEL-LEFT
lY
12
DOOR STOP j
FOR MAGNETS DOOR
BRACKET
Figure 7
11
DECORATIVE
PANEL
DECORATIVE
INSIDE PLATE
TANK PULL-OUT
TRAY KIT
(LP gas model only)
TANK PULL-OUT
TRAY BRACKET
CART SIDE
PANEL-RIGHT
!
CART SIDE
PANEL-RIGHT
DIVISION PANEL
gas model only)
REAR
PANEL