


Special offers from our partners!

Find Replacement BBQ Parts for 20,308 Models. Repair your BBQ today.

9
This will allow the orifices to disengage
from the burner venturi.
6. Unscrew each gas valve and re-install
new natural gas valves and orifices.
Use teflon tape or pipe dope when
installing valves and orifices.
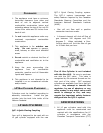
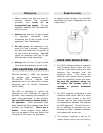
GAS LINE
Remove the 3/8” flare fitting that attaches
the propane hose from the fitting block
inside of the pedestal and replace with an
approved 10’ neopream hose.
Make sure when the new gas valves are
installed that they have a bright silver
face near the stem of the gas valve. This
identifies them as Natural Gas valves.
REMEMBER TO LEAK CHECK ALL
FITTINGS. AFTER ALL OF THE
CONVERSION IS COMPLETED, LEAK
CHECK ALL FITTINGS AND TEST FIRE
ALL BURNERS TO ENSURE PROPER,
SAFE OPERATION.
MAINTENANCE
Burner Inspection
We recommend that the gas burners be
inspected and cleaned once a year.
Burner Removal for Cleaning
1. Ensure the gas supply is off and grill is
cool.
2. Remove cooking grates and flame
tamers.
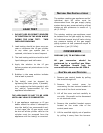
3. Remove burner mounting screw
located at the very back of burner near
the rear of the firebox.
4. Remove burners by lifting up and out
of firebox on an angle. Repeat for all
burners.
5. Clean the outside of the burners with a
wire brush and make sure all gas ports
are clear. Use a straight coat hanger
to clear any obstructions.
6. Use a flashlight to look into the venturi
end of the burner to check for
blockages. If necessary, use a straight
coat hanger to clear any obstructions.
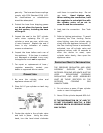
7. Inspect and clean the venturi end of
the burner by removing the venturi set
screw on the end of the burner and
removing the venturi shutter. Once
removed, make sure the burner is
thoroughly cleaned and the venturi
shutter is re-installed with an opening
of 1/8” for Natural Gas and ¼” for
Propane.
8. Re-install and secure burner.
9. Re-mount flame tamers and cooking
grids.
10. Light each burner to ensure they are
operating correctly.
Note: When installing burners, it is very
important to center the burner over the
gas orifice. You should look under the
main control panel with a flashlight once
installed to make sure they are in the
proper position. Failure to clean and
install burners correctly could result in fire
or explosion.
HELPFUL HINTS FOR CLEANING THE
COOKING GRILLS
Do not clean the cooking surface once the
grill has cooled down. Allow cooking
residues to remain on the surface until the
next time you grill, then do a pre-burn for
10 minutes prior to grilling. Remove