


Special offers from our partners!

Find Replacement BBQ Parts for 20,308 Models. Repair your BBQ today.
10 Heat & Glo LifeStyle Collection • Patio Campfi re • Rev B • 08/08
6
6
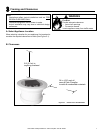
Appliance Setup
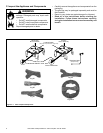
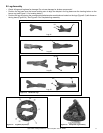
A. Burner Assembly
All Models
• Remove the burner assembly and check for damage. Do
not use damaged components.
• Position the burner assembly in the desired location.
This location must be adjacent to the gas supply line.
You must have easy access to the gas valve control
knob after it is installed and connected to the gas supply
because the ON/OFF gas valve is used to turn the burner
on and off.
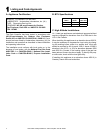
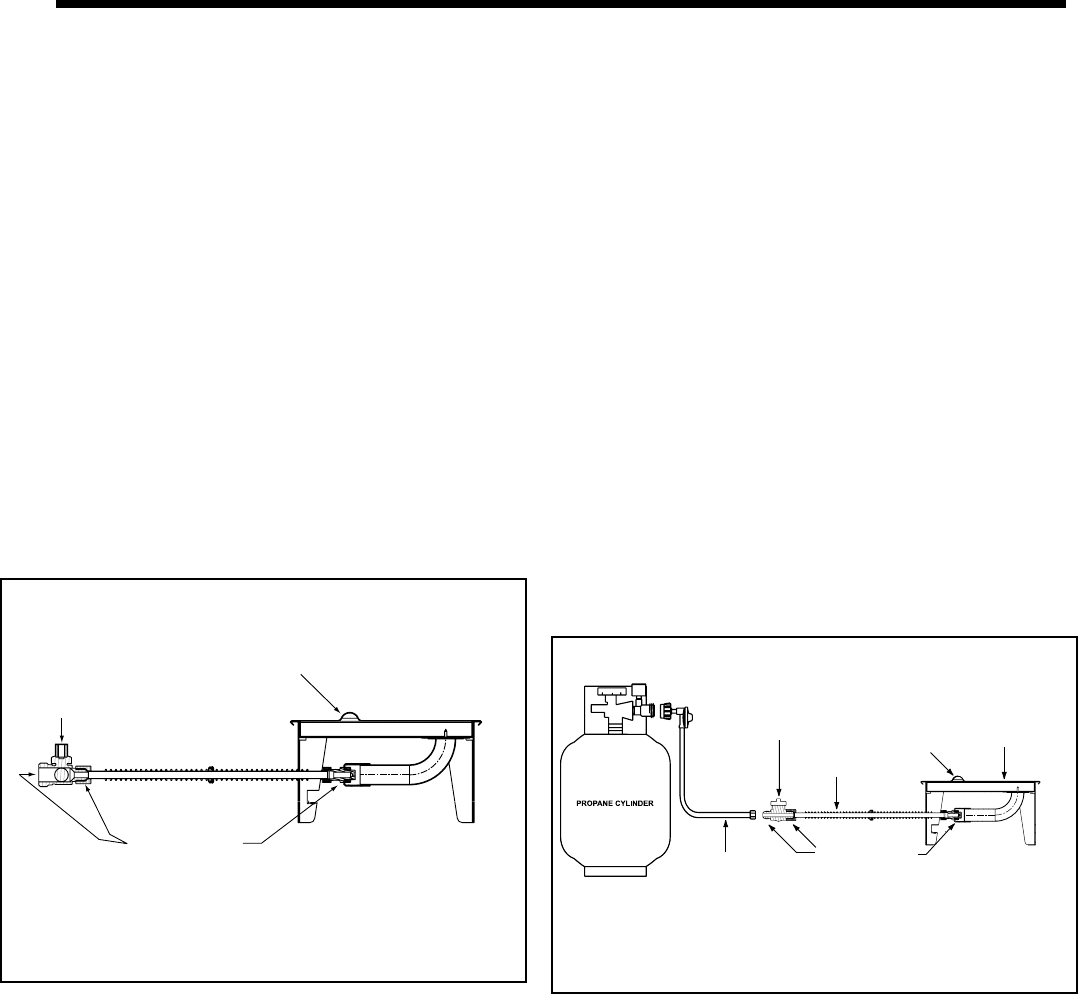
Natural Gas Models
• Connect the ON/OFF gas valve of the appliance to the
incoming gas supply line. See Figure 6.1. Make certain
all gas connections are tight.
• Turn the ON/OFF valve at the appliance slowly to the “ON”
position. All connections must be tightened and checked
for leaks with a commercially available, non-corrosive leak
check solution. Be sure to rinse off the solution when done
leak testing.
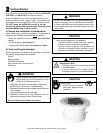
LP Gas Models
• Make sure the tank valve is turned completely off
(clockwise).
• Ensure the tank valve has the proper external mating
threads (tank valve marked “USE WITH TYPE 1”).
• Inspect the hose shipped with the appliance for any
damage. Do not use if there is evidence of damage.
• Connect the end of the hose onto the ON/OFF gas valve
of the appliance. Make sure it is secured tightly.
• Connect the regulator assembly to the tank valve. Hand
tighten only (clockwise). Do not use a wrench to tighten!
Use of a wrench may damage the quick closing nut and
result in a hazardous condition. See Figure 6.2.
• Position the hose out of pathways where people might
trip over it or in areas where the hose might be subject to
accidental damage.
• Open the tank valve fully (counterclockwise). Turn the ON/
OFF valve slowly to the “ON” position. All connections must
be tightened and checked for leaks with a commercially
available, non-corrosive leak check solution. Be sure to
rinse off the solution when done leak testing. If a leak is
found, turn the tank valve off and do not use the appliance
until repairs can be made.
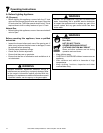
Locating
Button
Check fittings
for leaks
"ON/OFF"
Valve
Figure 6.1 Natural Gas Burner Assembly
Locating
Button
"ON/OFF"
Gas Valve
Flex
Connector
Check fittings
for leaks
Propane
Regulator Hose
Burner
Assembly
Figure 6.2 Propane Gas Burner Assembly