


Special offers from our partners!

Find Replacement BBQ Parts for 20,308 Models. Repair your BBQ today.
7
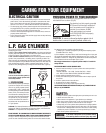
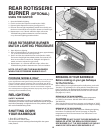
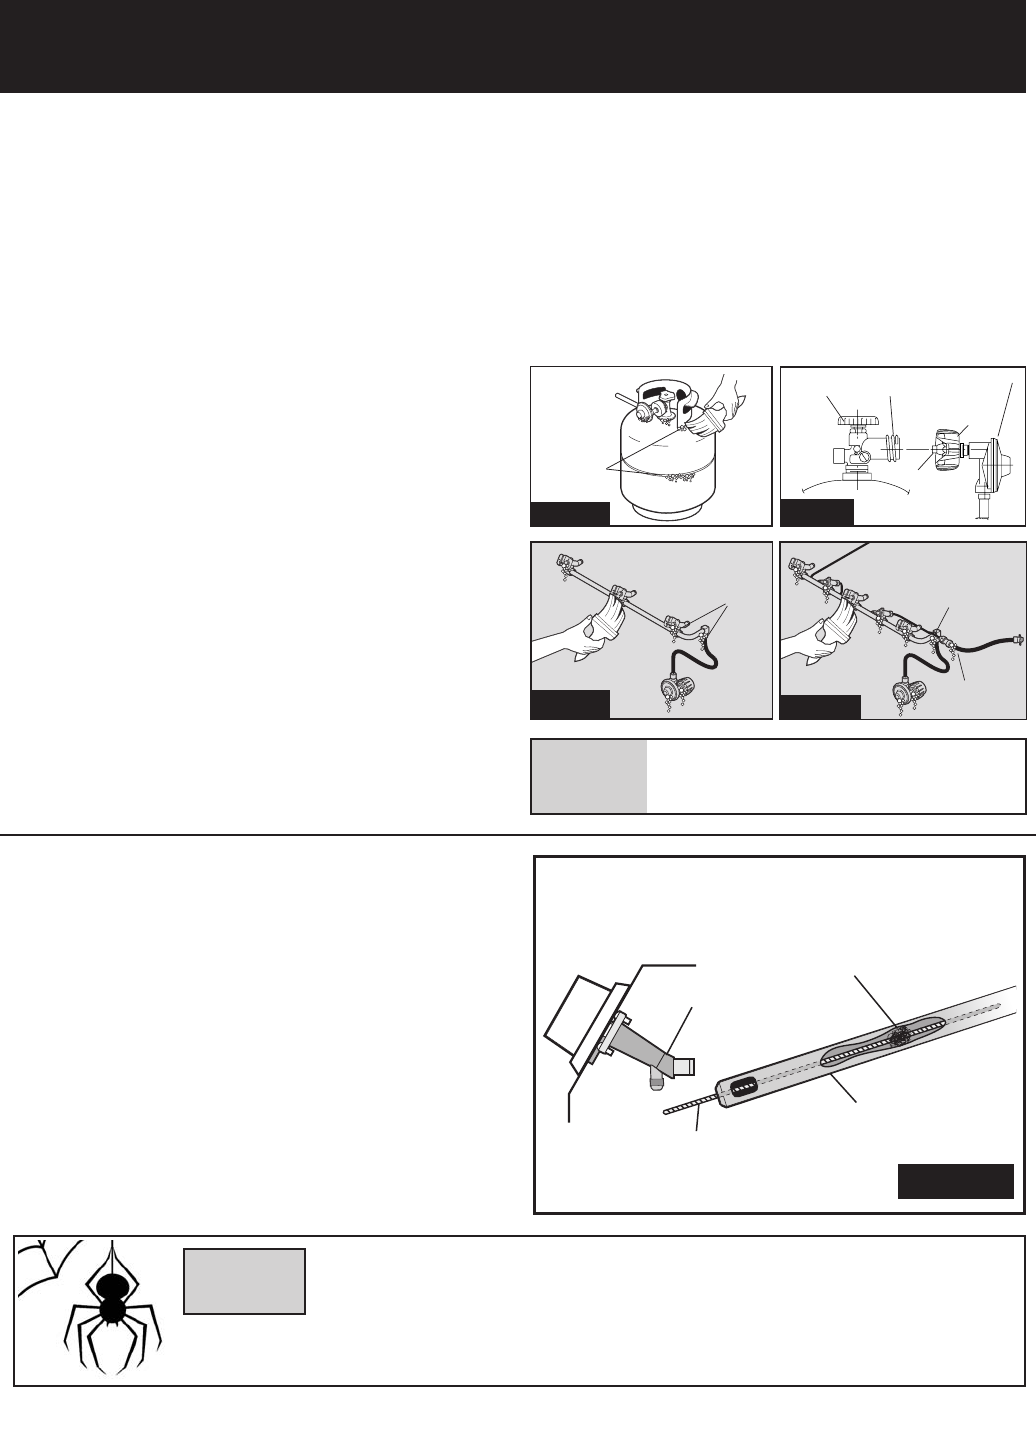
Fig. 7C
STANDARD
3 BURNER
Fig. 7D
GAS VALVE
3 BURNER WITH SIDE
BURNER & ROTISSERIE
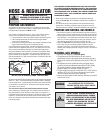
HOSE &
CONNECTIONS
SIDE BURNER
GAS LINE
REGULATOR
GAS VALVE
GAS REGULATOR
EXTERNAL
THREAD
HAND
VALVE
Fig. 7B
THERMALLY
SENSITIVE
NUT
PROBE
TANK
TANK
WELDS
Fig. 7A
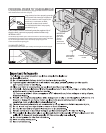
CLEANING VENTURI TUBES
Periodic cleaning of the venturi tubes is recommended
for optimum burner performance, especially after
prolonged storage or a period of non-use.
How to Clean:
• Remove the burner (refer to ‘ASSEMBLY PROCEDURE’).
• Use a venturi cleaning brush and insert the brush into the venturi tube 1
inch at a time, then remove to prevent moving the debris upwards
(see Figure 8).
• As you remove the brush head inspect and discard any debris
• Continue this procedure until the entire lengths of all venturi tubes are
free of debris.
• Reinstall burner (as per assembly instructions), ensure the venturi
tubes are seated over the valve orifices (see Figure 1).
• Perform a Leak Test (see pages 4 & 5).
CHECK TO ENSURE THE BURNER HAS A
GOOD FLAME EACH TIME IT IS TURNED ON.
Fig. 8
VALVE
BLOCKAGE
VENTURI
CLEANING BRUSH
WARNING
It is possible that very small insects could make webs or nest in the venturi tubes, as they are naturally
attracted to the smell of gas. This will partially or completely block the flow of gas through the venturi
and is indicated by a smoky yellow flame, and/or a burner that is difficult or impossible to light.
Ultimately, it may cause the gas to burn outside the venturis, which can cause a fire resulting in damage
to your barbeque and potential personal injury. IF THIS HAPPENS IMMEDIATELY SHUT OFF THE PROPANE AT CYLINDER.
When the barbeque has cooled, follow the "How to Clean" steps above.
WARNING
Failure to ensure the above may result in a
hazardous fire or explosion causing serious
bodily injury and/or property damage.
REGULATOR
HOSE &
CONNECTIONS
To keep your barbeque working at its peak efficiency
as well as contribute to the safe operation of this
unit, perform all of the operations below at least
once a year -- preferably at the start of each cooking
season.
PERFORM A LEAK TEST
A leak test ensures that there are no gas leaks prior to lighting your
barbeque.
WHEN A LEAK TEST MUST BE PERFORMED:
• Before lighting your barbeque for the first time
• Every time the propane cylinder is refilled
• If any gas component is changed
• At a minimum once per season
• After prolonged period of storage or non-us
• If the regulator flow-limiting device has been activated
The leak test should be performed in a well-ventilated area away from any
open flame, heat or ignition sources.
DO NOT USE A MATCH, OPEN FLAME OR SMOKE DURING LEAK TESTING.
WHAT YOU’LL NEED FOR TESTING:
1. A mixture of 50% liquid dish soap and 50% water.
2. A brush or cloth to apply the mixture.
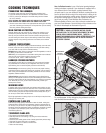
AREAS TO TEST ON A PROPANE BARBEQUE:
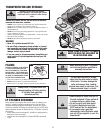
• All propane cylinder welds (see Figure 7A)
• Propane cylinder valve – including threads into cylinder (see Figure 7B)
• Regulator fitting and propane cylinder connection (see Figure 7B)
• All hose connections (see Figure 7C) including side burner tubing,
if equipped (see Figure 7D)
• All valve connections (see Figure 7C & D)
AREAS TO TEST ON NATURAL GAS BARBEQUES:
• All hose connections (see Figure 7C)
• All valve connections (see Figure 7C & 7D)
CLEANING & MAINTENANCE
HOW TO DO THE TESTING:
1. With the barbeque console control knobs in the ‘OFF’ position, twist the valve
on your propane cylinder 1 turn, or the main natural gas valve on.
DO NOT IGNITE THE BURNERS WHILE PERFORMING THE LEAK CHECK.
2. Brush your soap and water solution on all connections and components
as outlined above.
3. Observe each place for growing bubbles, which indicate that a leak is present.
4. Shut off the flow of gas while fixing the leak. Tighten any leaking
connection and repeat test until no leaks are detected.
5. If the leak(s) cannot be stopped DO NOT USE. Shut off the fuel source at
the valve immediately (if appropriate, remove propane cylinder). Call a
certified gas appliance service person, or a gas dealer for proper repairs.