


Special offers from our partners!

Find Replacement BBQ Parts for 20,308 Models. Repair your BBQ today.
Grill Assembly
5
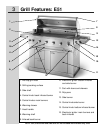
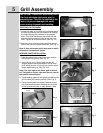
IMPORTANT: Remove all protective plastic
film from stainless steel parts prior to
assembly/use. This film is installed at the
factory to prevent damage that could
occur during shipment and handling.
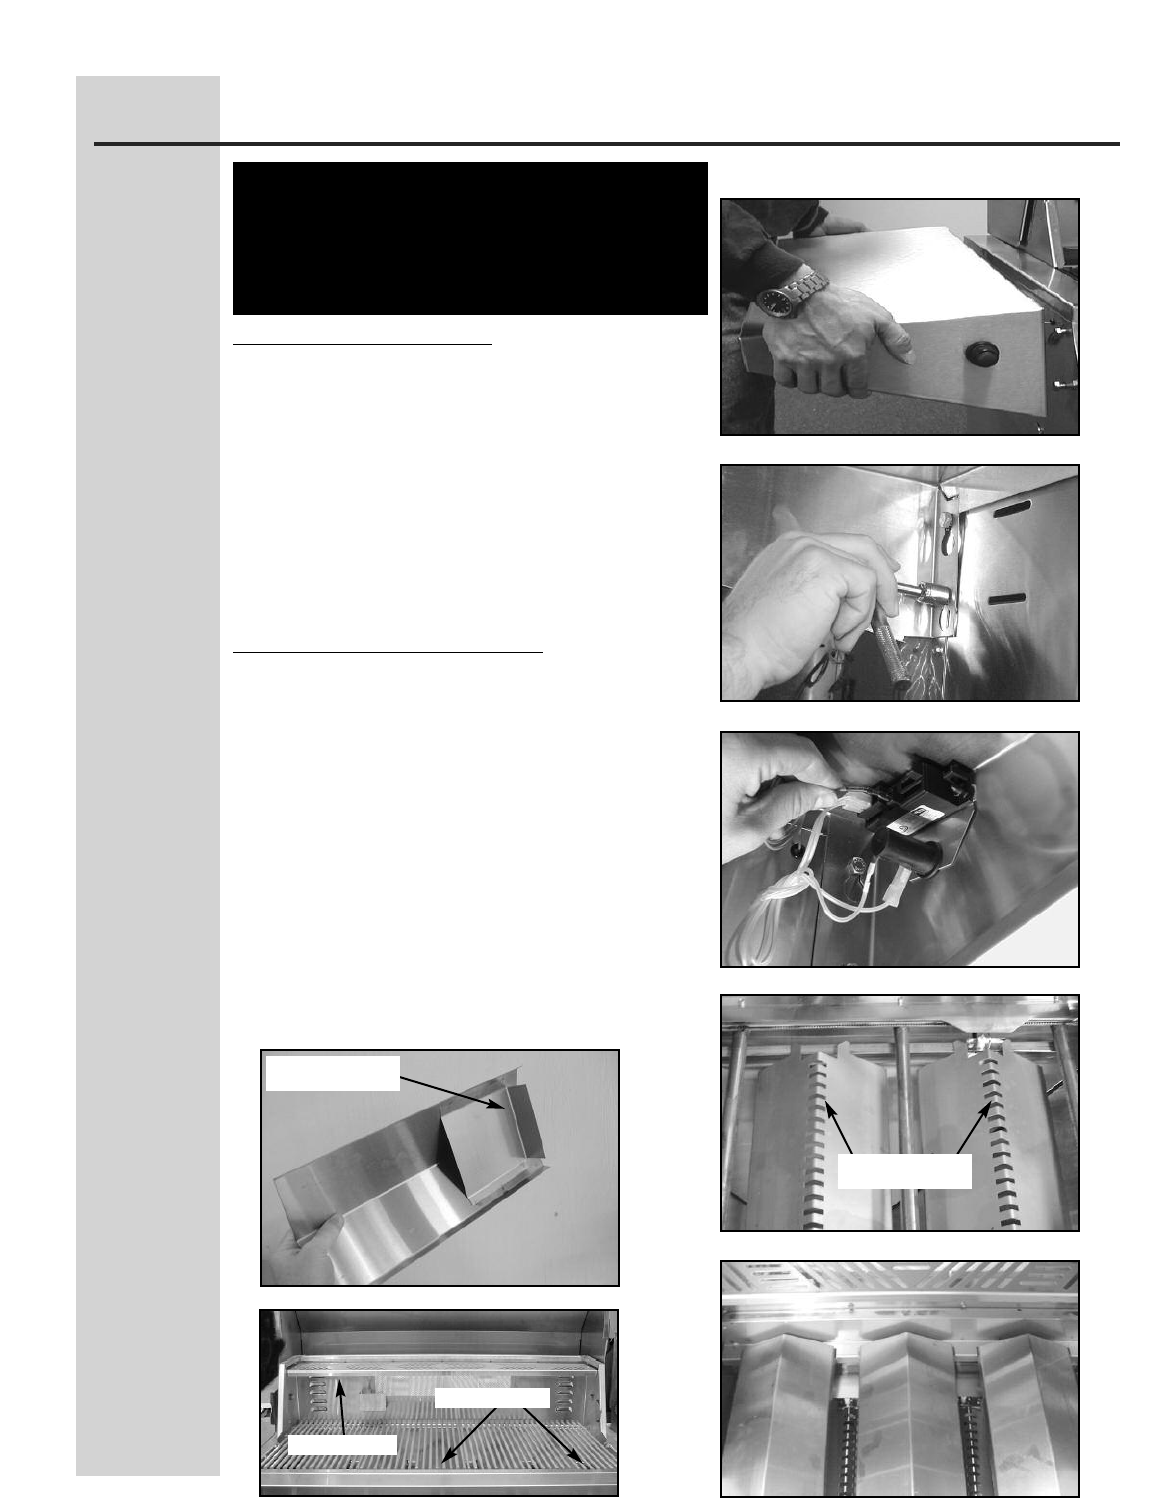
SIDE SHELF ATTACHMENT
1. Loosen the bolts on the side of the grill and attach
the shelf by allowing the bolt heads to fall through
the large opening in the bottom of the keyhole
slots. Then slide the shelves downward until the
bolts are resting against the top of the key hole
slots. Tighten all of the shelf bolts. (See Fig. 1-2)
2. Attach the four (4) wires coming out from the left
side of the grill to the igniter terminals. (See Fig. 3)
Note: It does not matter which wire goes to which
terminal on the electronic igniter
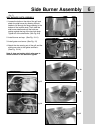
INTERIOR P
ARTS INSTALLATION
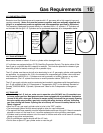
1. Install the bottom flavor grids in the lower cutouts
and around the igniters. (See Fig. 4)
2. Insert the top row of flavor grids with the 90
degree angled heat shield (bottom side of flavor
grid) facing the rear of the unit into cutouts with tri-
angle ridges facing up. (See Fig. 5-6)
Note: The right side of one flavor grid is extend-
ed. This goes on the far right main burner, next to
the bottom infrared burner.
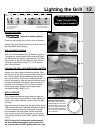
3. Install cooking grates on the ledges provided on the
grill to create your cooking surface. (See. Fig. 7)
4.
Place warming shelf on support brackets by set
-
ting it flat across brackets allowing the two holes
to line up with the holes on each bracket. (See
Fig. 1
Fig. 2
Fig. 3
Fig. 4
Fig. 5
Fig. 6
Bottom flavor grids
in between burners
Faces the back of
the grill
Fig. 7
Cooking Grates
Warming Shelf