


Special offers from our partners!

Find Replacement BBQ Parts for 20,308 Models. Repair your BBQ today.
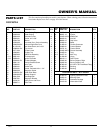
19
104278
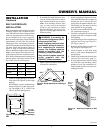
OWNER’S MANUAL
REPLACEMENT
PARTS
Note:
Use only original replacement parts.
This will protect your warranty coverage
for parts replaced under warranty.
PARTS UNDER WARRANTY
Contact authorized dealers of this product.
If they can’t supply original replacement
part(s) call DESA International’s Technical
Service Department at 1-800-323-5190 for
referral information.
When calling DESA International, have
ready
• your name
• your address
• model and serial numbers of your fireplace
• how fireplace was malfunctioning
• type of gas used (propane/LP or natural gas)
• purchase date
Usually, we will ask you to return the defec-
tive part to the factory.
PARTS NOT UNDER
WARRANTY
Contact authorized dealers of this product
or Parts Central (see page 23). If they can’t
supply original replacement part(s) call
DESA International’s Parts Department at
1-800-972-7879 for referral information.
When calling DESA International, have ready:
• model number of your fireplace
• the replacement part number
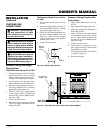
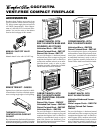
CLEANING AND
MAINTENANCE
CABINET
Air Passageways
• Use a vacuum cleaner or pressurized air
to clean.
Exterior
• Use a soft cloth dampened with a mild
soap and water mixture. Wipe the cabi-
net to remove dust.
WARNING: Turn off fireplace
and let cool before cleaning.
CAUTION: You must keep con-
trol areas, burner, and circulating
air passageways of fireplace
clean. Inspect these areas of fire-
place before each use. Have fire-
place inspected yearly by a quali-
fied service person. Fireplace may
need more frequent cleaning due
to excessive lint from carpeting,
pet hair, etc.
SERVICE HINTS
When Gas Pressure Is Too Low
• pilot will not stay lit
• burner will have delayed ignition
• fireplace will not produce specified heat
• propane/LP gas supply may be low
When Gas Quality Is Bad
• pilot will not stay lit
• burner will produce flames and soot
• fireplace will backfire when lit
You may feel your gas pressure is too low or
gas quality is bad. If so, contact your local
propane/LP gas supplier.
CLEANING BURNER
INJECTOR HOLDER AND
PILOT AIR INLET HOLE
The primary air inlet holes allow the proper
amount of air to mix with the gas. This
provides a clean burning flame. Keep these
holes clear of dust, dirt, and lint. Clean these
air inlet holes prior to each heating season.
Blocked air holes will create soot. We rec-
ommend that you clean the unit every 2,500
hours of operation or every three months.
We also recommend that you keep the burner
tube and pilot assembly clean and free of dust
and dirt. To clean these parts we recommend
using compressed air no greater than 30 PSI.
Your local computer store, hardware store, or
home center may carry compressed air in a
can. You can use a vacuum cleaner in the
blow position. If using compressed air in a
can, please follow the directions on the can.
If you don't follow directions on the can, you
could damage the pilot assembly.
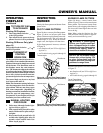
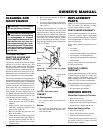
1. Shut off the unit, including the pilot.
Allow the unit to cool for at least thirty
minutes.
2. Inspect burner, pilot, and primary air
inlet holes on injector holder for dust
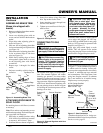
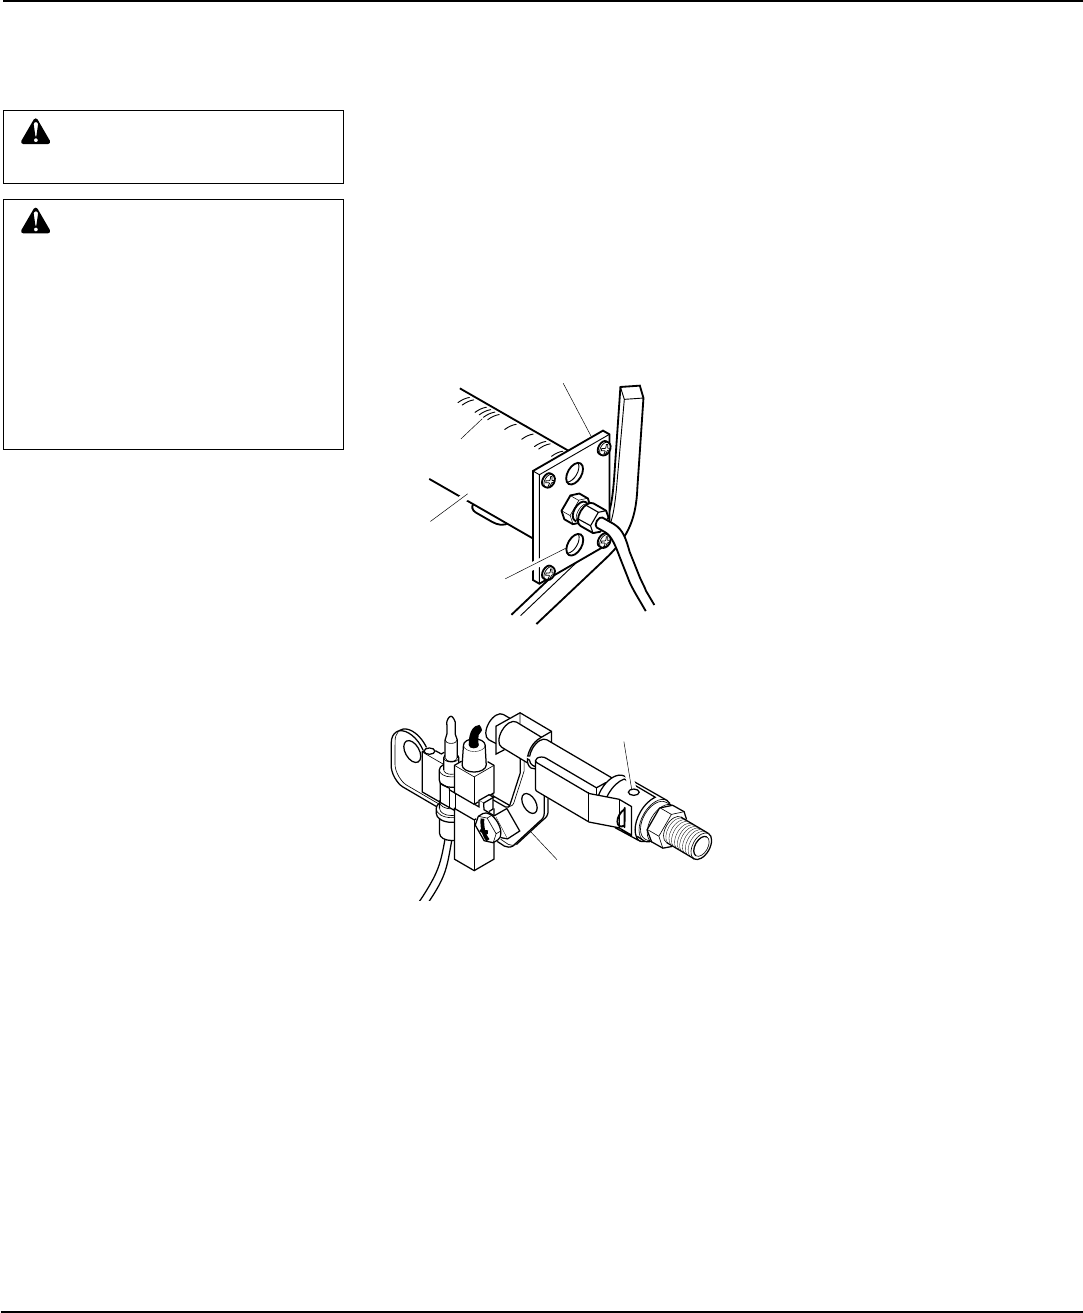
and dirt (see Figure 28).
3. Blow air through the ports/slots and
holes in the burner.
4. Check the injector holder located at the
end of the burner tube again. Remove
any large particles of dust, dirt, lint, or
pet hairs with a soft cloth or vacuum
cleaner nozzle.
Figure 28 - Injector Holder On Outlet
Burner Tube
5. Blow air into the primary air holes on
the injector holder.
6. In case any large clumps of dust have
now been pushed into the burner repeat
steps 3 and 4.
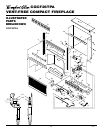
Clean the pilot assembly also. A yellow tip
on the pilot flame indicates dust and dirt in
the pilot assembly. There is a small pilot air
inlet hole about two inches from where the
pilot flame comes out of the pilot assembly
(see Figure 29). With the unit off, lightly
blow air through the air inlet hole. You may
blow through a drinking straw if compressed
air is not available.
Burner
Tube
Injector Holder
Primary Air Inlet
Holes
Figure 29 - Pilot Inlet Air Hole
Pilot Assembly
Pilot Air Inlet
Hole
Ports/Slots