


Special offers from our partners!

Find Replacement BBQ Parts for 20,308 Models. Repair your BBQ today.
5. Operating Your Grill
5.1 Select a proper location
Once you have assembled your new grill, nd a suitable location for use.
Note: The use and installation of this product must conform to local codes. In the absence of local codes, use the
National Fuel Gas Code: ANSI Z223.1/NFPA54, Storage and Handling of Liqueed Petroleum Gases, ANSI.NFPA 58
or Natural Gas and Propane Installation Code, CSA B149.1; Propane Storage and Handling, CSA B149.2.
m DANGER
1. Never use this outdoor grill inside any building, garage, shed or breezeway, or inside any boat, trailer or
recreational vehicle and/or boat, to prevent possible re and to prevent the possibility of carbon monoxide
poisoning or asphyxiation.
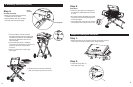
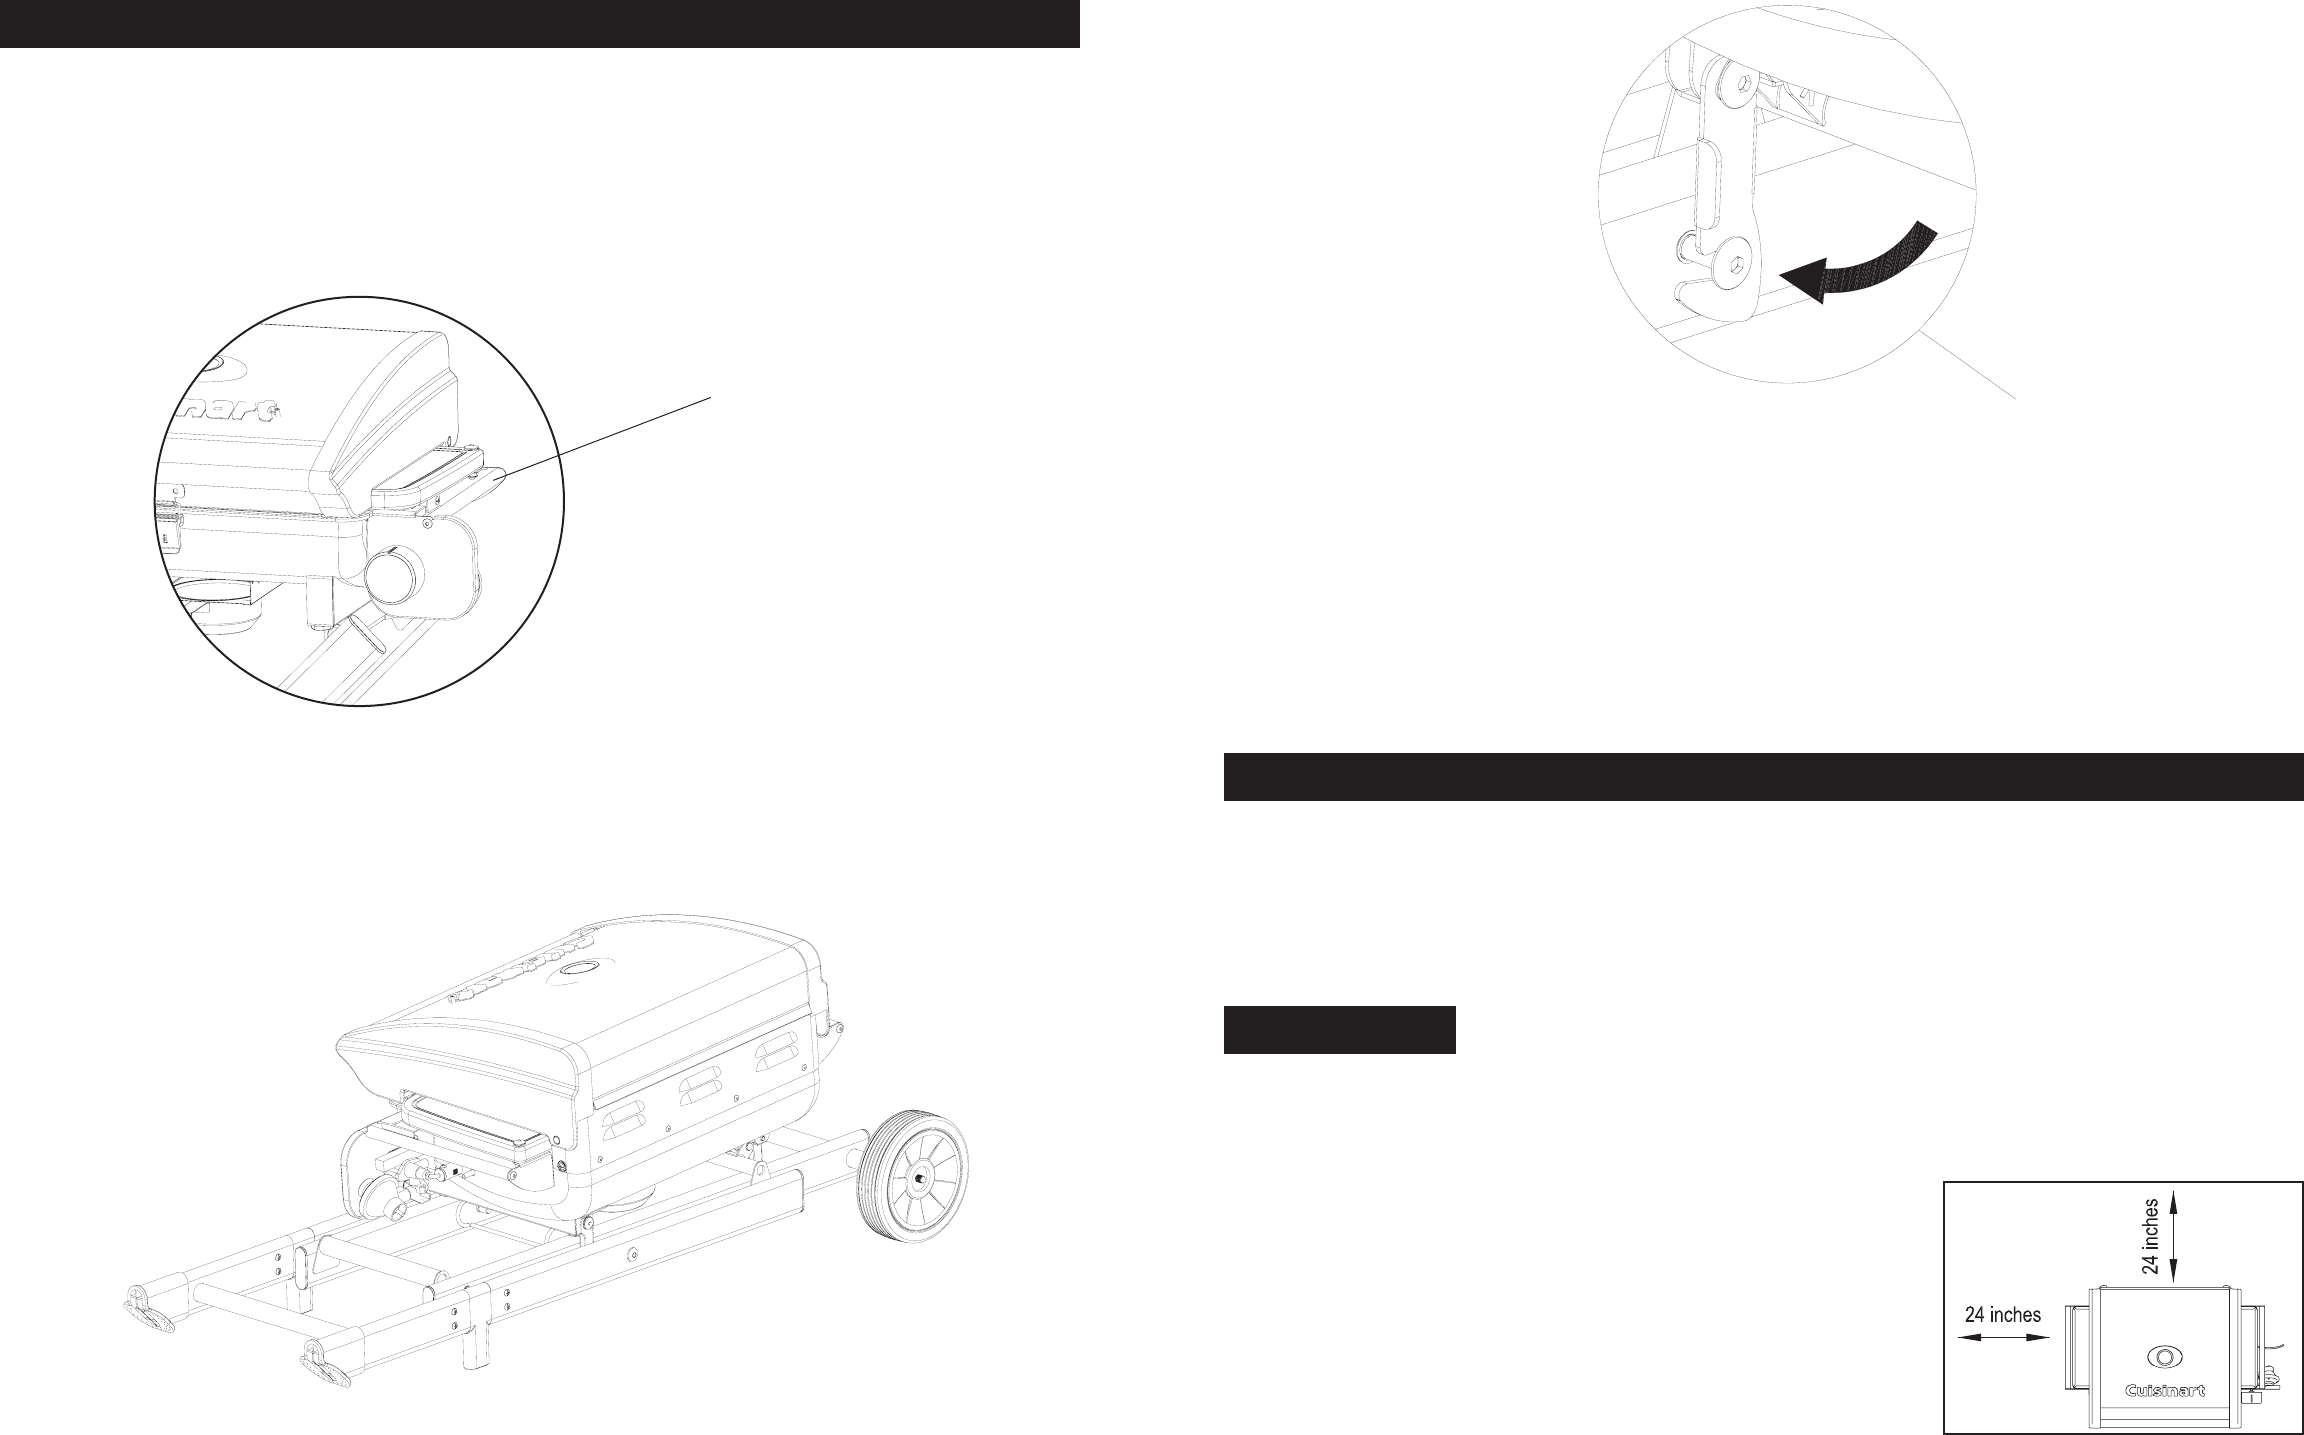
2. Always place your grill on a hard and level surface far away from combustible materials and structures.
3. Do not use this grill under overhead combustible surface or covered area
(e.g., awnings, umbrellas, porches or gazeboes ). Keep all combustible
surfaces at least 24” (61cm) away.
4. Locate the grill away from any combustible and non-combustible material or
construction by at least 24 inches (61cm) from back and 24 inches (61cm)
from side.(See the diagram below)
5. Never store or use gasoline or other ammable or volatile substances in the
vicinity of this grill or in the vicinity of any other heat-generating appliance,
because of the danger of starting a re.
6. Do not obstructing the ow of combustion and ventilation air.
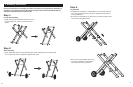
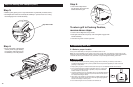
Step 4:
• Once Locking Bar is disengaged,
carefully lower the grill, allowing
the wheels to slide forward until
the Gill Body is in a at position.
To return grill to Cooking Position,
reverse above steps:
• Unlock Left and Right Securing Latches.
• Grab right side handle and pull up until Locking Bar engages with
Handle Assembly.
• Lock Securing Latch on back right side.
Step 5:
• Lock Left and Right Secur-
ing Latches to the Lock Posts
located behind the grill.
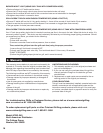
Step 3:
• Stablize grill by placing foot on right side Bottom Leg Assembly Crossbar (Part L).
• Grab Right Side Handle and carefully lift Grill Body in upward motion so Locking
Bar disengages from Handle Assembly.
Steps for Folding and Transport (cont.)
10
11
Right Side Handle