


Special offers from our partners!

Find Replacement BBQ Parts for 20,308 Models. Repair your BBQ today.
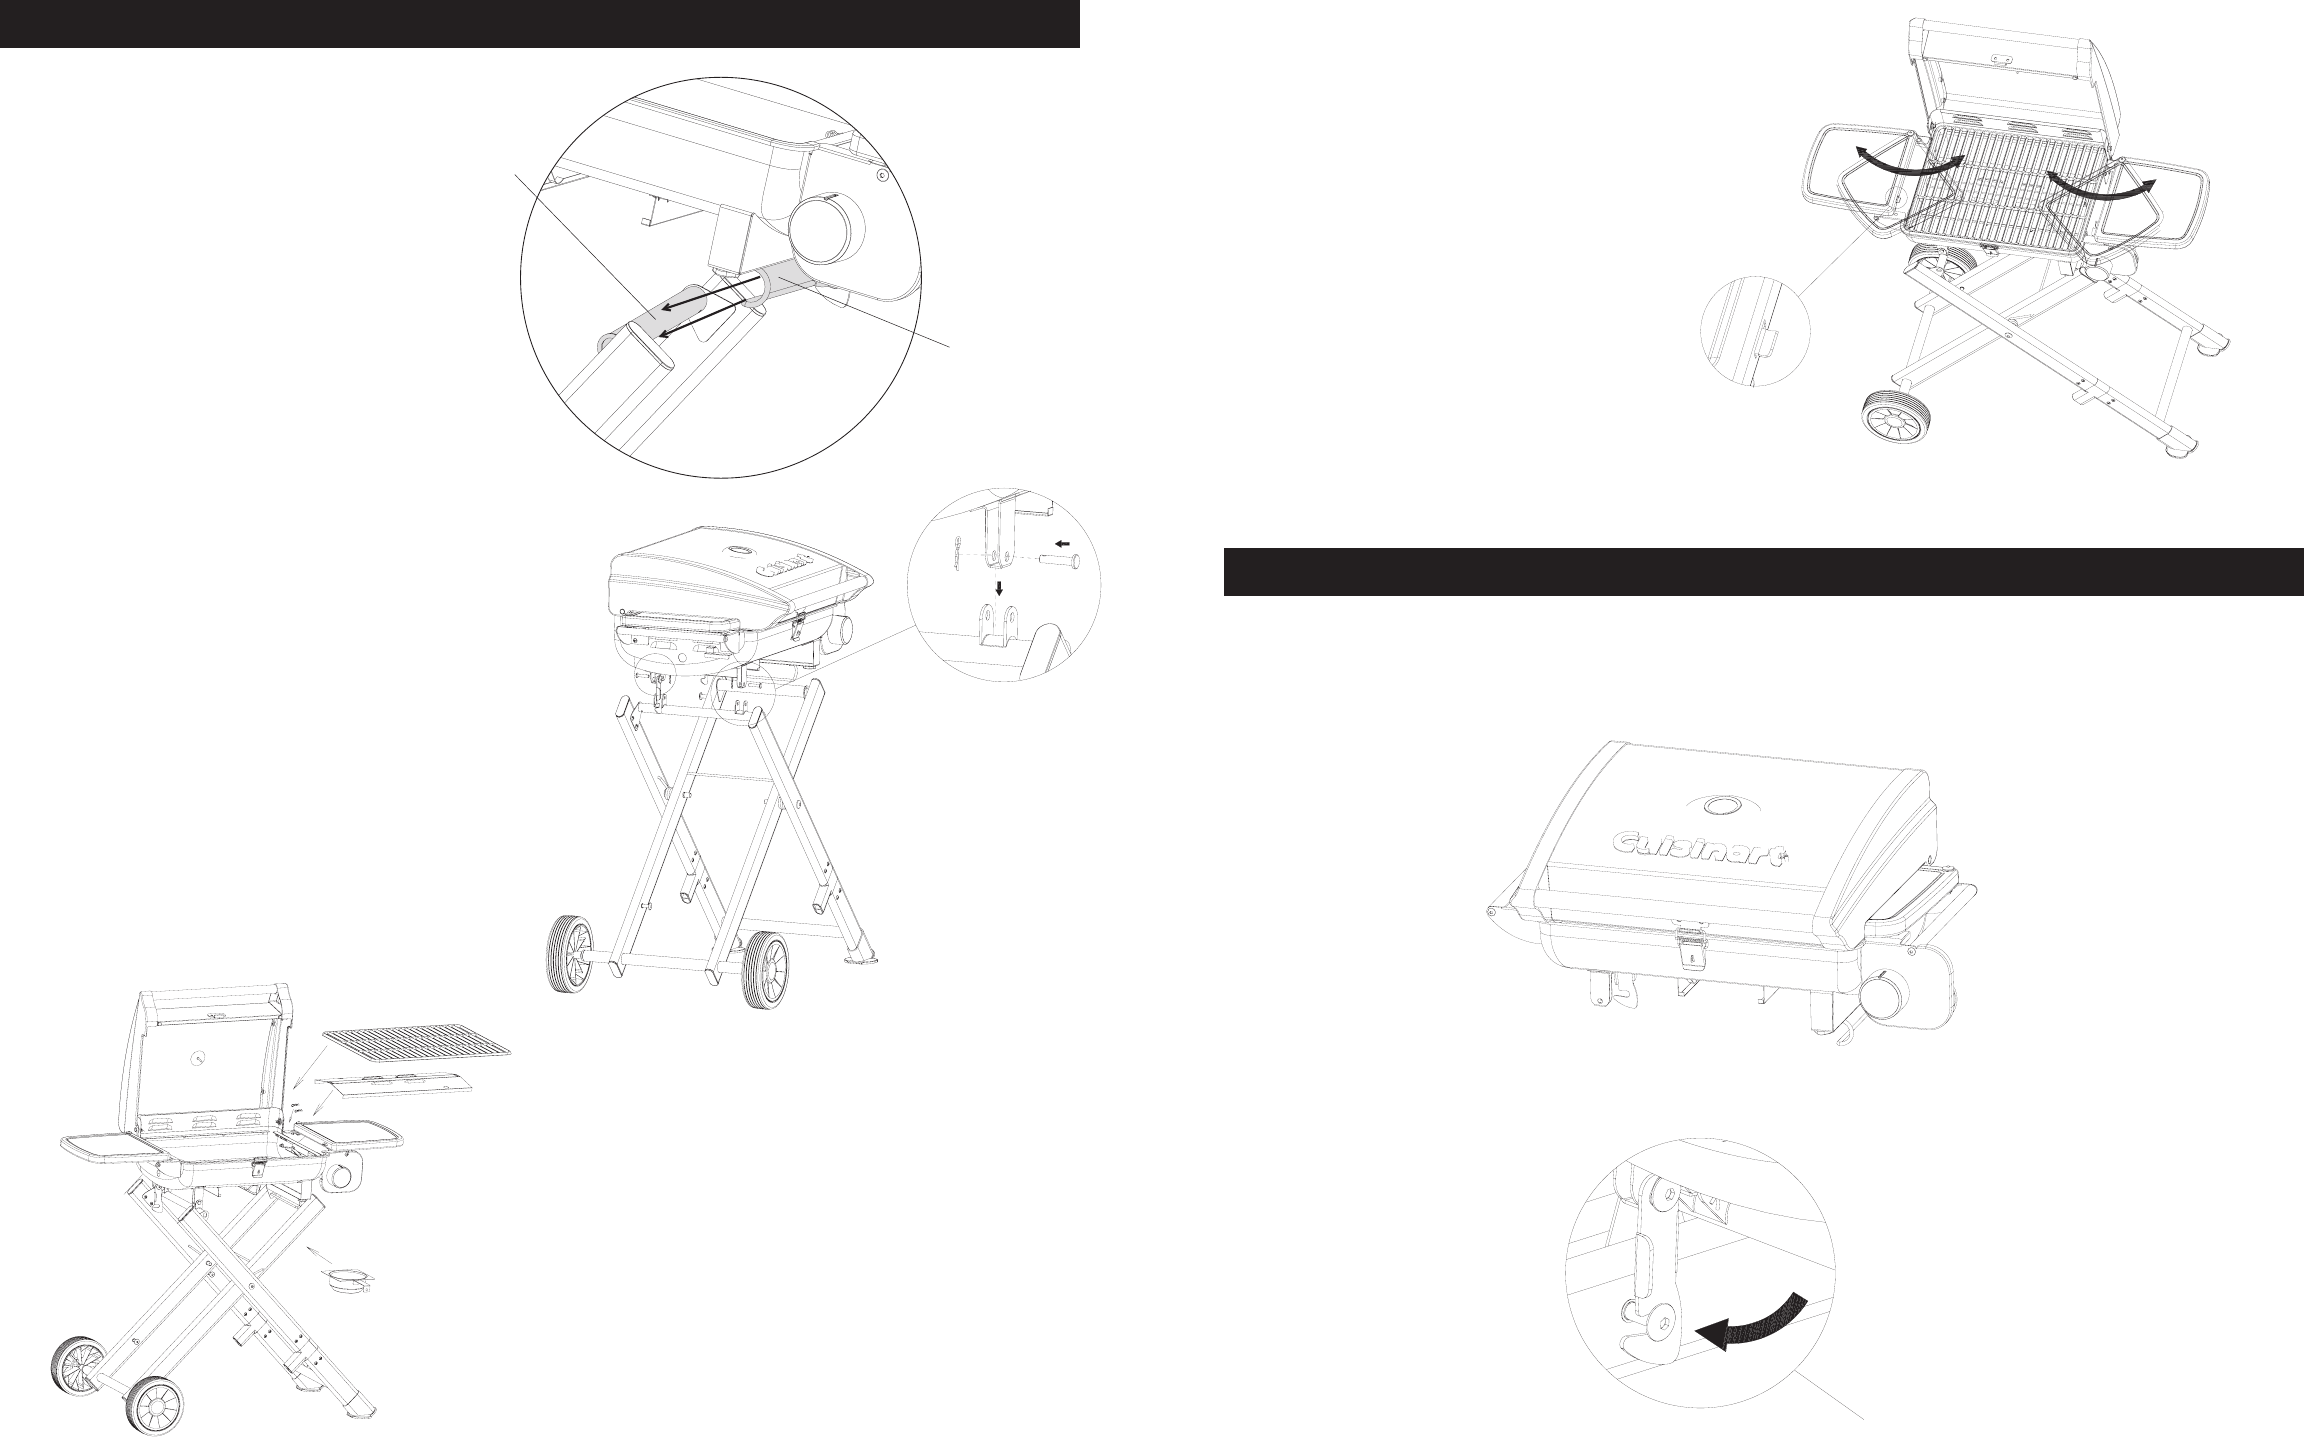
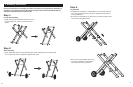
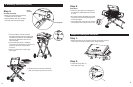
Step 1:
• Slide side shelves in and close the Grill Lid. Ensure the Front Lid
Lock is secure so Grill Lid will not open during transport
Step 2:
• Unlock Securing Latch on
back right side of grill
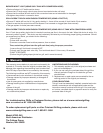
Step 4:
Grill Body Assembly
• Make sure wheels and leg assembly
are stable and will not slide.
• Angle Grill Body (Part A) so Locking
Bar rests under Handle Assembly.
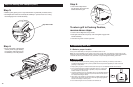
Steps for Folding and Transport
Step 5:
Side Tables
• Hide-away side shelves are designed to
provide sturdy table space when the grill
is in use.
• Be certain that the side tables are locked
into place as shown when placing items
on the side tables.
• The shelves slide inward for easy storage
and transport when the grill is not in use.
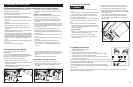
4. Assembly Instructions (cont.)
8
9
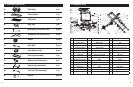
• Install Flame Tamer (Part B), Grill Grate
(Part C) and Drip Tray (Part D) as shown.
• Lower Grill Body onto Left Up Tube
Assembly (Part M) as shown, aligning the
brackets on the bottom of the Grill Body
between the brackets on the Left Up
Tube Assembly.
• Secure Grill Body using 1 Grill Body
Connector Pin (Part E) and 1 Connector Pin
Cotter Pin (Part F) for each bracket
as shown.
• Secure Locking Latch on back right
side of grill.
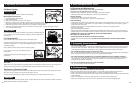
Locking Bar
Handle
Assembly